Concrete Installation
Snow Melting Mats & Cable
If you’re ready to put away the shovel and stop spending money on salt for your walkways, it’s time to install a snow melting system from WarmlyYours. Our snow melting systems add a touch of convenience and luxury to your home, and eliminate the risk of slipping on ice and the need to shovel the driveway. Just think—during the next big storm, you can watch it from your front window rather than heading outside every few hours to keep up with the falling snow.
WarmlyYours’ driveway heating systems are available for installation underneath concrete, asphalt, and pavers, with different installation instructions for each. If you’re installing one of these systems, be sure to use the correct set of instructions. Typically, an electrician will work with a paving contractor for the job—it is a complex process and generally not a do-it-yourself weekend project.
Follow this handy concrete snow melting system installation guide, and stop wasting time shoveling the driveway and walkway. Please Note: This is an installation guide for Snow Melting Systems with Concrete, you can also find out how to install with Asphalt or with Pavers.
Getting Started
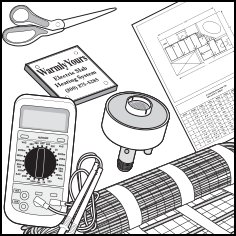
Material and Tools Required:
- WarmlyYours Snow Melt Mats and/or Cables
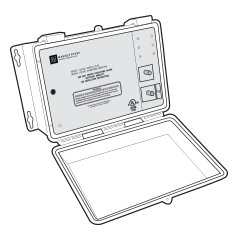
- Controller, sensor(s), relay panel and Plaque
- Custom Design Layout (provided FREE with order)
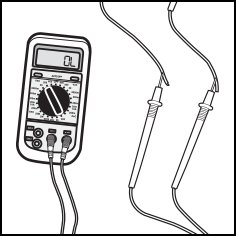
- Digital Ohms Meter & 500 VDC Digital Megohm Meter (Megger)
- Amp Meter, Plastic cable ties, & Scissors
Please call WarmlyYours (800) 875-5285 for 24/7 installation and technical support if needed.
Step 1 - Electrical Rough-In
The electrician will supply appropriately sized breakers that are 30mA trip GFPE type for each heater circuit. The relay panel(s) must be installed, and power routed from the breakers to the relay panel(s). The electrician should complete any outdoor trenching needed for routing power to the heated zone. All outdoor rated junction box(es) required for cold lead extensions/splicing should be installed at this time. Control panel, relay(s), aerial mount sensor(s) (if used) and associated wiring should be installed at this time.
Step 2 - Mat/Cable Heater Installation
When material order shipment arrives, use ohms meter to test each mat heater (between the two conductors), and verify number with the UL tag. Also, test each heating mat for megohms (between conductor and yellow/green ground wire). The Megohm Meter (500 VDC) tests for insulation resistance around the conductor(s), and should read infinite, OL, or a minimum of 10 megohms.

Step 3 - Basic Preparation
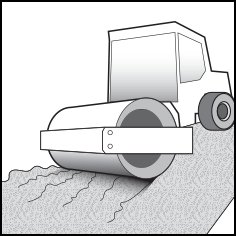
Concrete installer ensures that the base has at least 8" - 12" of crushed rock aggregate that has been spread, and rolled over or tamped down. If insulation is desired, it should be located on top of the crushed rock aggregate (insulation must never make direct contact with heating cable). Heavy gauge wire mesh and or rebar should be used for reinforcement, and should be propped up (2" to 3" from finished surface), with wire chairs or 2" pavers. The conduit for the OT Sensor (if applicable), should be placed on the wire mesh or rebar. The SLAB-SS sensor foam insert (if applicable), should be placed using a block of concrete or brick for proper in-slab elevation (refer to SCE-120-Install Guide for more detail).
Step 4 - Heater Placement
The electrician attaches the heating cable (or mats) to the wire mesh with cable ties, at the appropriate spacing (as per drawing plan layout). Avoid any overlapping, touching, or crossing of heating wires. Cable heaters must be placed within 2" of both sides of the OT Sensor Conduit (when applicable). Cable heaters must be placed within 2" of both sides of the SCE-SLAB-SS-KIT Sensor (when applicable). Contact WarmlyYours tech support for deeper pours, and two pour techniques.
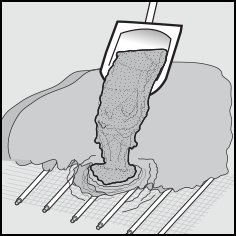
Step 5 - Heater Burial
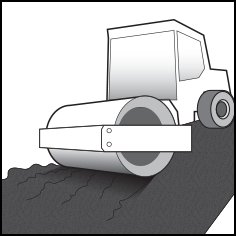
The paving contractor buries the heating cables/mat in a single, 4" to 6" pour, so the heaters are within 2" to 3" from the finished surface. Electrician tests the heaters continuously during the pour with ohms meter.
Step 6 - Re-test Mat/Cable Heaters
The electrician takes a final ohms & megohms test on each mat/cable and completes the warranty documentation with all test results.
Step 7 - Final Wiring & Amp Testing
Electrician should complete all wire splicing in the junction box(s). The OT Sensor should be inserted into its conduit using "fish-tape."" Sensor wire splicing should be completed. Any associated control or relay panel wiring should be completed. Breakers should be turned ON, sensor(s) should be tested, and the system should be activated temporarily (manually, or with ice, snow or ice water) to allow the electrician to check the amperage of each heater.
