Heated Driveway Tire Tracks in Asphalt
Follow our detailed guide and learn how to install a tire tracks snow melting system under an asphalt driveway.

What is Snow Melting?
If you're a home owner and you've ever wondered, "how can we reduce the freezing of snow on asphalt?", then perhaps radiant snow melting systems can be of some assistance to you and your loved ones.
Have you ever seen snow fall on an already warm car? It melts instantly.
This is the essential idea behind snow melting systems—a heating element is embedded in your driveway (or patio, walkway, etc.) and it melts the snow that falls on it.
The heating element can either be tubes of heated water (hydronic) or electric cables. In asphalt installations, the heating element should always be electric as the asphalt can reach temperatures of 330 degrees Fahrenheit, which can melt the tubes used in hydronic systems.
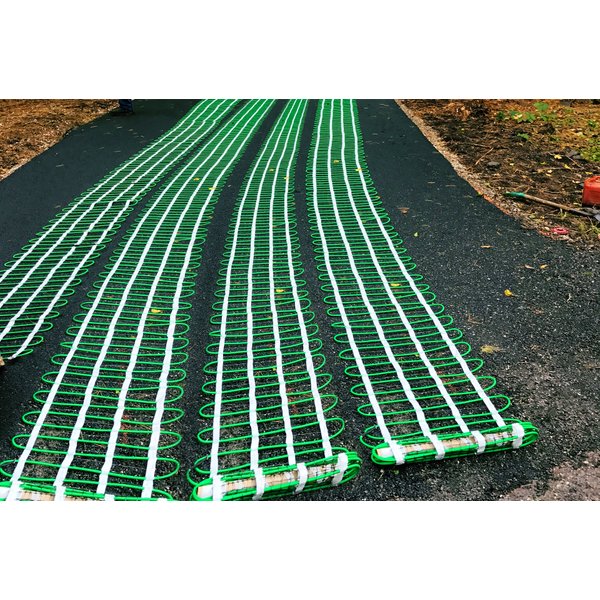
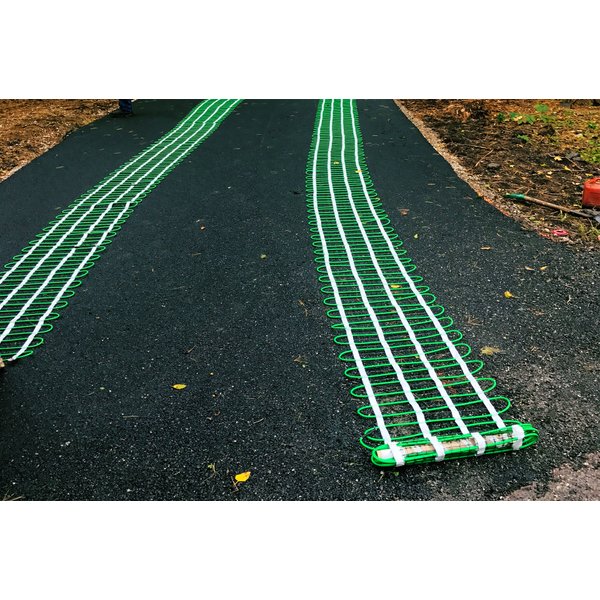
Electric systems, like our WarmlyYours snow melting cables and mats, are rated to withstand temperatures of up to 450 degrees Fahrenheit and they are also much easier to install, as they don't require costly boilers or pumps. This project used mats, which consist of heating cables attached to polypropylene mesh. They are very easy and fast to install.
Learn More About Snow MeltingWarmlyYours Snow Melting Systems
Snow can be beautiful, but it can also deliver a huge amount of inconvenience and even danger. When you have somewhere you need to be, like work or a doctor's appointment, winter can be your worst enemy.
By installing a WarmlyYours snow melting system in your driveway, you can finally put away the rock-salt and shovels and start enjoying winter again.
This guide will walk you through a single snow melting project in an asphalt driveway from start to finish.
The steps for a heated driveway DYI installation would be similar but please contact the WarmlyYours 24/7 support team if you have any questions about this installation.
Start Smart with a Free SmartPlan
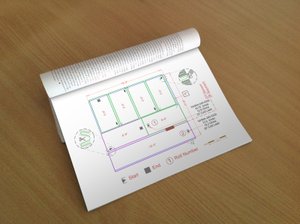
Perhaps the most important stage in installing a snow melting system is getting a good installation plan.
WarmlyYours provides a free, no-obligation SmartPlan that includes an installation plan, an electrical plan, and an itemized quote, all of which is prepared by a highly skilled team of engineers.
All you have to do to take advantage of this service is to provide WarmlyYours with a sketch of the project that includes dimensions and other relevant information, like where power will be most readily accessible.
Within typically one day of providing this information, you'll receive your free SmartPlan. The itemized quote included in your SmartPlan will also include MSRP pricing so that you can properly budget for your project.
Request a Free SmartPlan


When to Install a Snow Melting System
Because the snow melting system is embedded within the driveway itself, the best time to install a snow melting system is when a driveway is either being created for the first time, redone, or expanded.
These kinds of projects are typically undertaken from late spring to late fall. The contractor has more time to work with asphalt at warmer temperatures of 50°F and above. The warmer the better. The contractor has less time to work with asphalt at colder temperatures and lesser depths. For example, at 40°F, a contractor has only 25 minutes to work with a 2" thick asphalt installation. However, you'll want to consult with your local trade professionals about their availability and best times.
The example pictured is of a driveway expansion that began in mid-fall. The homeowners wanted to add a connecting branch to their long and twisting driveway to make it easier to navigate and turn around.
By adding the snow melting system to the extension, they'll now have a spot clean of snow and ice to park their cars when their snow removal service comes to plow the unheated portion of the driveway.
Because this snow melting system is electric, it can easily be added on to in the future if these homeowners decide to replace the original driveway at some point.

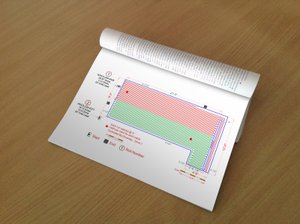
Full Coverage vs. Tire Tracks
You can choose to have your entire driveway project covered with snow melting, but one popular alternative to full coverage is to simply heat tire tracks.
This economical option helps users cut down on both installation and operating costs, while still providing great functionality.
This coverage system works by installing two sets of heating elements, typically 2 feet wide and the length of the driveway, which will keep the driveway passable, even in the heaviest of snow falls.
Installing the Snow Melting System
The construction of any quality asphalt driveway involves several layers. In this project, one of the layers will include 5/16" thick snow melting mats.
The thinness of an electrical snow melting system means it has a minimal impact on the overall depth of the driveway. These snow melting systems can be used not only with asphalt, but also with a variety of different surface types, like concrete and pavers. Each surface type will have a different cross section with suggested depths.
At this point you may have a lot of questions like “how are heated driveways constructed?” or even “what is the best material to pave a driveway?”. The good news is that this electric radiant heat guide will provide some answers for you.
We’re going to use asphalt pavement for this project for a couple of reasons including it can be used by light or heavy vehicles, hides tire marks well, and is often the driveway material that is least likely to freeze over because of retaining heat from the sun better than other materials.
Step 1. Excavate and Compact the Ground
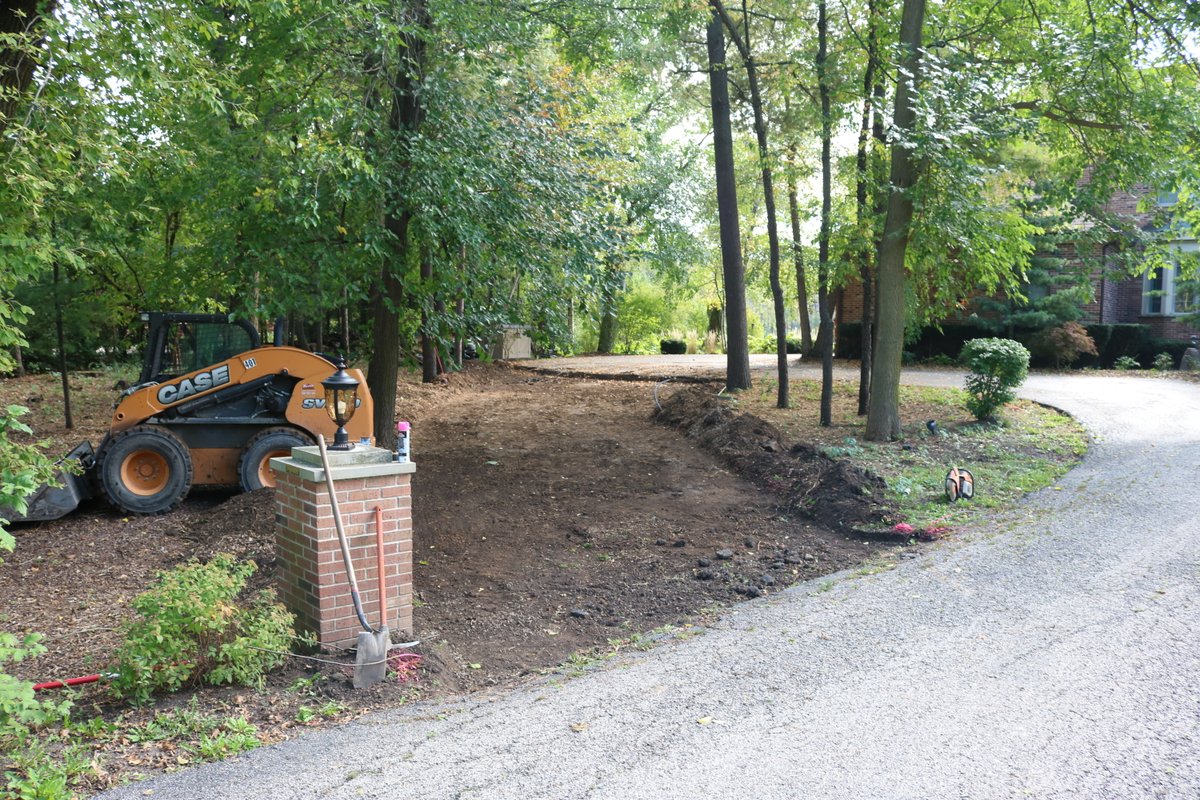
Prior to beginning any digging, we suggest contacting a local utility locating/marking firm to make sure your project won't run into any gas, water, or electrical lines. Once that's done, you'll want to excavate and tamp down a solid base of soil. While this can be accomplished with hand tools, a front-loader and steamroller will make quick work of it.
Because this project involved an expansion, the depth of the total finished driveway had to be accounted for when excavating and compacting the soil, which resulted in a flush finished product.

Compacted gravel is a familiar component of many driveways. It is so popular because it provides a stable base for the higher-up layers of the driveway, while still allowing for effective drainage. In fact, many professionals say that the secret to a long-lasting asphalt driveway is having a good, strong layer of gravel base compacted by a steamroller.
So don't skimp. For most residential applications, WarmlyYours recommends a layer of compacted gravel that is 4" to 8" deep; however, some highly-trafficked applications can require up to 12".
Step 2. Prepping for the Junction Box
Depending on the size and location of your project, you may require the use of a junction box.
By reviewing your WarmlyYours SmartPlan, your electrician will be able to identify where the junction box for your snow melting system should be located.
The junction box serves as an intermediary between the heating element itself and the snow melting relay panel or control that you select.
Making sure to establish the location of the junction box early on will allow you make sure that all sequential steps are going according to plan.
Step 3. Base Coat of Asphalt 1.5″ – 2″
While some non-heated driveways may be poured all at once, a quality and long lasting driveway will have a base, or binder, coat poured and spread before the final coat.
This helps increase the longevity of the driveway and is a required step for any asphalt driveway with an embedded snow melting system.
We recommend that this layer be between 1.5" and 2" deep.
Step 4. Dry-fitting the Snow Melting System

With the base layer of asphalt down, you have an excellent opportunity to lay out your snow melting mats before completing installation.
This step allows you to make sure that all the elements will fit exactly where they are supposed to according to your WarmlyYours SmartPlan.
Step 5. Test your System at Every Stage of Installation
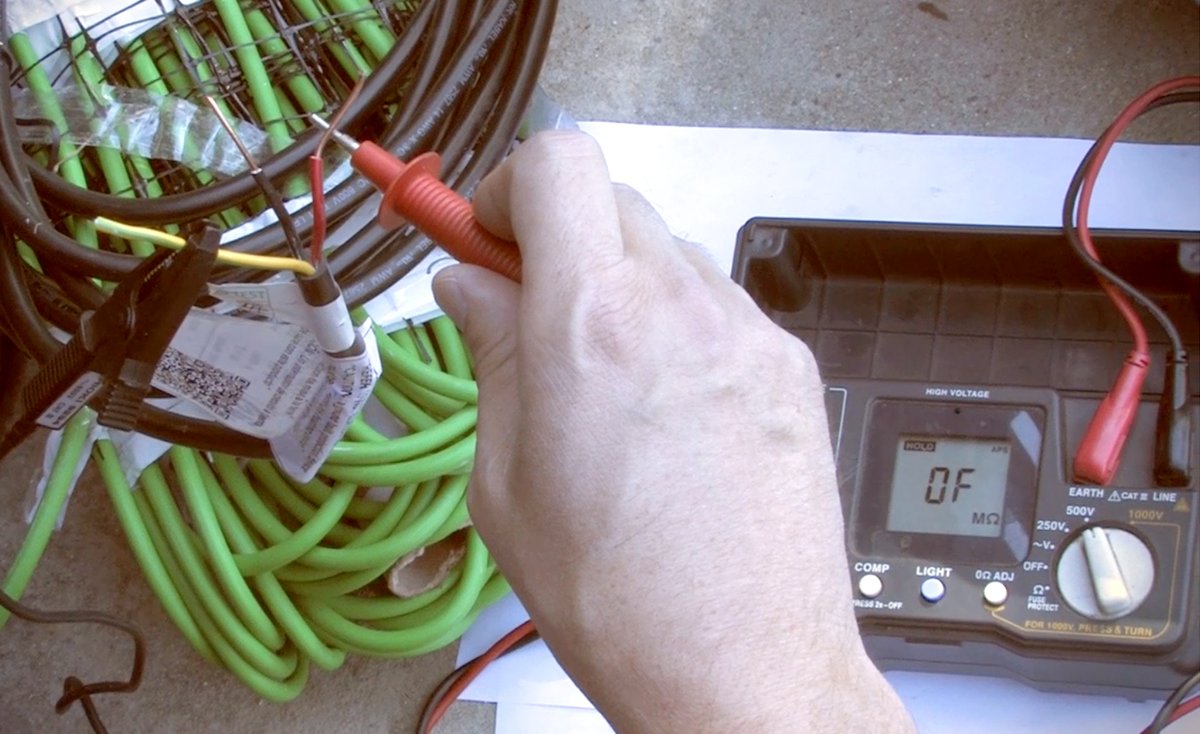
Testing your snow melting system with an ohmmeter at every stage of installation will allow you to be certain that the heating element is functioning properly.
Completing these tests, and recording your readings accurately, will also qualify your project for WarmlyYours' 10-year warranty.
Make sure to consult your WarmlyYours snow melting installation manual for more information.
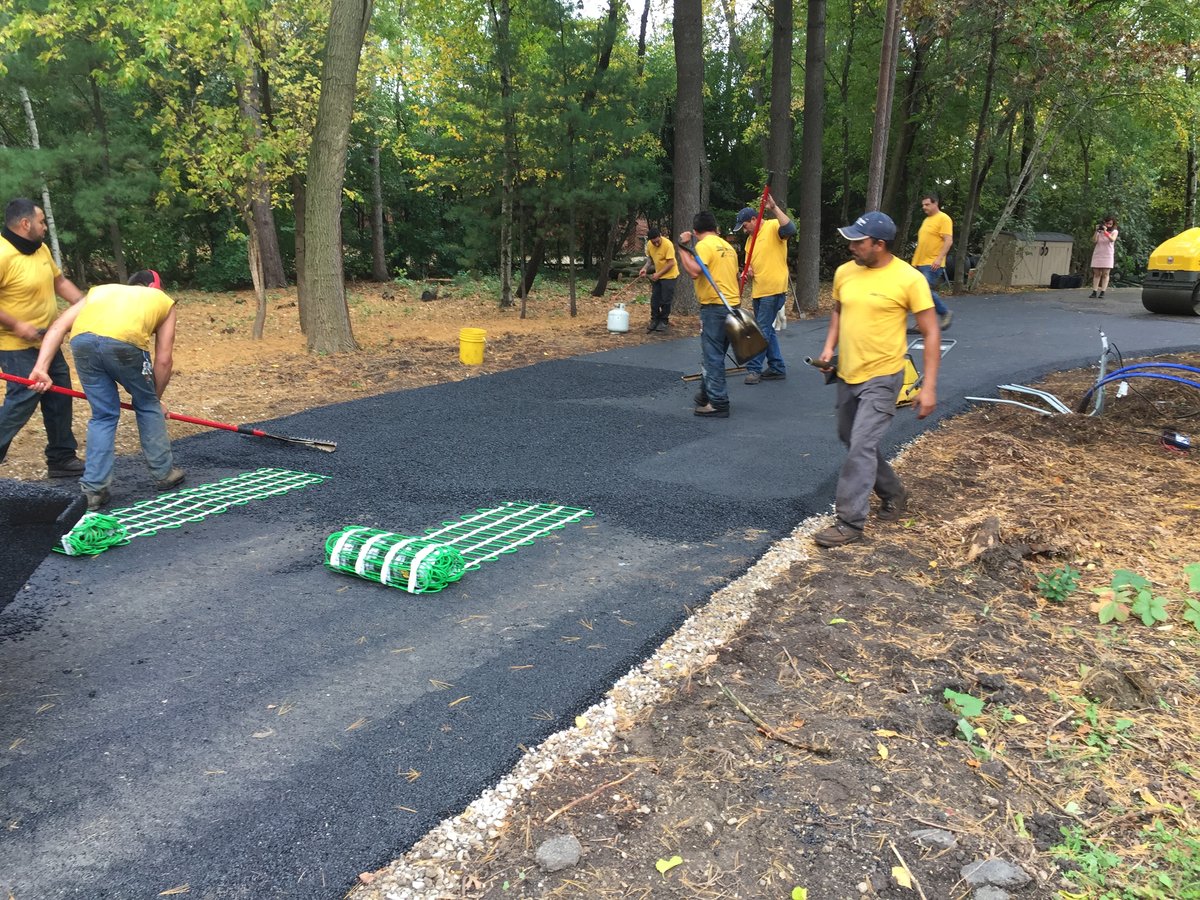
Step 6. Two Ways to Start Laying Out Snow Melting Mats
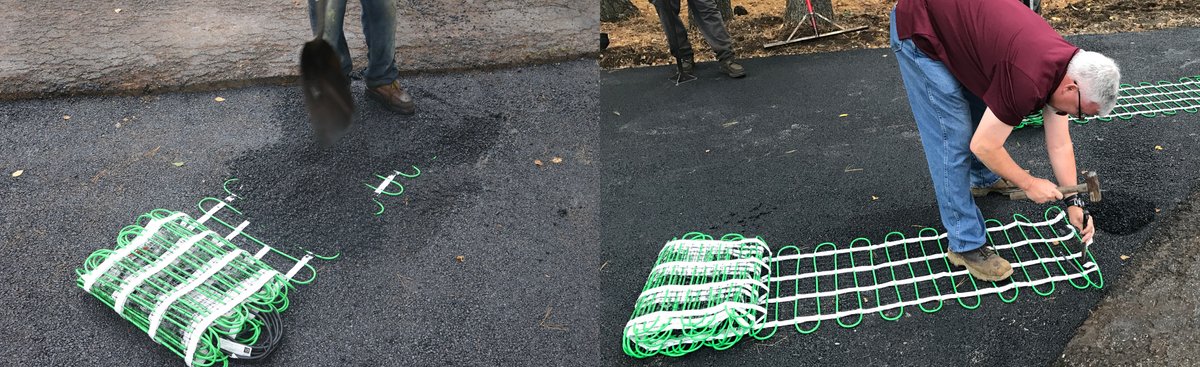
There are two primary ways to accomplish this: you can put a large scoop of asphalt down on one end or you can drive a stake into the binder coat of asphalt (while avoiding hitting the heating element) to hold the mesh. Either way works just fine.
Another tip is to only unroll a few feet of the mat at a time. This will allow you to make sure your proper spacing is maintained.
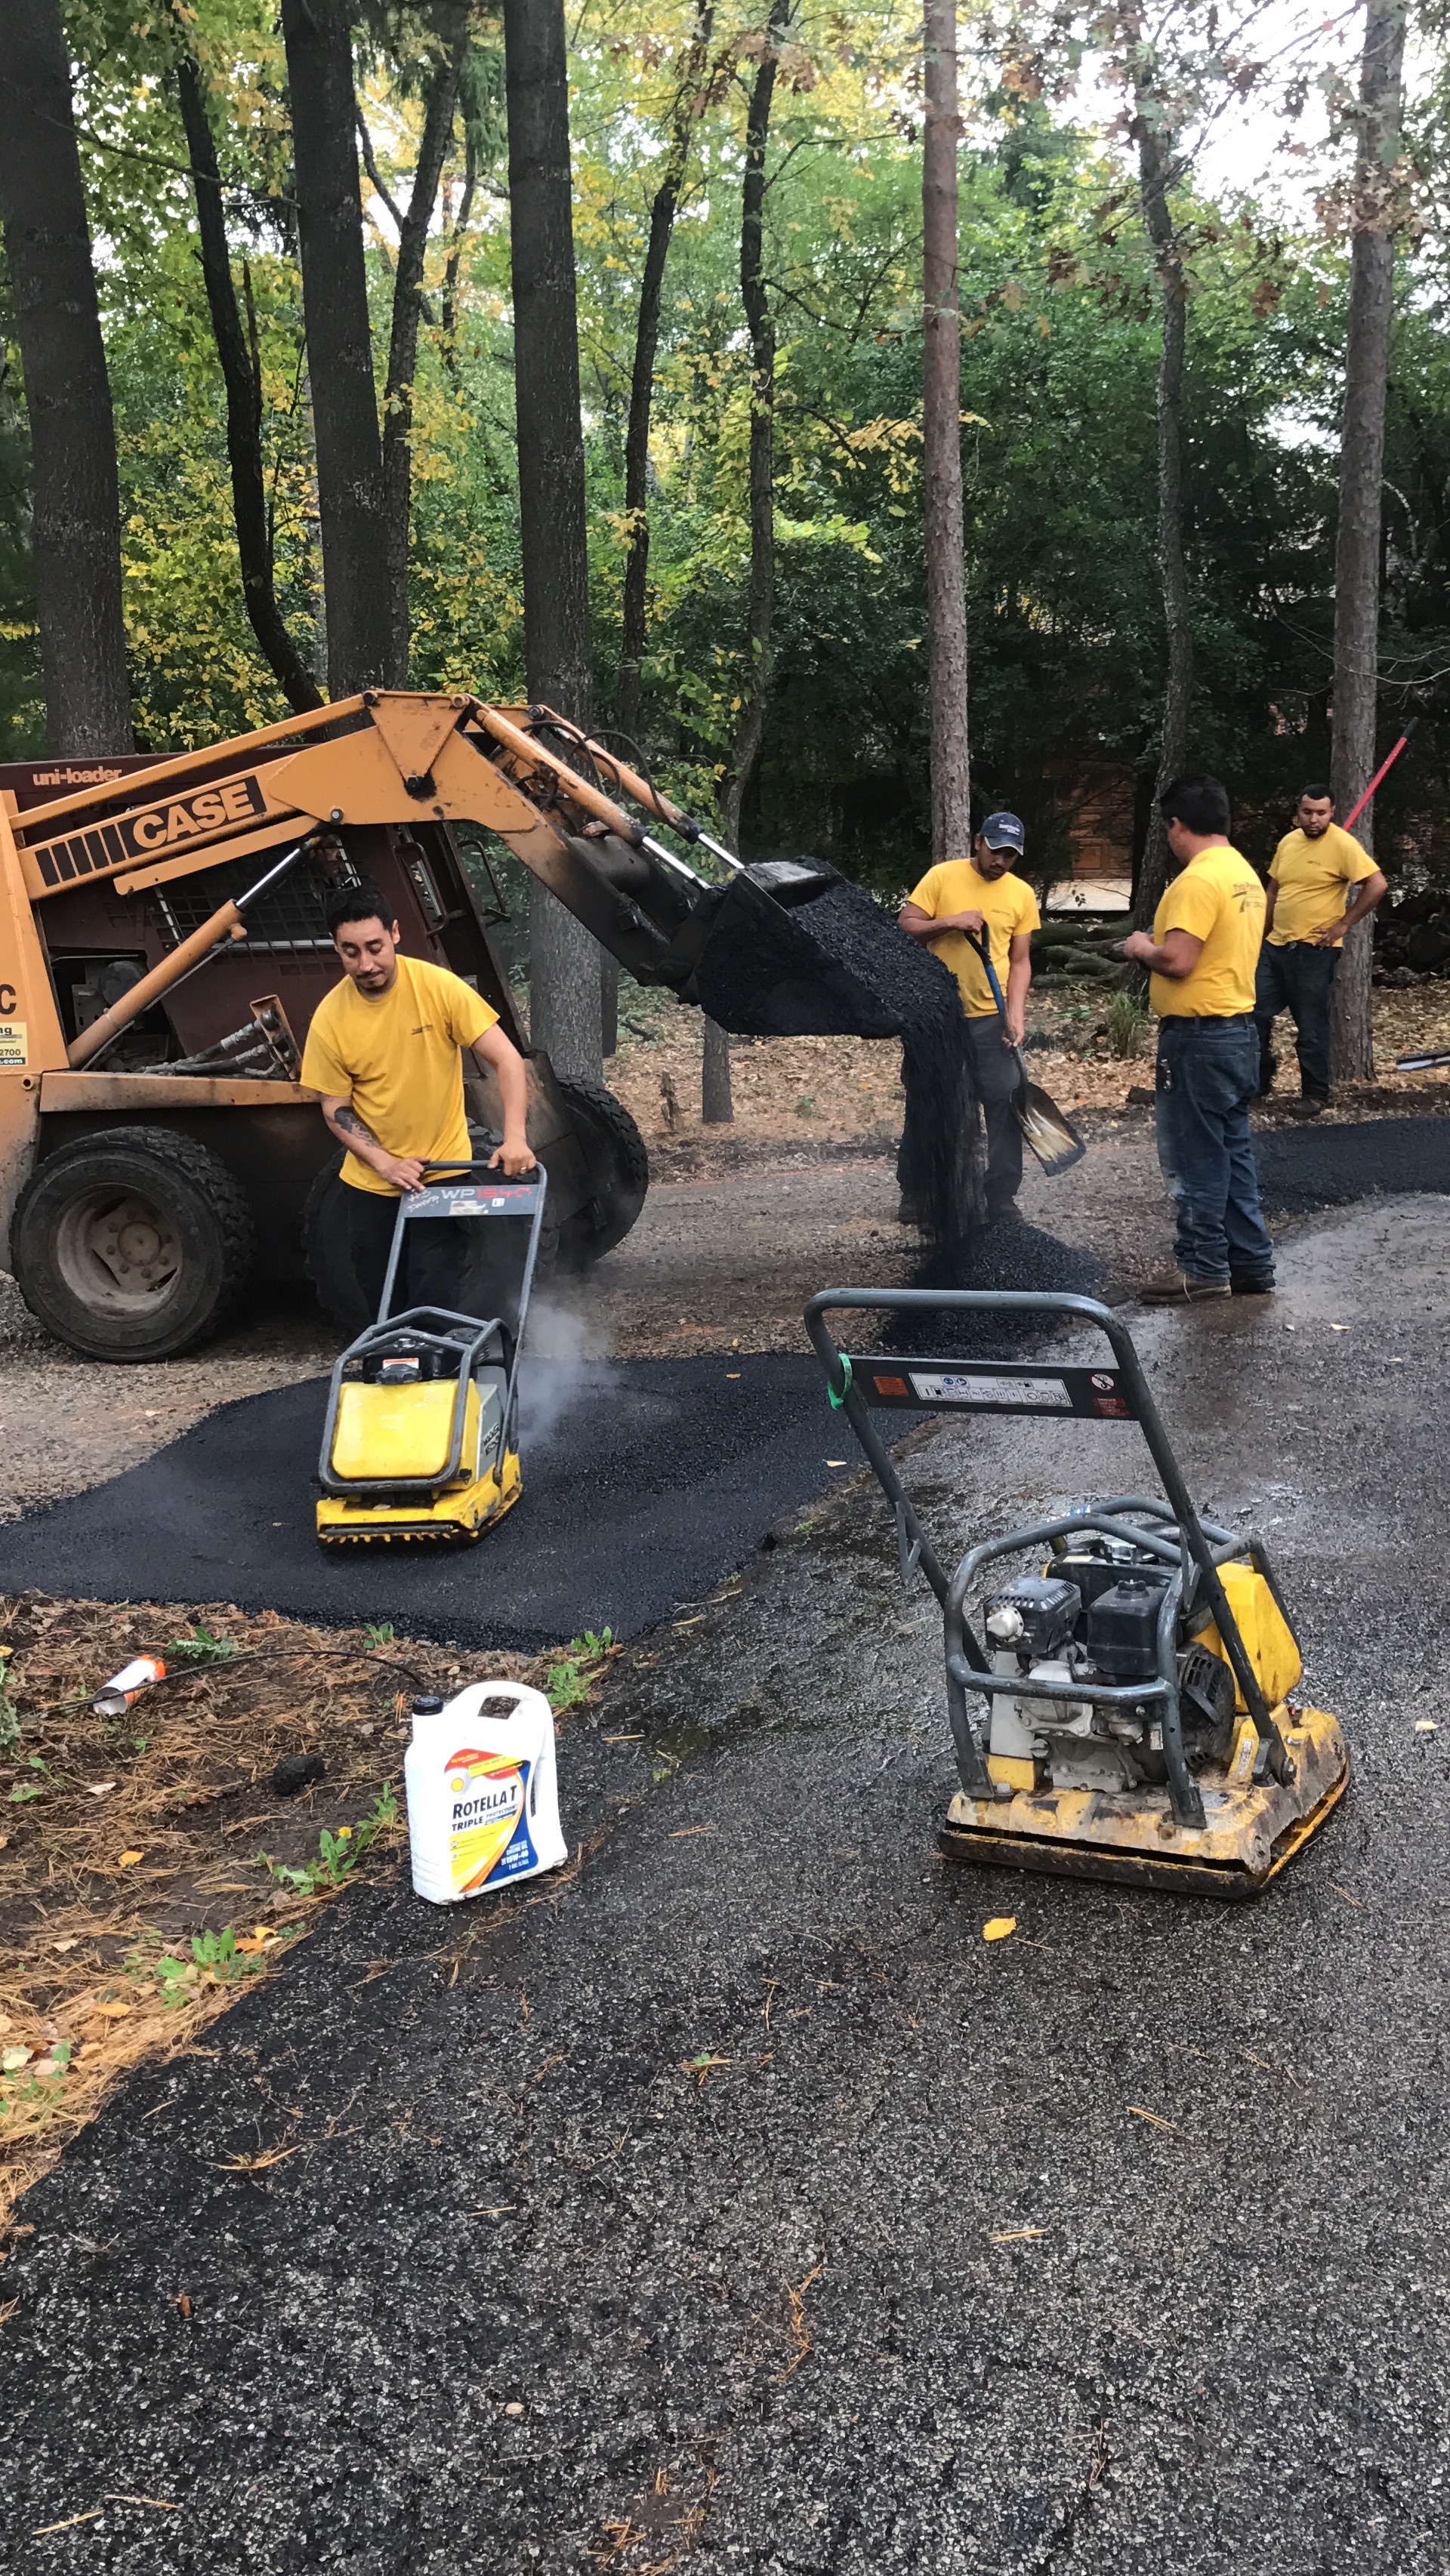
Step 7. Spreading Asphalt Over the Mats 2″ – 3″
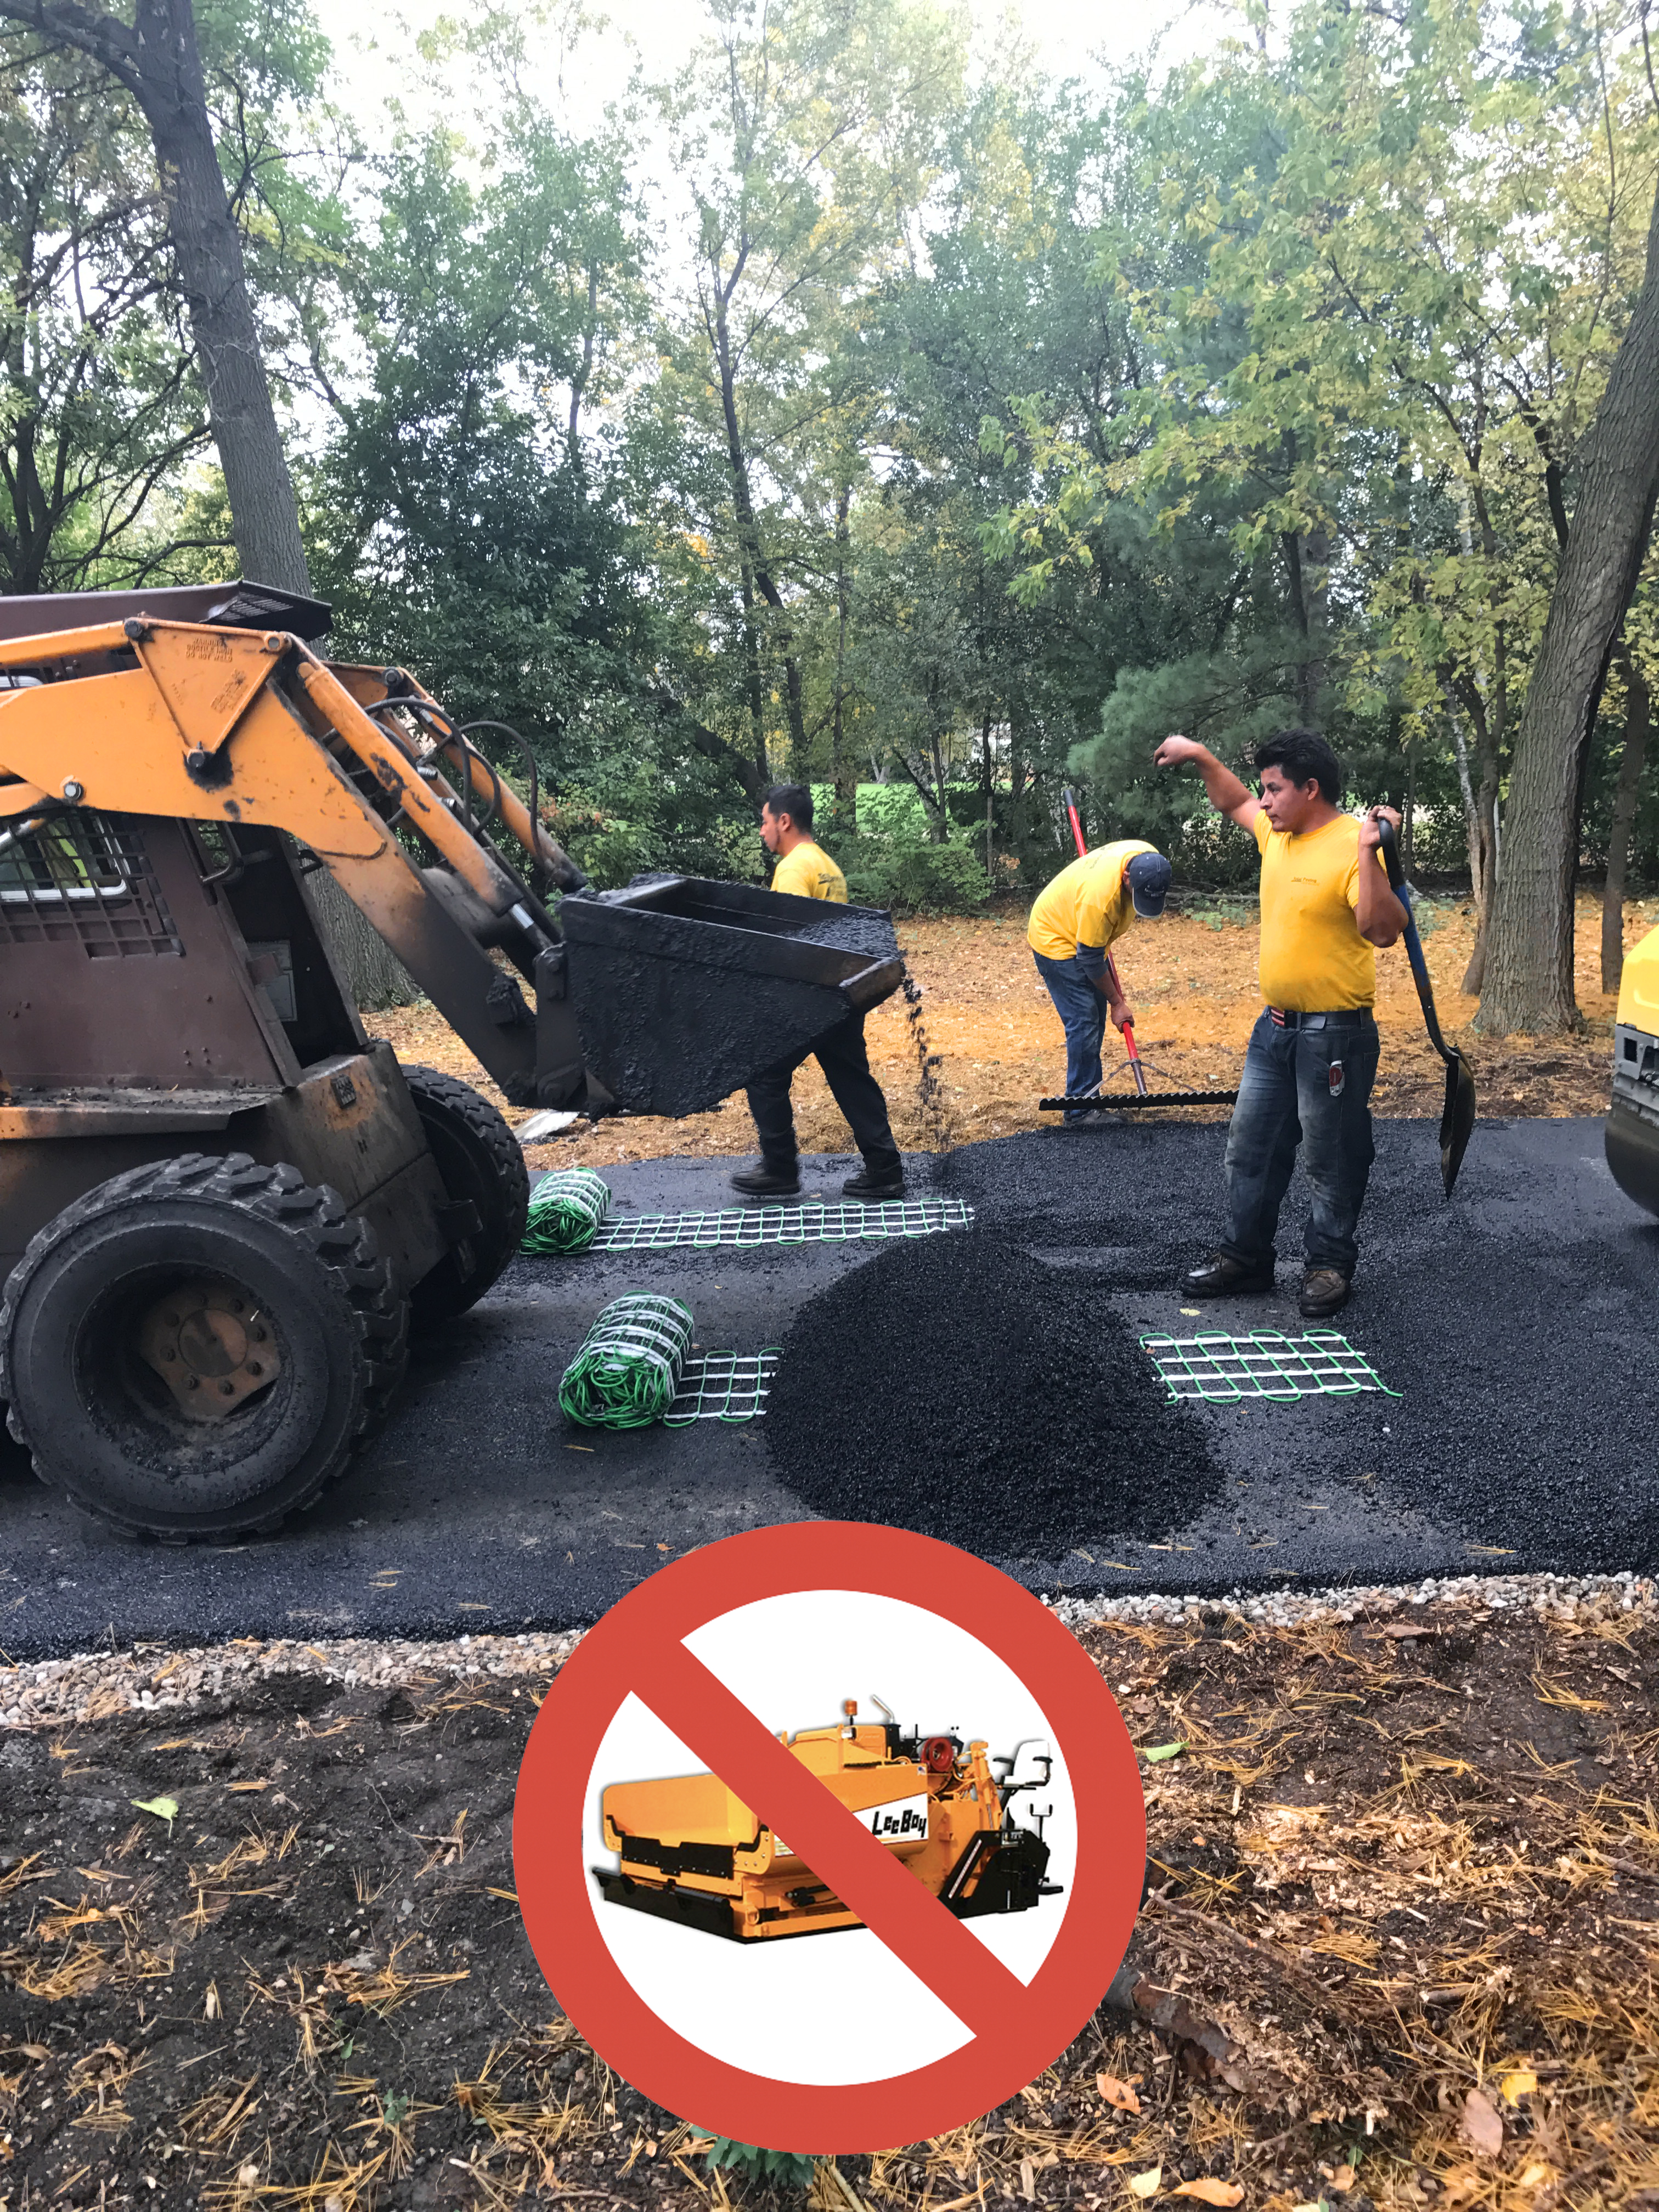
While a front loader can be used to bring hot asphalt closer to the work area, it's very important that all of the spreading be done with hand tools like shovels and asphalt rakes, with special care taken to avoid hitting the heating elements.
Mechanized asphalt pavers should never be used, as they can damage the heating element.
We recommend that this layer of "finished asphalt" be between 2" to 3".
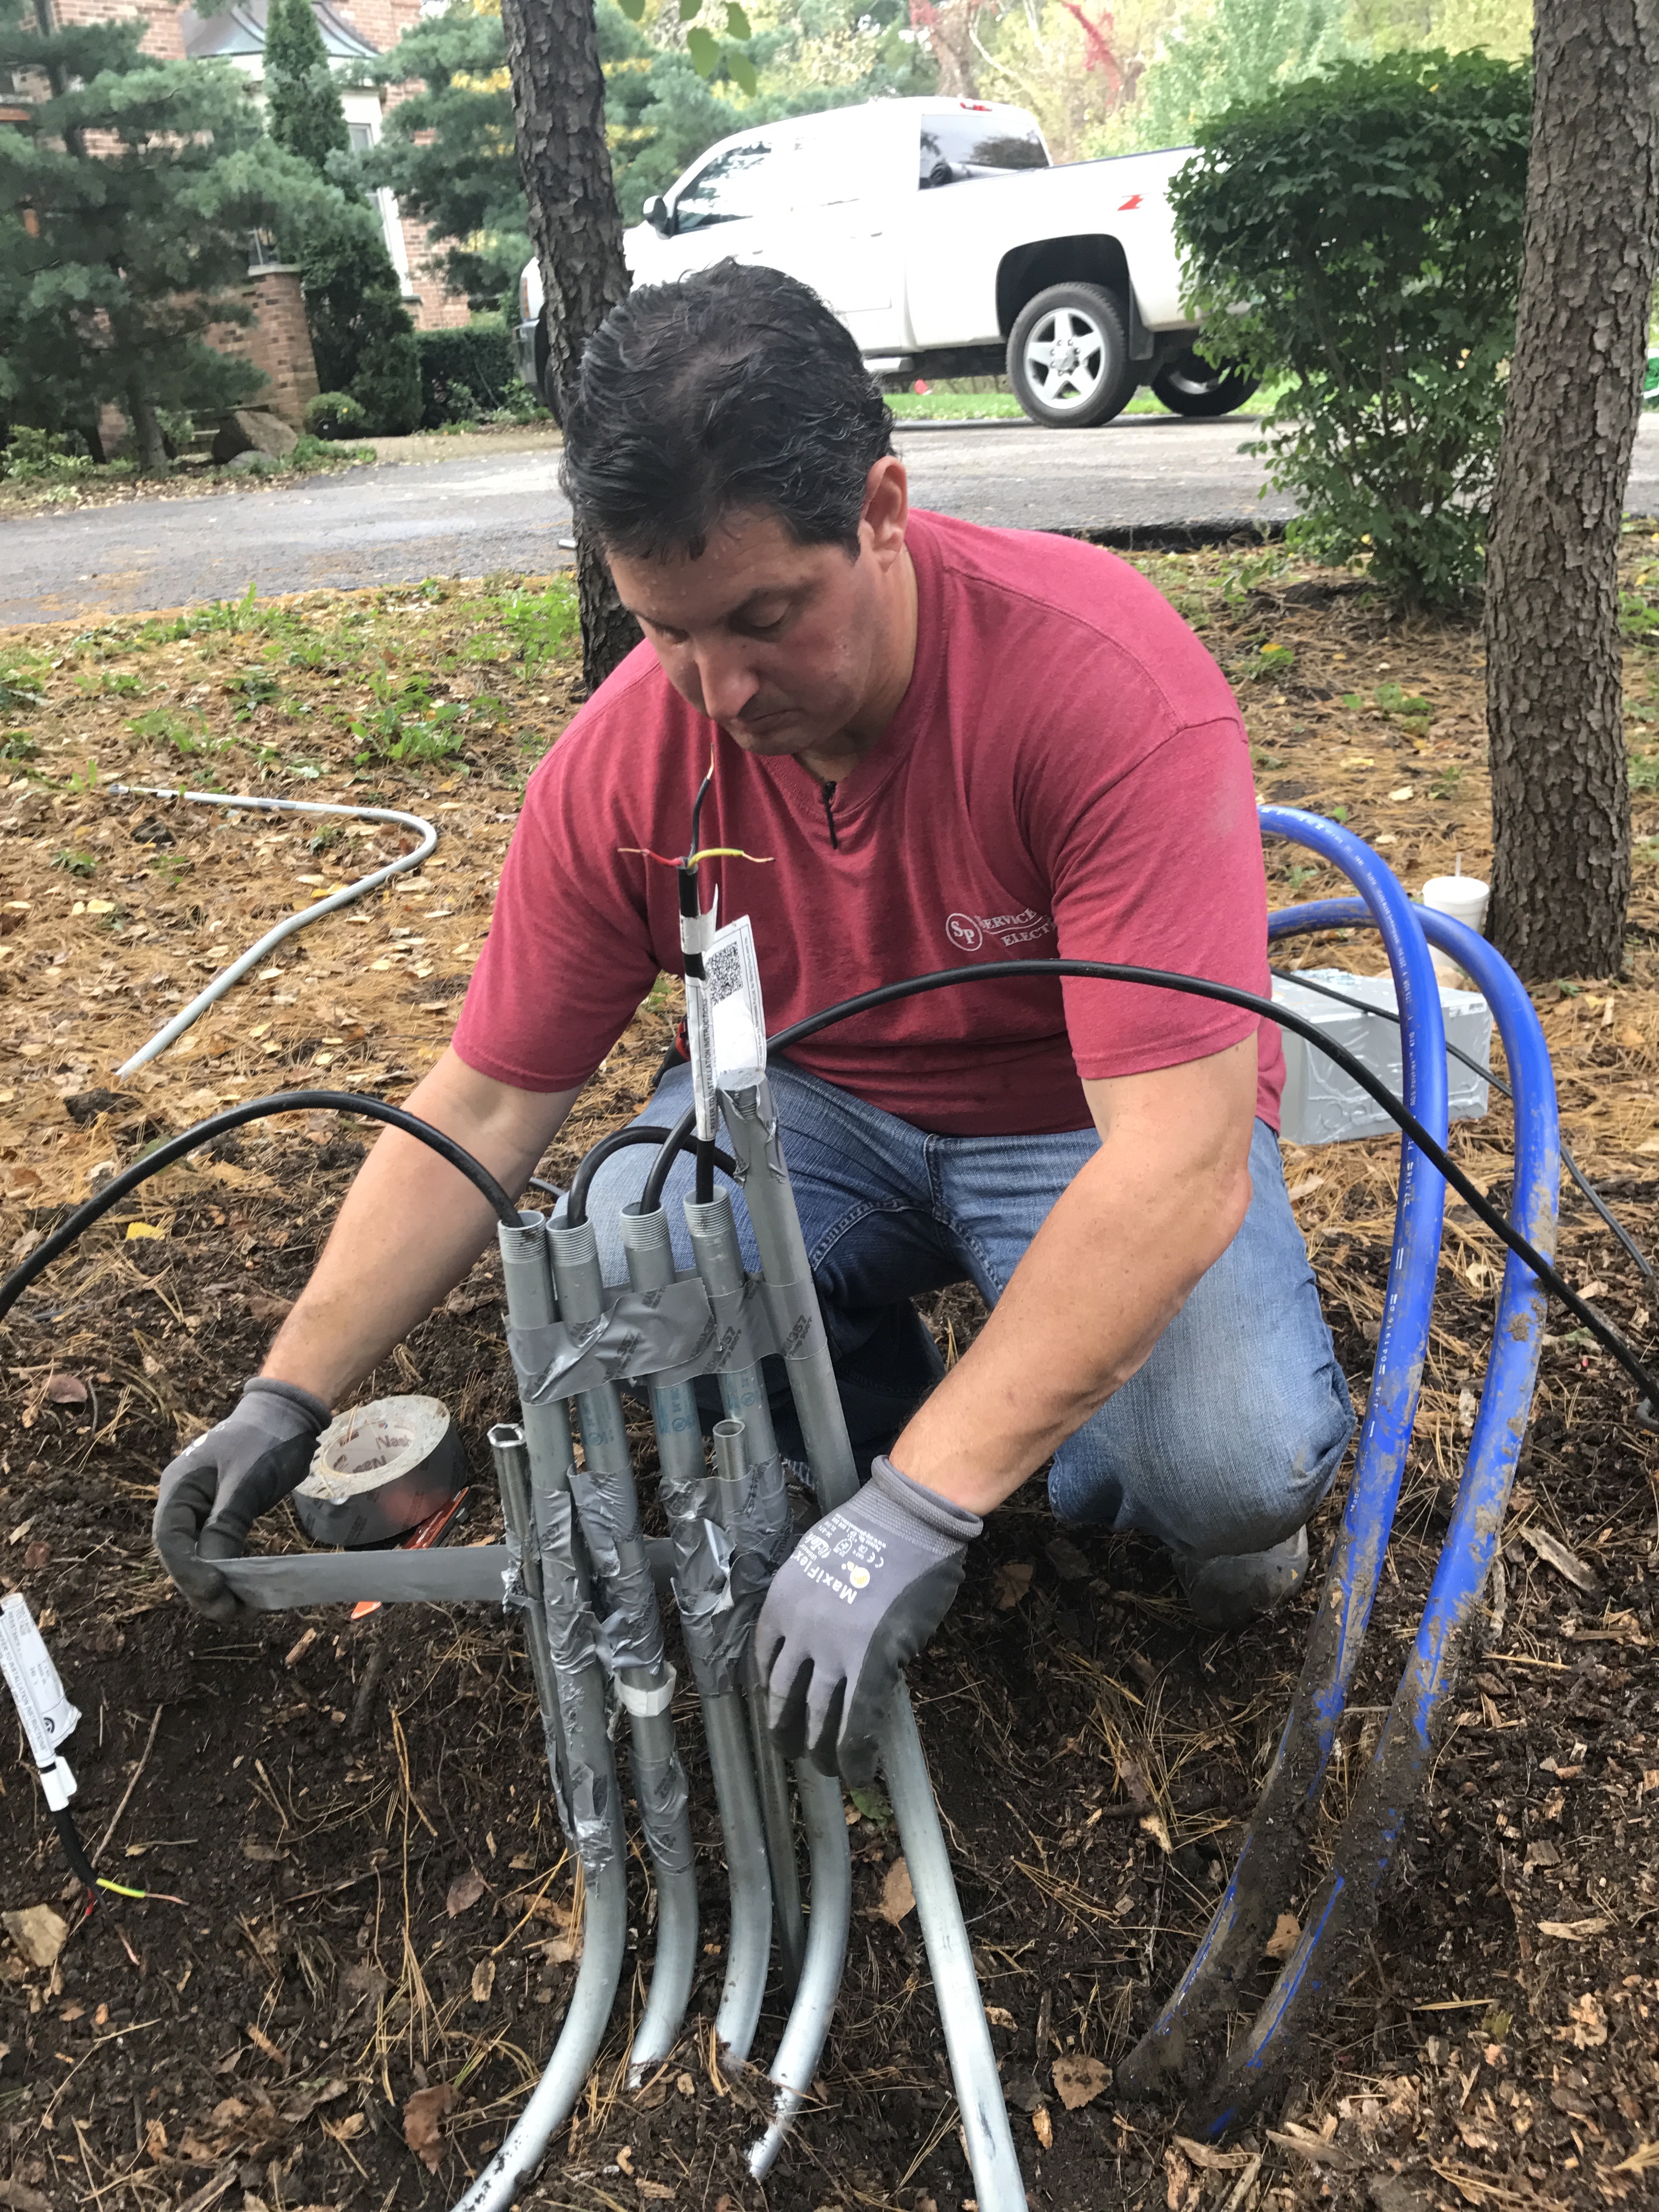
Step 8. Making Sure the Manufacturer's Splice is Embedded in Asphalt
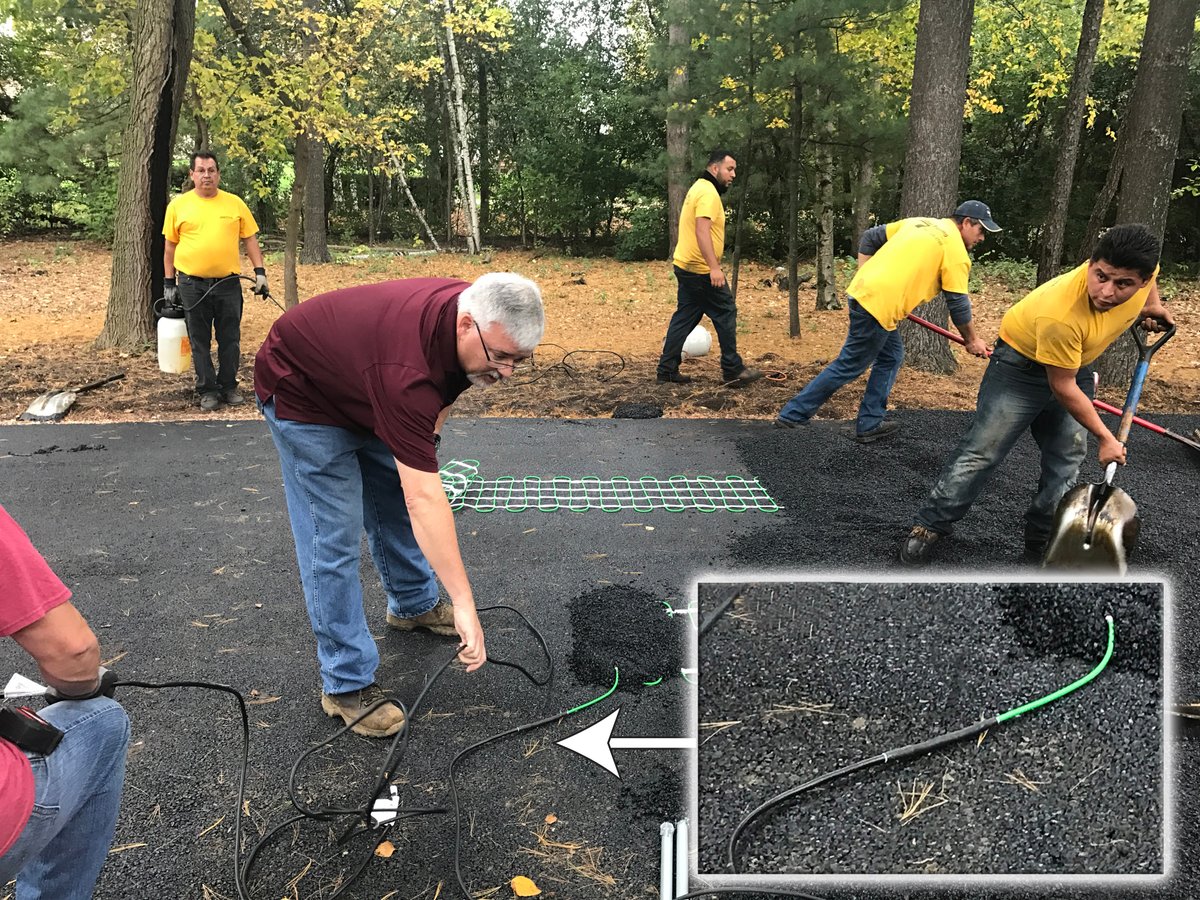
In this project, four separate heating mats (two per each tire track) are set up so that they "begin" near the middle of the driveway. This allows for one central junction box to carry power to the mats.
That power is carried to each mat by a "cold lead", which is connected to the heating cable on the mat via a manufacturer's splice.
One of the most common snow melting installation mistakes that people make is leaving this splice, and some of the heating cable, outside of the asphalt (sometimes people leave it in the conduit or simply leave it exposed). This can cause the splice, which is half heating element, to overheat and fail. By simply making sure that the splice is embedded in the asphalt, you'll ensure that it has an appropriate medium (the asphalt) to prevent overheating.
Step 9. Continuing the Second Set of Snow Melting Mats
This project required two sets of two snow melting mats, with all four mats beginning near the location where the junction box will be. This area can be seen in this picture where the pieces of bent electrical conduit meet the asphalt.
In this picture, you can also see the asphalt crew continuing to spread asphalt, while making sure to avoid hitting the heating mats with their tools.
Step 10. Surfacing the Asphalt as you Work
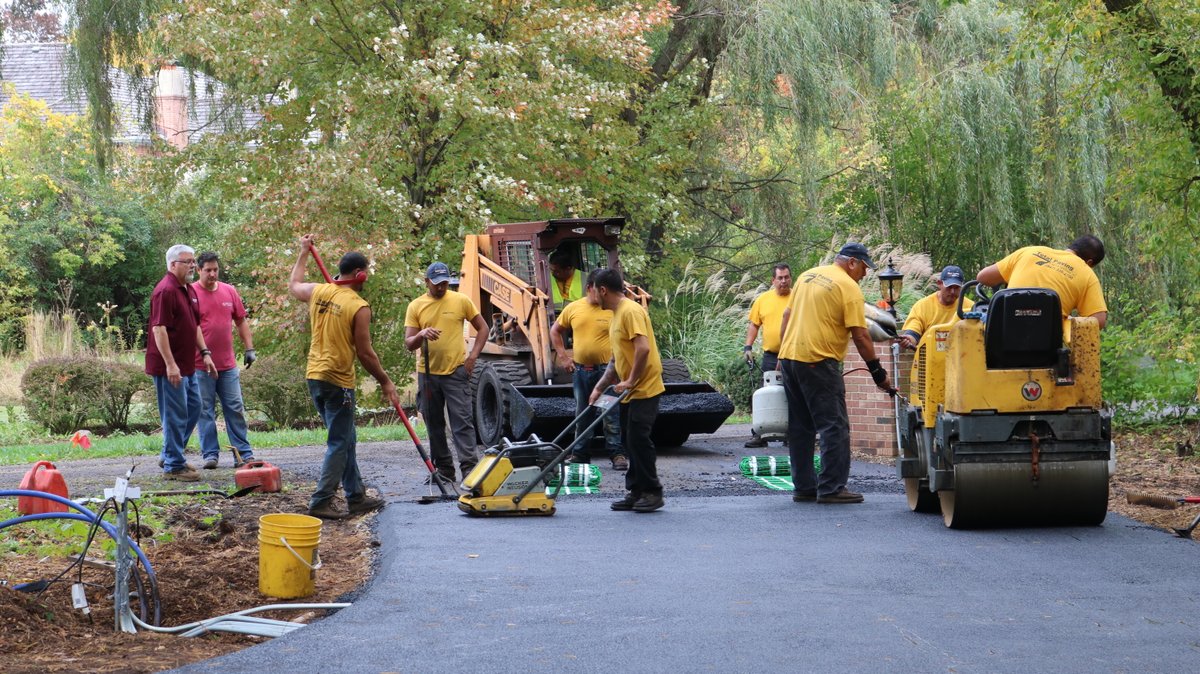
As anyone who has ever worked on an asphalt driveway will tell you, speed is key.
The tar that binds the particulate in asphalt cools relatively quickly, which means it must be poured and surfaced within a fairly short timeframe.
Once the heating element is embedded in 2". to 3". of finished asphalt, it's completely safe to use traditional surfacing methods/machines and steamrollers.
In this photo, you can see several steps being addressed at once. A front-loader with fresh, hot asphalt is supplying the dedicated spreaders and in the foreground, you can see how the crew is surfacing the asphalt.
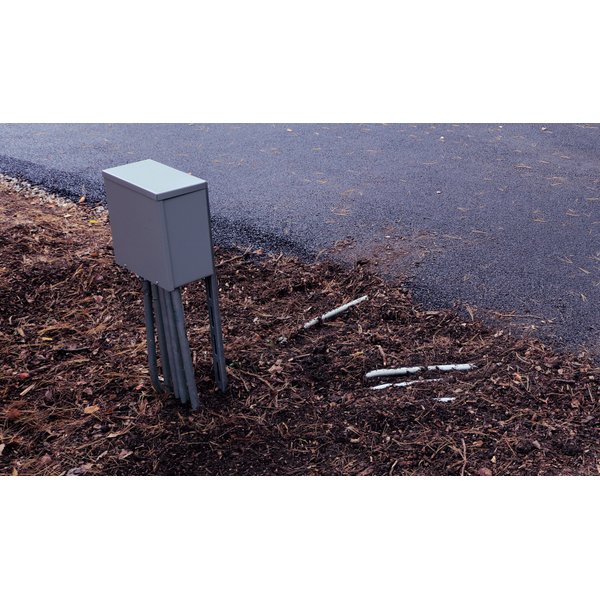
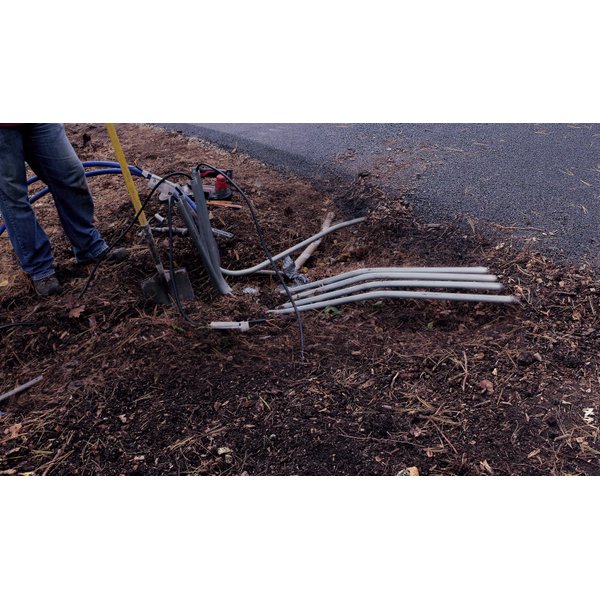
The Junction Box: Before and After Shots
In the "before" photo, you can see the conduits which will ultimately be attached to the junction box. There is a conduit for each mat that will contain the cold lead and another conduit for the temperature sensor.
The sensor measures how warm the heated asphalt gets and is a crucial component for a wellfunctioning snow melting system. The temperature sensor conduit should be capped with the sensor itself within the conduit near the cap.
To get the most accurate reading, this capped conduit should be in the middle of two heating cables.
This junction box is elevated, but some homeowners will choose to embed the junction box so that it is flush with the ground. The most important thing is that the junction box remains accessible.

The Control for Your Snow Melting System
WarmlyYours offers a wide variety of controls for our snow melting systems - from a manual option with a timer that will only activate when you turn it on/off, to an automatic option that will turn on when it senses snow is falling.
The control used in this project was a multi-zone controller. This control allows the system to heat up in separate zones, instead of all at once, which can be very useful for projects with limited power availability. This also allows you to maintain the functionality of the snow melting system while greatly cutting down on the energy consumption.
For more information about the variety of snow melt controls and sensors available from WarmlyYours, check out this comparison chart.
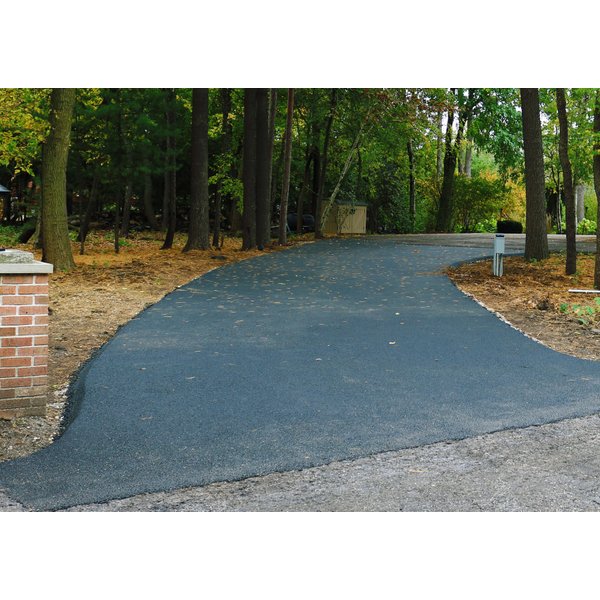
Shop ControlsThe Finished Driveway
Once the driveway is completed, it's ready to be used. Just add snow! Make sure to monitor your driveway system and control throughout the first couple of snowfalls to see if any adjustments are required.
As you can see, this snow melting system in the tire tracks format will keep your driveway usable, even in the dead of winter.
In this video, you may notice that the melted area is fairly wet with melted snow. Most WarmlyYours snow melting systems will continue to run past when the snow stops falling. This will typically evaporate the water left behind, and in its place, you'll find clean, dry asphalt.
Snow melting systems like this allow you to do away with chemical melting agents, which will be easier on your pets and your vehicles. It will also be much easier on your body when you can officially retire the snow shovel.
Get Your Snow Melting Project Started Now!
Get an Instant Quote to find out how much snow melting on your driveway will cost.
Free, no-obligation SmartPlan that includes an installation plan, an electrical plan, and an itemized quote.
Find out the estimated operating cost for your system.