

In This Article
If you’ve recently purchased a programmable thermostat, you’re probably excited to set a schedule to help save on energy costs — and rightfully so! Saving energy (and, therefore, money) and gaining convenience are the top reasons homeowners get programmable thermostats. Unfortunately, these controls aren’t always intuitive to set up. That’s why WarmlyYours developed two new, and easy to set up, programmable thermostats.
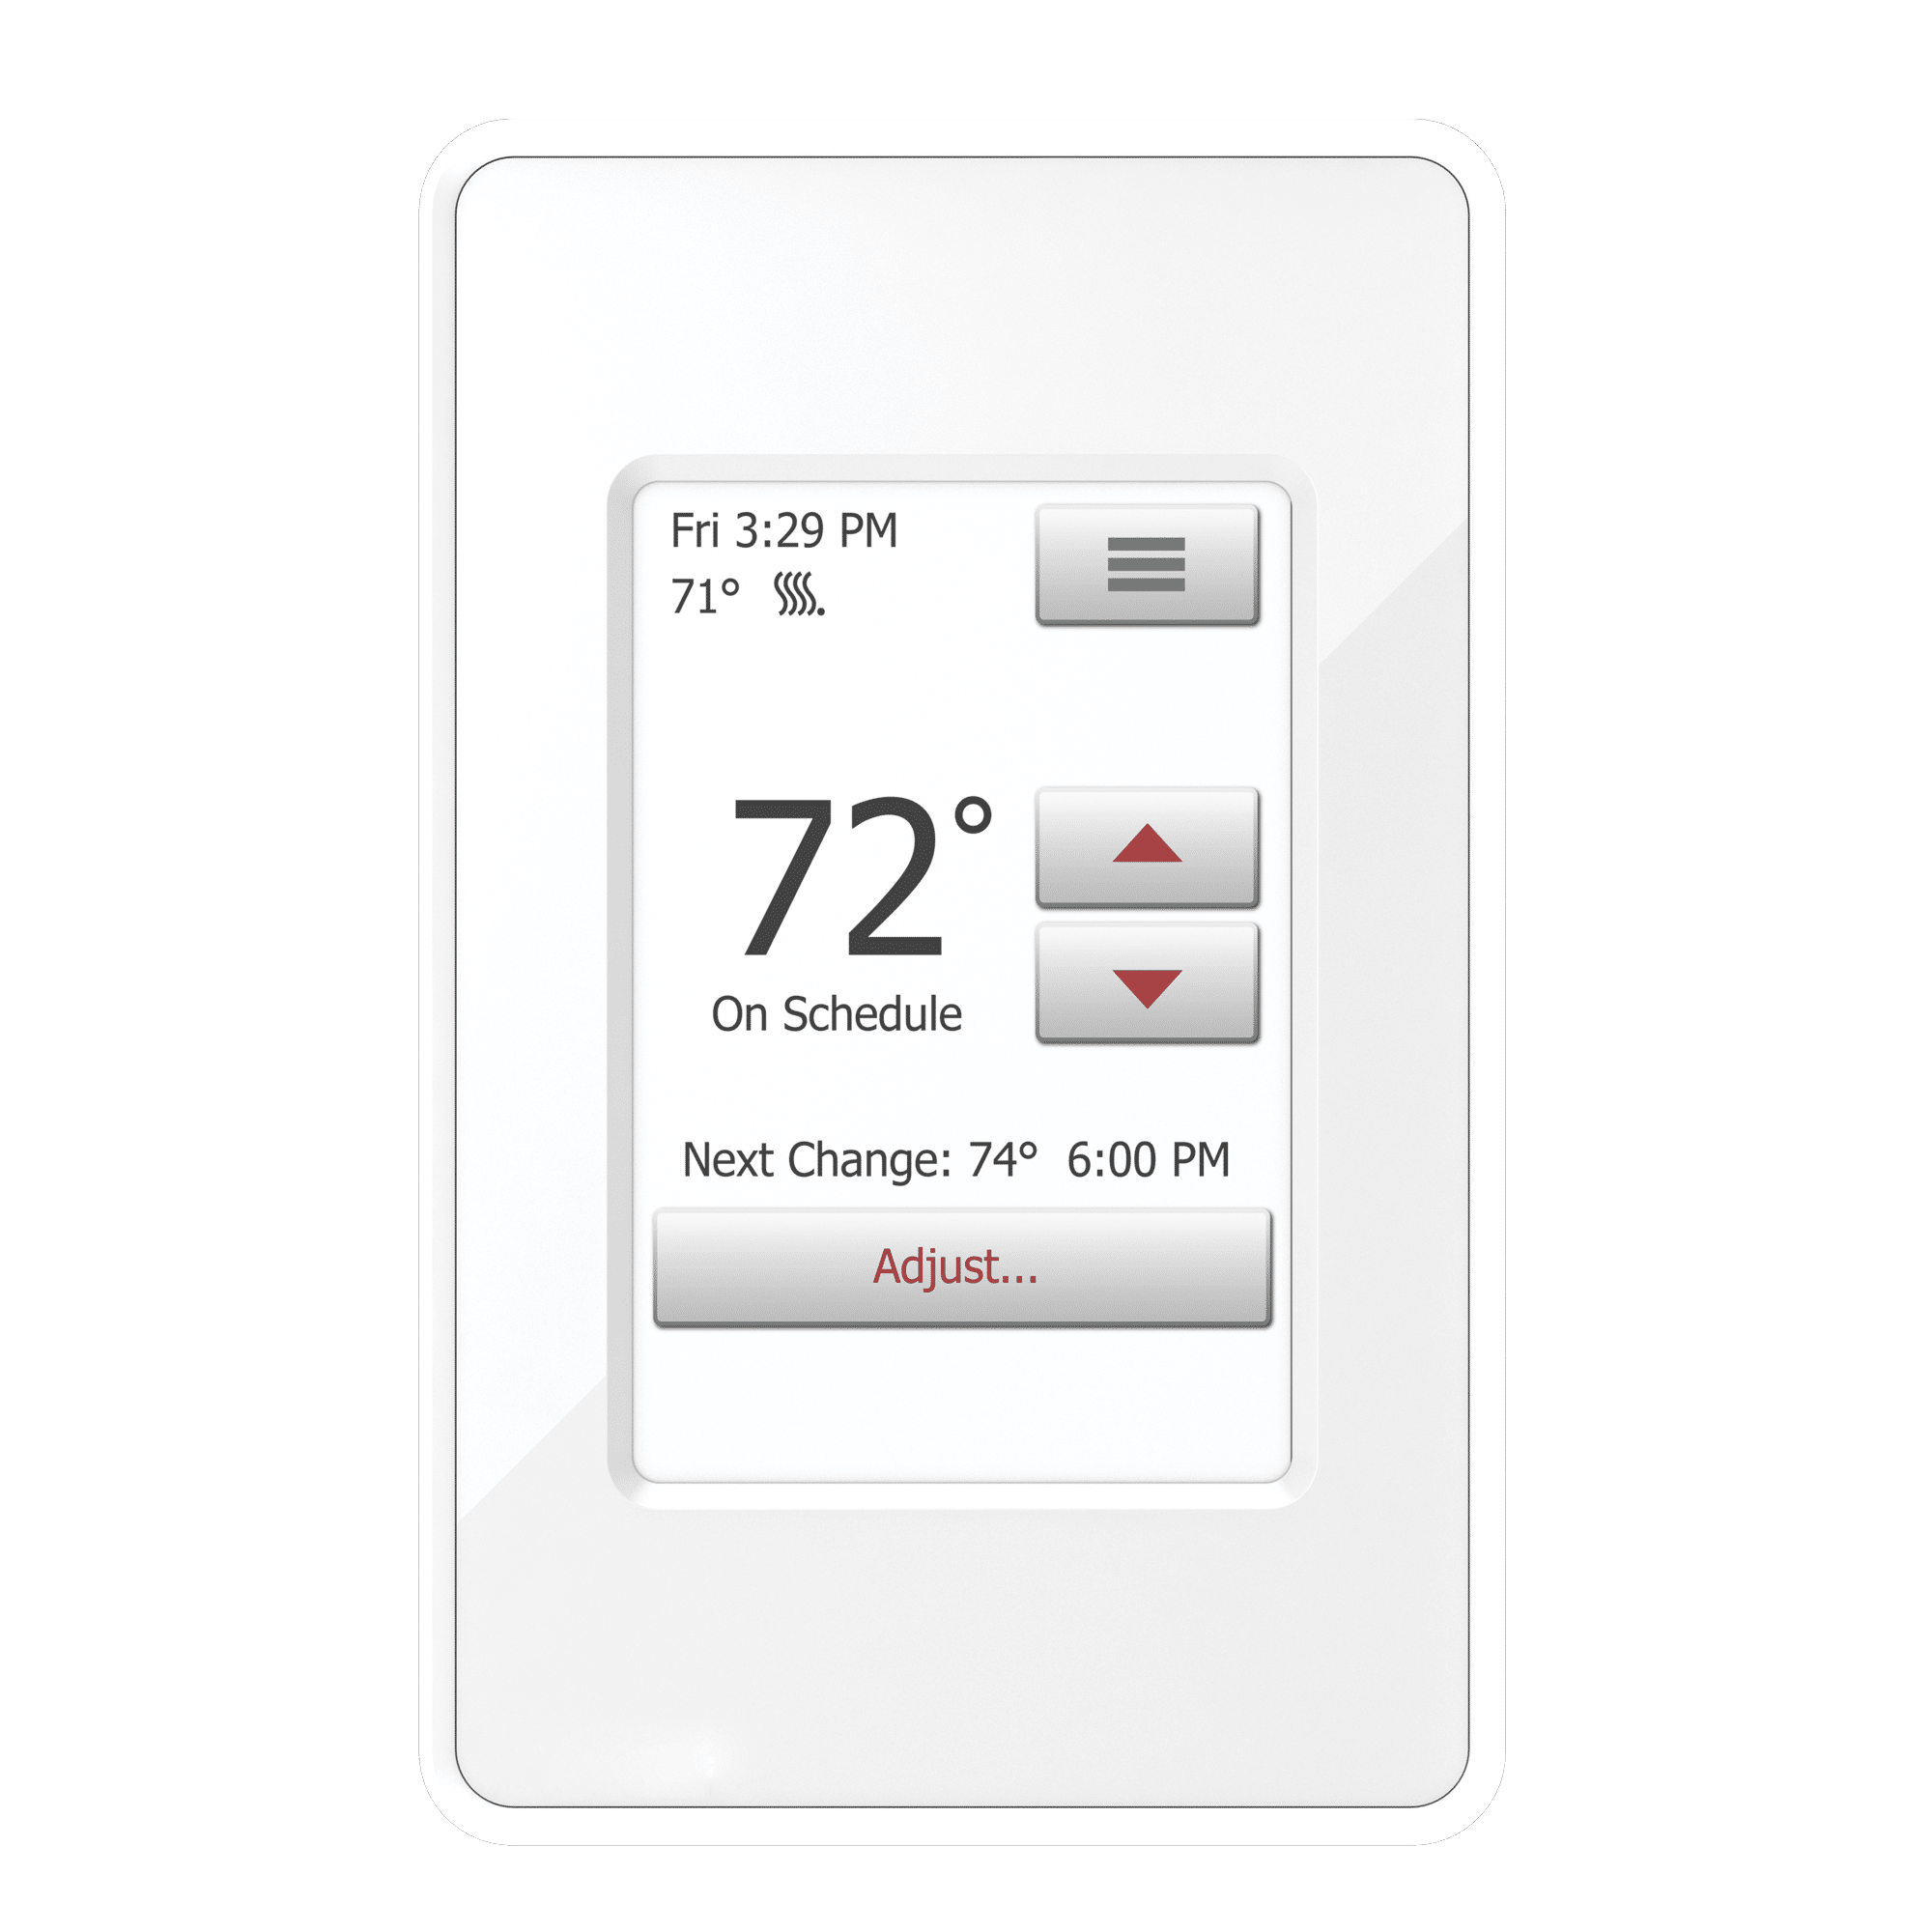
The nSpire Touch and nSpire Touch WiFi thermostats are uniquely easy to set up because they feature an easy to navigate 3.5" touchscreen and a Startup Wizard that walks you through the process step by step. As soon as the thermostat is installed and turned on, you’ll be prompted to begin the Startup Wizard. In these 10 easy steps, you’ll be more effectively heating your home and saving time and money in the process.
Step 1: Set the language.
Start by selecting the language you speak. You can choose between English, French and Spanish.
Step 2: Test the system.
Next, the thermostat will perform an automatic test of the thermostat itself, the air/room sensor and the floor sensor. If each test results in “Pass,” you can move on to the next step. If a test results in “Fail,” you should contact your installer — with one exception. If you’re not using a floor sensor, that test will result in “Fail.” So, if you’re only using an air/room sensor for your floor-heating system and your Floor Sensor test fails, you can still continue on to the next step.
Step 3: Perform a safety test.
Safety is everything. That’s why the Startup Wizard will perform a ground fault test in this step. Just push the test button on top of the thermostat to test the ground fault. If everything is wired properly, a red light in the test button will light up and “ground fault error” text will appear on screen. Once you see this, press the power/reset button and then hit continue.
Step 4: Select your preferred temperature unit.
Choose whether you want the temperature shown in Fahrenheit or Celsius.
If you have the nSpire Touch Wi-Fi thermostat, the next step will be to enter your distributor ID. You can find the ID on the box the thermostat came in or on the custom installation plan provided by WarmlyYours.
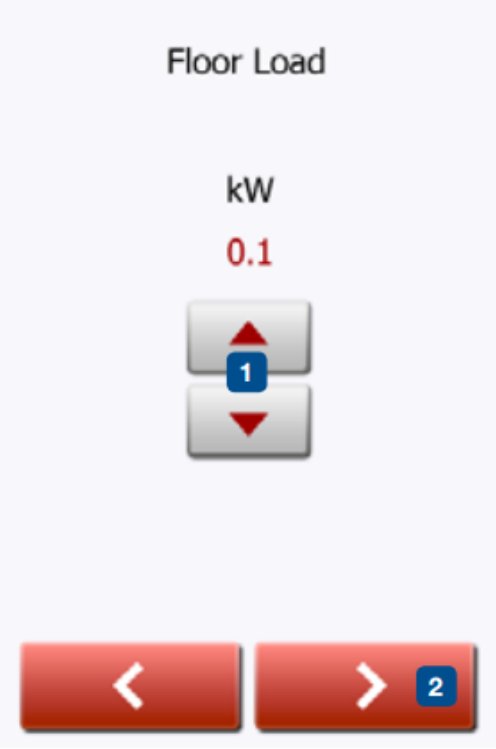
Step 5: Set the floor load.
The floor load is the total wattage of your floor-heating system. It is used to calculate the energy usage of your system. You can find your floor load on the custom installation plan provided by WarmlyYours or on the UL tag on the product. Once you’ve located it, enter the floor load in kilowatts.
Step 6: Set the sensor type.
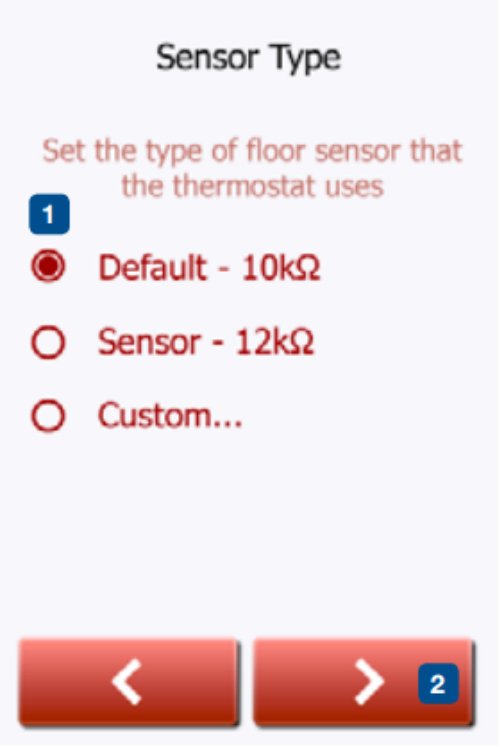
Select the type of floor sensor that the thermostat uses. The thermostat is calibrated for use with 10kΩ or 12kΩ sensors, but you can also enter a custom sensor type if necessary. If you’re using an air/room sensor without a floor sensor, select the Default option. Then, once you’ve finished the Startup Wizard, go to Menu>Installer Settings>Sensor Application and choose “Room.”
Step 7: Set the date.
Use the up and down arrows to select the date and choose whether you would like the month or day to appear first.
Step 8: Set the time.
Again, using the up and down arrows, set the time and select whether you would like to use a 12- or 24-hour clock.
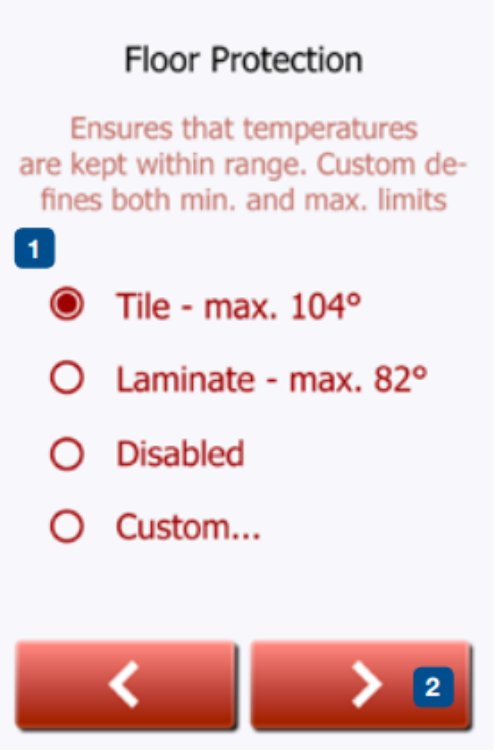
Step 9: Select your floor type.
Select the type of flooring you have. By entering this information, your thermostat can make sure that the heat output always stays compliant with the limits of the flooring material. For instance, laminate floors can only tolerate up to 82 degrees Fahrenheit, while tile can endure up to 104 degrees. For information about the proper temperature limitations for your flooring material, consult the manufacturers.
Step 10: Activate.
Finally, click the check mark button to activate your system!
With a Startup Wizard, getting your new programmable thermostat set up is easier than ever. For more details on each step, check out the nSpire Touch user manual.
Have Questions About Your Project?
Our team of Radiant Experts is ready to help!

Stay Updated
Get the latest radiant heating news and tips delivered to your inbox.