
Online Floor Heating Design Tool
Free to Use • No CAD Skills Needed • Instant Quote at the End
Meet Rae Radiant—Your Floor Heating Design Guide
"Draw your room in minutes, drop in fixtures, and our Quote Builder does the rest. You'll get an instant side-by-side comparison of heating systems with real pricing—completely free."
Design Your Room in 4 Easy Steps
From blank canvas to instant quote—here's exactly what to expect.
Choose Your Room Shape
Pick a starting shape that most closely resembles your space. We have presets for square, rectangular, L-shaped, and custom rooms—don't worry if it's not a perfect match, you'll refine it in the next step.
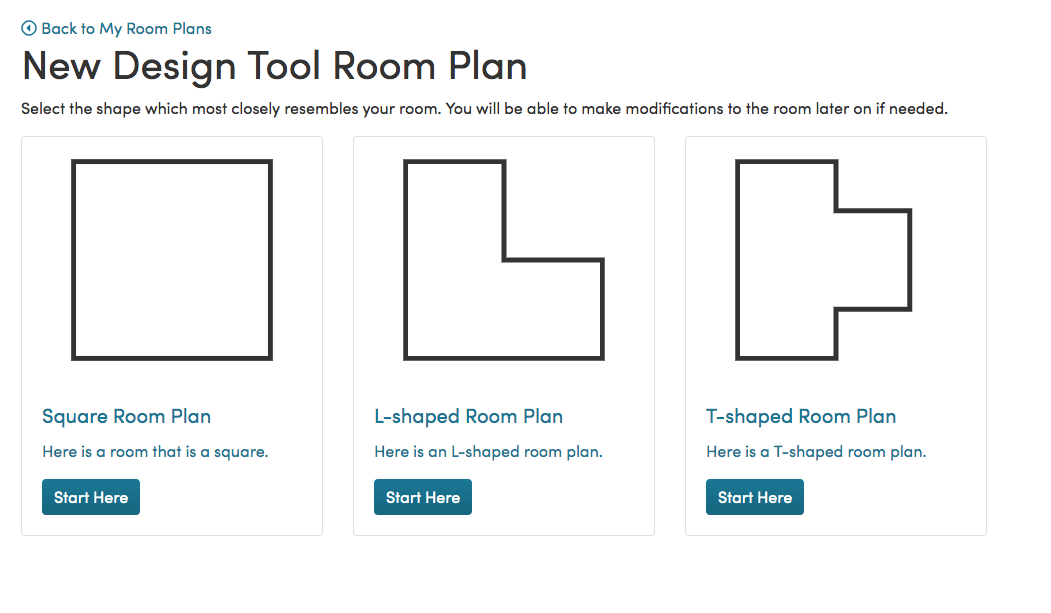
Rae Says
"Don't stress about picking the perfect shape right away. Our most popular starting point is the basic rectangle—you can always add notches and angles afterward. Just get started and we'll guide you the rest of the way!"
Customize Your Room Size
Drag the room's edges to match your exact dimensions. Need angled walls or an irregular shape? No problem—our tool handles complex layouts so you get the most accurate coverage calculation possible.
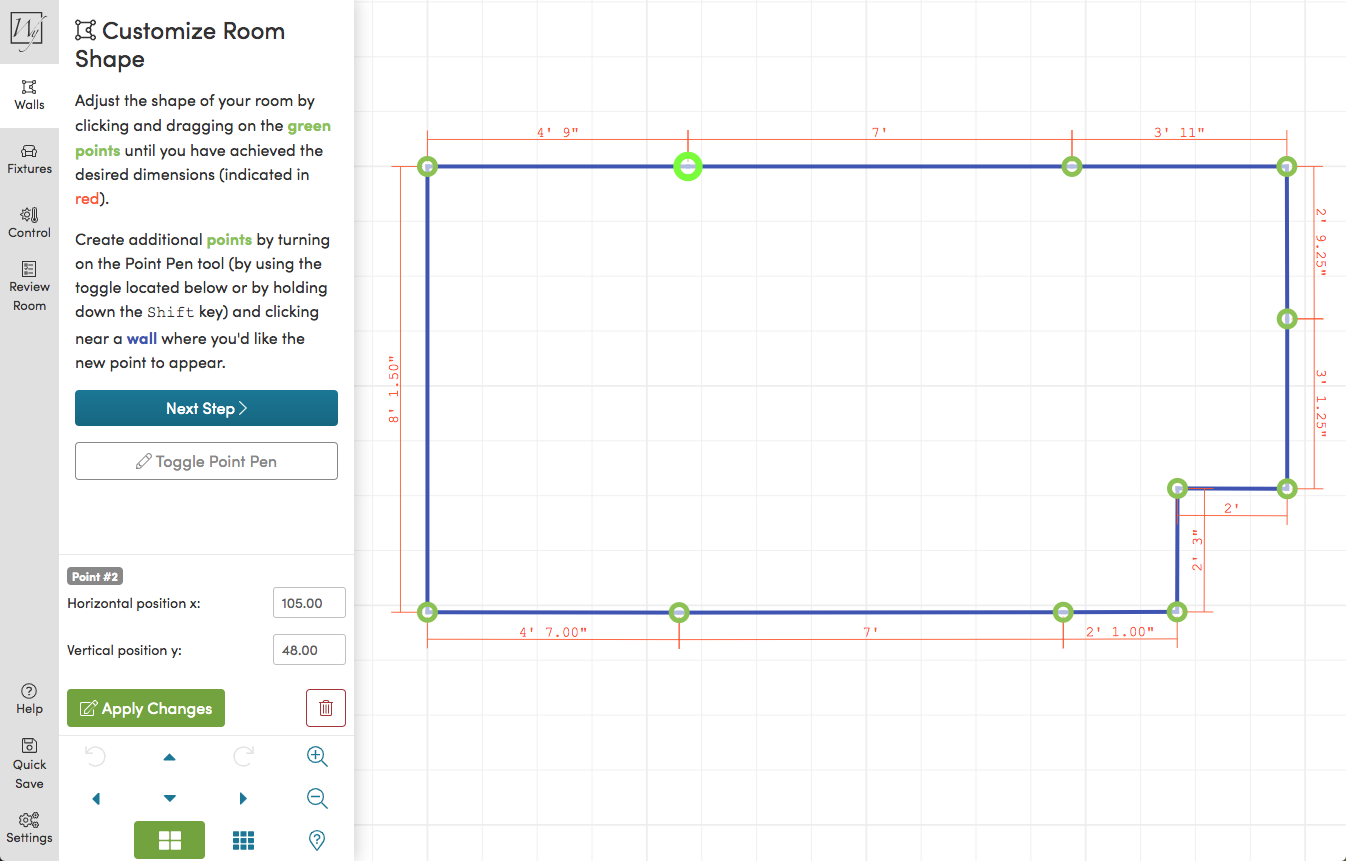
Rae Says
"Accurate dimensions are the key to an accurate quote. If you're unsure, measure twice! Even a rough estimate gets you 90% of the way there—my team will verify everything when we review your SmartPlan™ request."
Add Fixtures & Thermostat Position
Drag and drop permanent fixtures—cabinets, bathtubs, toilets, islands—into your floor plan. Then mark where your thermostat will go. These exclusions let us calculate the precise heated floor area and determine the right system size.
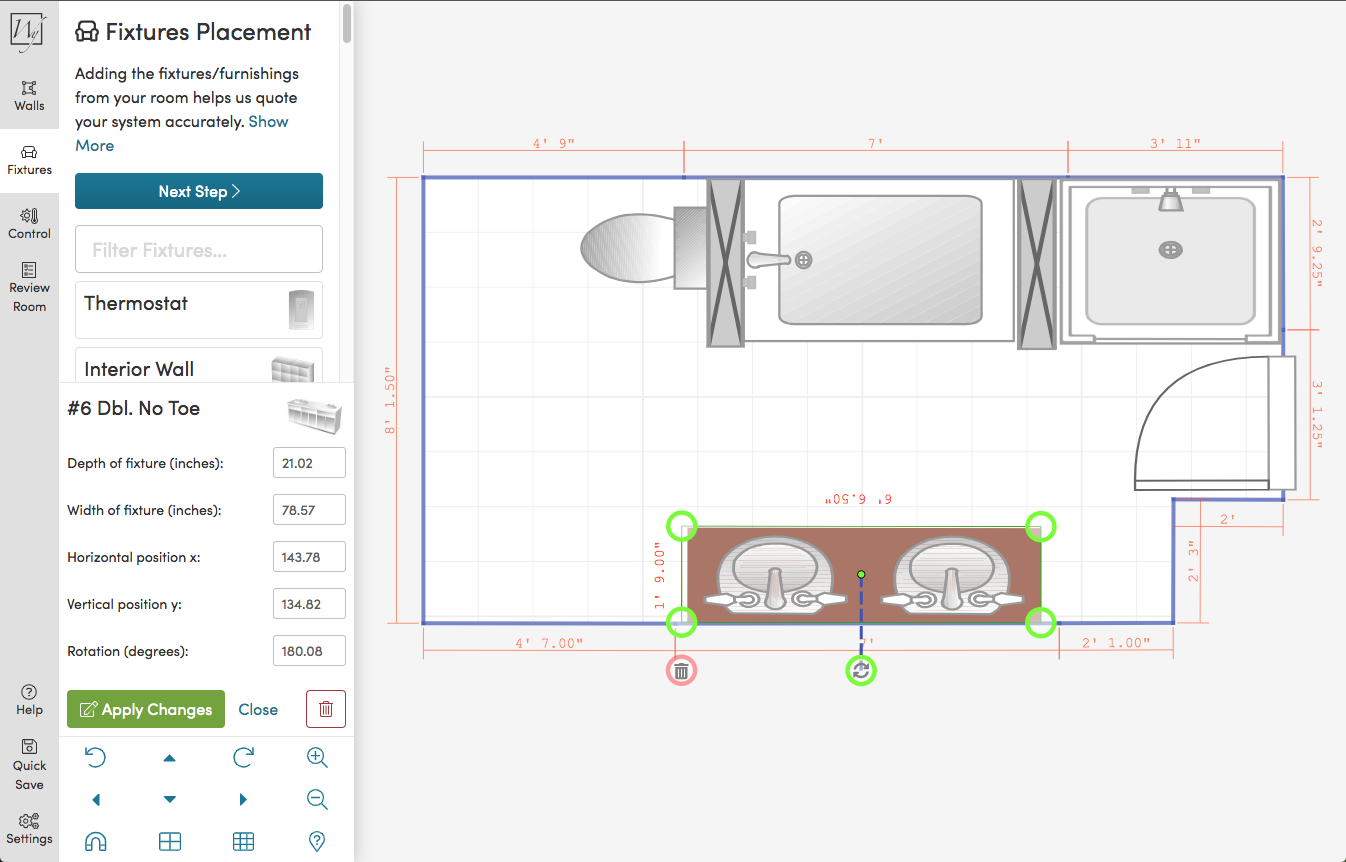
Rae Says
"Getting your fixture placements right is what separates a good heating plan from a great one. Placing the thermostat on an interior wall away from direct heat sources gives you the most accurate temperature readings."
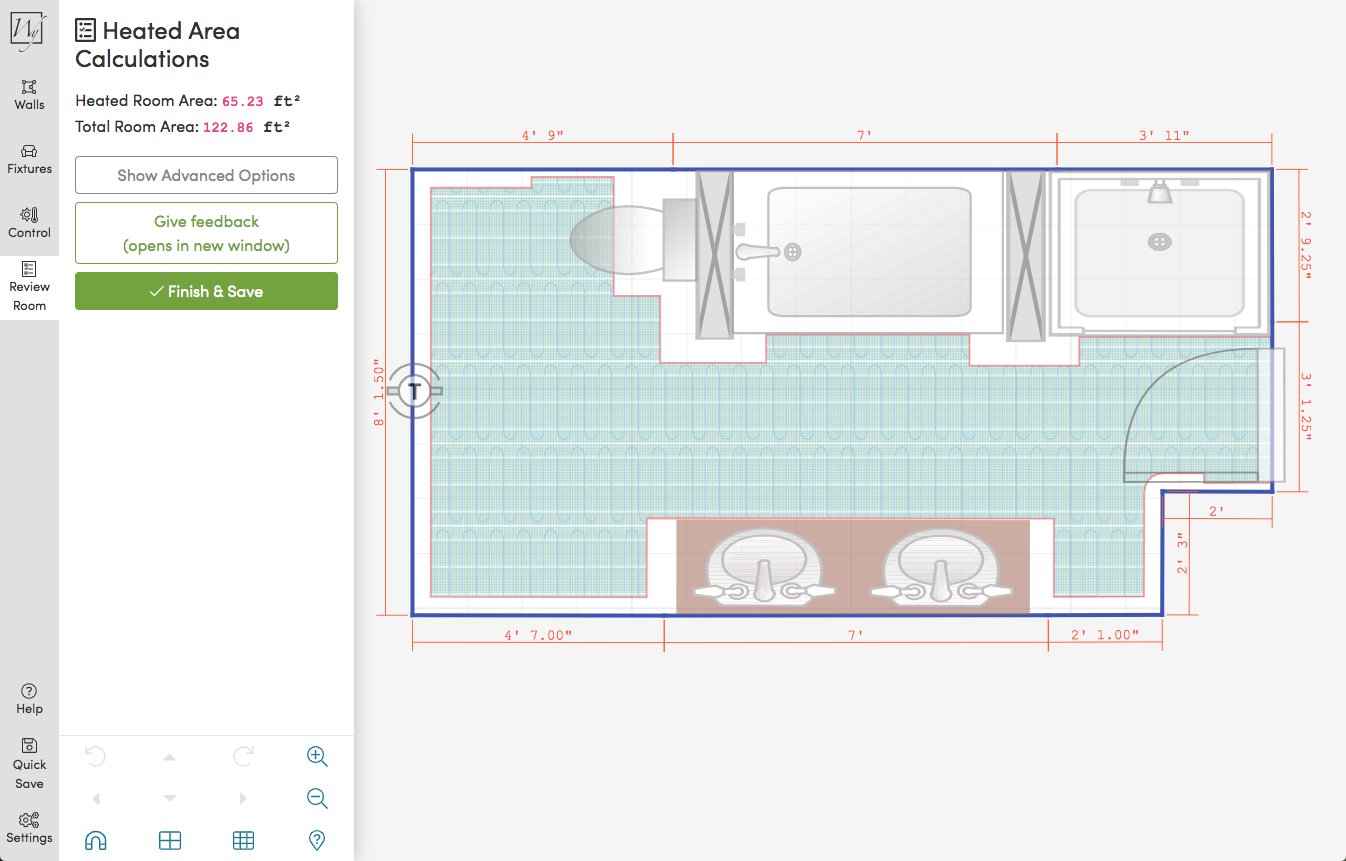
Get Your Instant Quote & Compare Systems
After your design is complete, our Quote Builder instantly generates a side-by-side comparison of compatible heating systems with real pricing. Save your project, explore options, or purchase directly—all in one flow.
Rae Says
"This is the moment everything clicks—you'll see exactly which heating systems fit your room and what each option costs. No surprises, no hidden fees. Take your time comparing and reach out if you have any questions!"
Designed for Homeowners & Pros Alike
No CAD Skills Required
Intuitive drag-and-drop interface anyone can use in minutes—no technical background needed.
Instant Quote
Get a real side-by-side comparison of heating systems with pricing the moment you finish your design.
Save & Revisit
Your project is automatically saved. Come back anytime to adjust your design or continue your purchase.
Most Accurate Coverage
Fixture placements give us precise heated-area data—so your system is sized perfectly, every time.
Rae Says
"The Online Design Tool pairs perfectly with a SmartPlan™ request. Use the tool to get an instant quote and ballpark layout, then send us your room plan and my engineering team will create a professional, print-ready installation plan—usually within 1 business day."

Ready to Design Your Heated Room?
Free to use • Instant quote • No commitment required
Start Designing NowPrefer to upload a sketch instead? Request a free SmartPlan™ and get a professional layout in 1 business day.