

When it comes to installing a floor-heating system, most of the attention goes to laying out the heating cable. Whether you’re using plastic fixing strips to weave the cable back and forth across the room, you’re pushing the cable into an installation membrane, or your system comes pre-assembled on mesh fabric, about 95 percent of the effort goes into installing the cable. The other 5 percent goes into hooking up the thermostat and installing the floor sensor. And though it’s clear what a floor sensor does — provides an accurate reading of the floor temperature to the thermostat so that it can regulate the system — how it works takes a little bit more research.

Your floor-heating system’s installation manual will have all the details on how to correctly install the floor sensor. For instance, it will explain that the floor sensor does not have to reach the middle of the room to get the most accurate floor temperature reading. It only needs to reach about 6 inches into the system, running parallel with (and never overlapping) the heating cable. However, there are a few installation tips that you might not find in your manual that would help to know ahead of time.
Tip #1: Install two floor sensors.
When it comes to in-floor heating, it’s better to be proactive than reactive if you can. That’s why WarmlyYours suggests installing two floor sensors — but only connecting one to the thermostat. That way, if your floor sensor fails, you have a backup already installed that you can simply connect to the back of the thermostat. Backup/replacement floor sensors are available for purchase on www.warmlyyours.com for just $10. Although floor sensors very rarely fail, installing two instead of one will keep you from having to make a repair in the case that you do encounter a failure.
Tip #2: Make use of the underlayment.
The floor sensor is thicker than the heating element. Nevertheless, when installing a floor-heating system under tile or stone, the floor sensor nestles in nicely next to the heating element without adding to the floor elevation because the thinset provides a thick enough cushion between the heating element and the flooring. However, floor-heating systems installed under carpet or laminate do not use thinset. The heating element sits directly against the flooring material. As a result, the floor sensor will be situated higher than the heating cable, causing a bump in your flooring if you don’t fix the issue. The best way to solve this problem is to cut a channel in the underlayment located beneath your floor-heating system. This will allow the floor sensor to get an accurate reading without adding to the floor elevation.
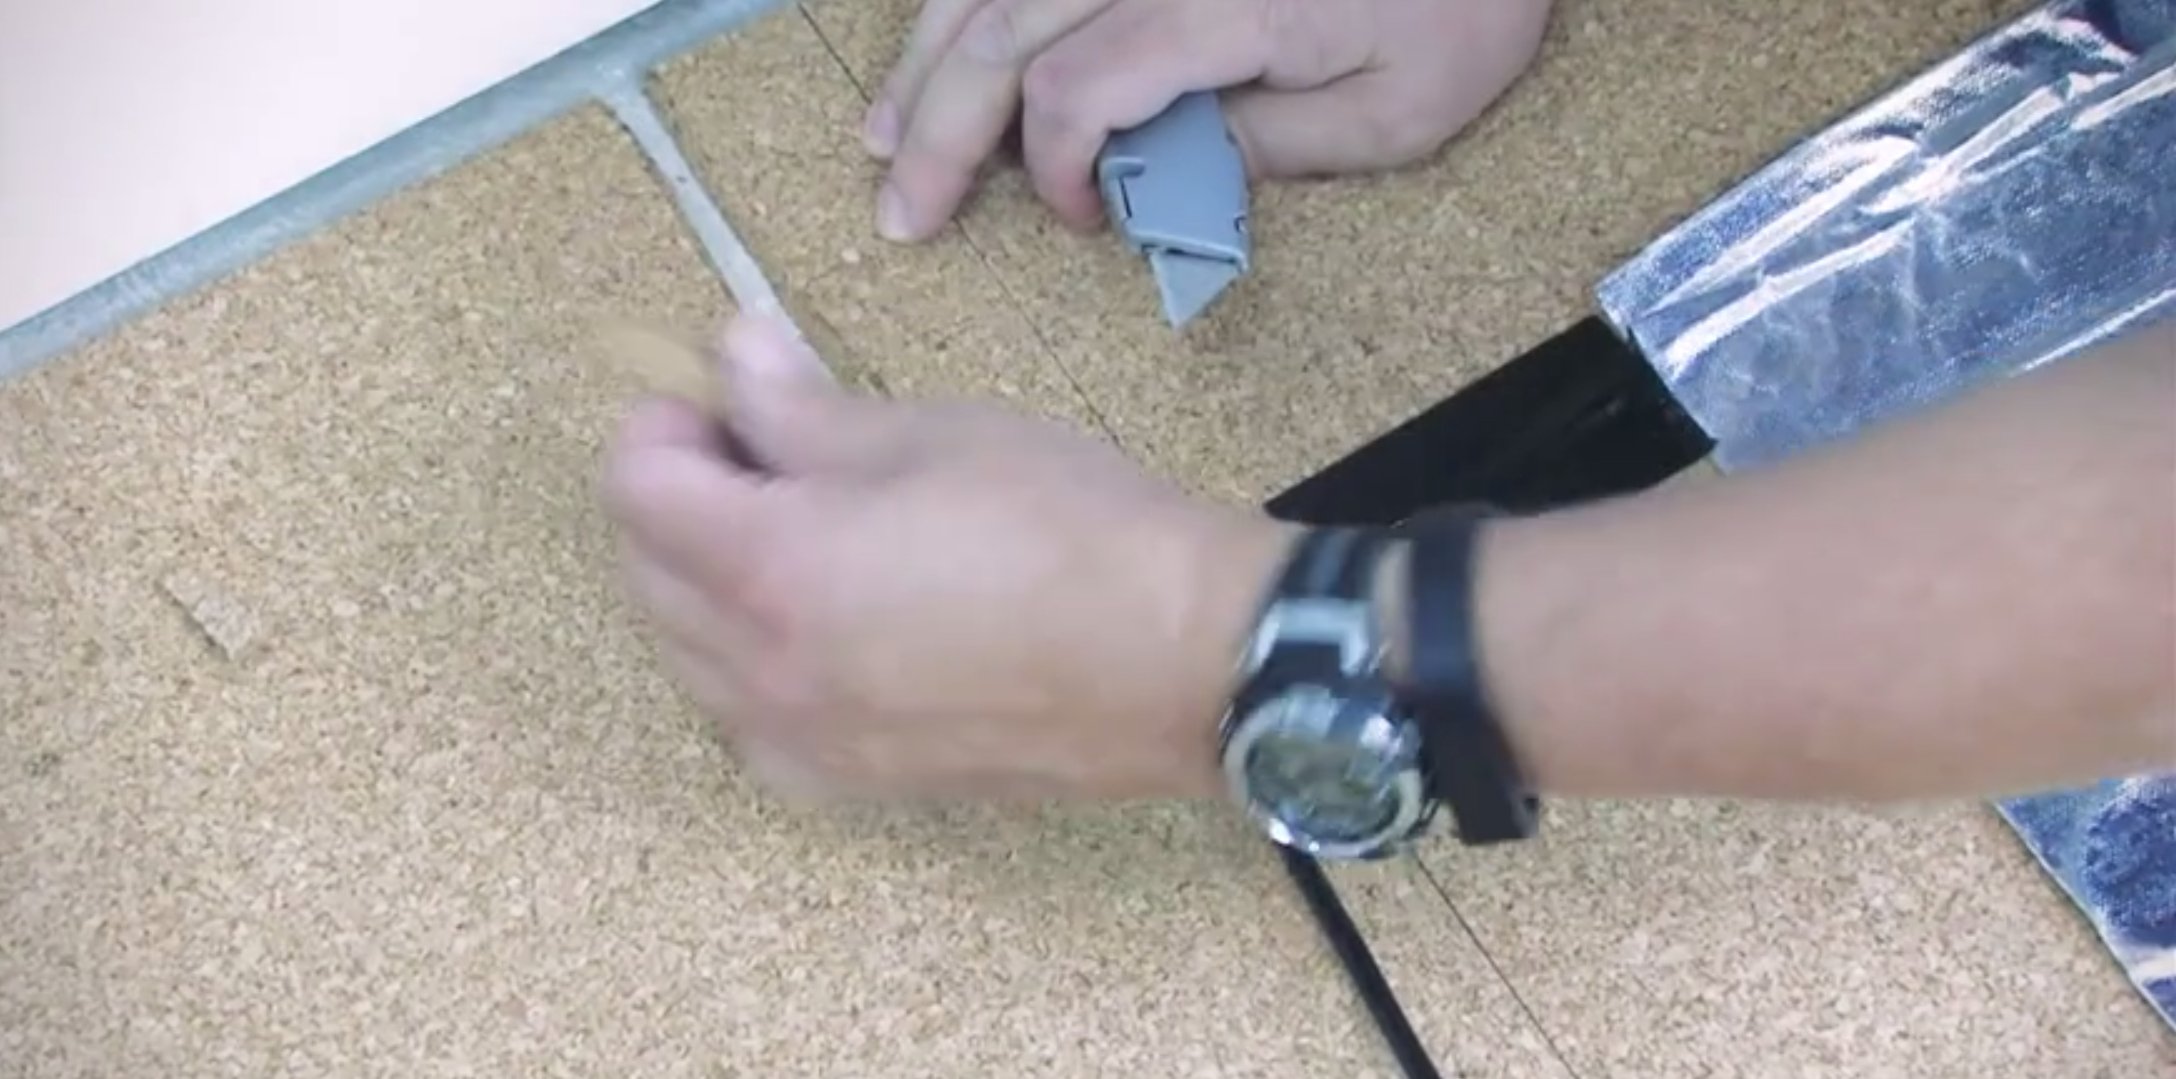
Tip #3: Use the grout joint for repairs.
If you have a floor-heating system installed under a tile or stone floor and the floor sensor fails, your grout joints can help! It’s possible to retrofit a replacement floor sensor into the grout joint and then grout over it. This will prevent you from having to tear up any tile to repair the sensor.
A complimentary floor sensor is included with the purchase of any nSpiration thermostat. In the thermostat settings, users can select their flooring type or even enter a custom temperature range to ensure that the floor temperature does not exceed the manufacturer’s recommended limits.
For more information, please consult your installation manual or call a WarmlyYours expert at 800-875-5285.
Have Questions About Your Project?
Our team of Radiant Experts is ready to help!

Related Articles


Stay Updated
Get the latest radiant heating news and tips delivered to your inbox.