
Why icicles on your roof could mean trouble
last updated august 30, 2026


In This Article
Icicles can accompany an ice dam, but their diameter alone does not show whether a dam is present. Look for a ridge of ice at the roof edge, trapped meltwater, or signs of leakage. Falling ice can be hazardous even without an ice dam.
Heat escaping into the attic can warm a snow-covered roof. Meltwater may then refreeze at colder eaves and obstruct drainage. Air sealing, insulation, and ventilation should be assessed as part of prevention. Correctly designed roof and gutter heat tape can help maintain drainage paths, but it does not correct attic heat loss or guarantee an ice-free roof.
Icicles and ice dams: warning signs
Use these observations as warning signs, not a diagnosis. Assess the roof from a safe location and contact a qualified professional if you suspect an ice dam or leak.
| What you see | Icicles alone | Destructive ice dam |
|---|---|---|
| Icicle size | Size varies; small icicles can still pose a falling-ice hazard | Large icicles may be a warning sign, but size alone does not establish an ice dam |
| Where the ice sits | Hanging from the gutter lip only | A ridge of solid ice built up along the roof edge and inside the gutter |
| Snow on the roof | Even snow cover across the whole roof | Bare or melted patches up high, thick snow and ice at the cold eaves |
| Cause | Sun melting surface snow on a mild day, refreezing at night | Warm air leaking from the living space into the attic, melting snow from underneath |
| Timing | Follows a brief thaw-freeze cycle | Follows heavy snowfall plus several days of sustained freezing temperatures |
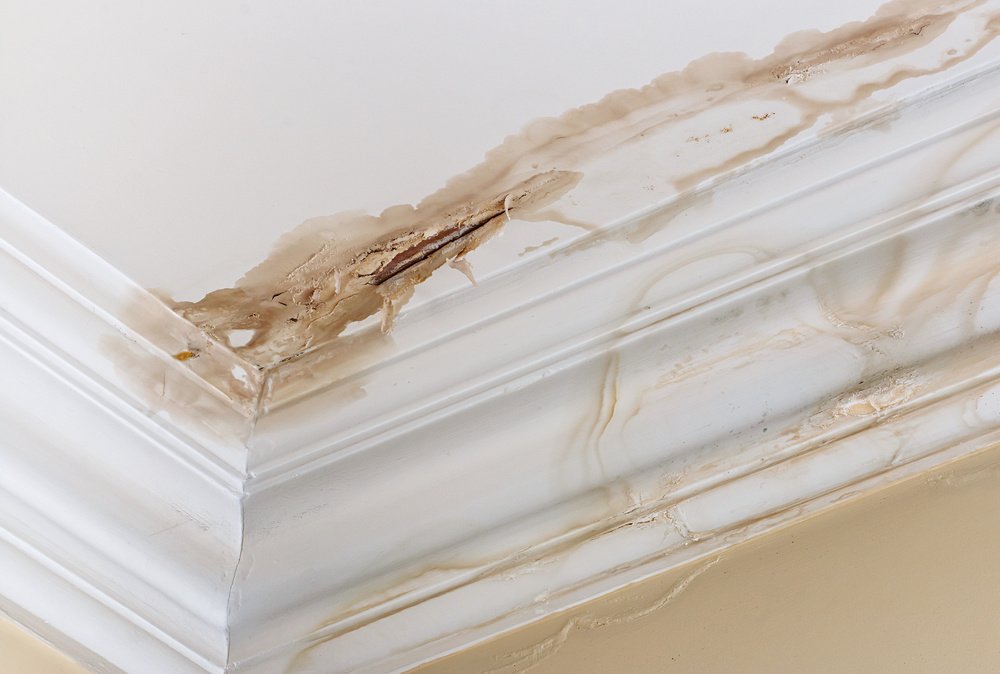
| Inside the home | No interior signs | Water stains or sagging ceilings, peeling paint, damp attic insulation, mold or mildew smell |
| Risk | Falling ice near walkways and entries | Torn-off gutters, loosened shingles, water backing up under the roof and into the house |
Rob Robillard, a general contractor and carpenter who edits AConcordCarpenter.com and writes on home repair for the Boston Globe, points to large icicles as a reason to inspect conditions above the eaves. Size is a warning sign, not a reliable cutoff between safe and dangerous ice.
How ice dams form
“Ice dams form as a result of warm air inside your home leaking into the attic and warming the underside of the roof, causing snow and ice to melt,” Robillard writes. “The melted water will drain along the roof, under the snow, until it reaches the cold overhang. The overhang tends to be at the same temperature (below 32 degrees) as the outdoors, and the melted water will refreeze and form icicles and possibly an ice dam.”
As more melted water reaches the dam, it backs up under the roof shingles and escapes through cracks and openings in the roofing, leaking into your home, he explains. Ice dam problems typically appear after heavy snowfall followed by several days of freezing temperatures.
What an ice dam does to your home
According to an article in This Old House Magazine, dams have the ability to “tear off gutters, loosen shingles, and cause water to back up and pour into your house.” In turn, this results in “peeling paint, warped floors, stained and sagging ceilings, [and] soggy insulation in the attic, which loses R-value and becomes a magnet for mold and mildew.”
What to do if you already have an ice dam
Never chip, hammer or salt an ice dam off your roof
Hammers, chisels, axes and ice picks crack shingles, puncture the roof deck and tear off gutters — the repair often costs more than the leak you were trying to stop. Tossing calcium chloride or rock-salt pucks into the gutter is just as risky: the salt corrodes aluminum gutters, flashing and fasteners, damages the plantings below, and only melts a narrow channel that refreezes within days. Working from a ladder on ice is also how most ice-dam injuries happen.
For an active leak or existing ice dam, contact a qualified roofing professional. Keep people away from falling ice and wet electrical equipment. Professional ice removal may include steam where appropriate; attic air sealing, insulation, and ventilation should also be assessed.
How to reduce ice dam risk
Reduce the conditions that allow ice dams to form by addressing attic heat loss and roof drainage. Roof and gutter heat tape may be part of that plan when specified and installed for the roof.
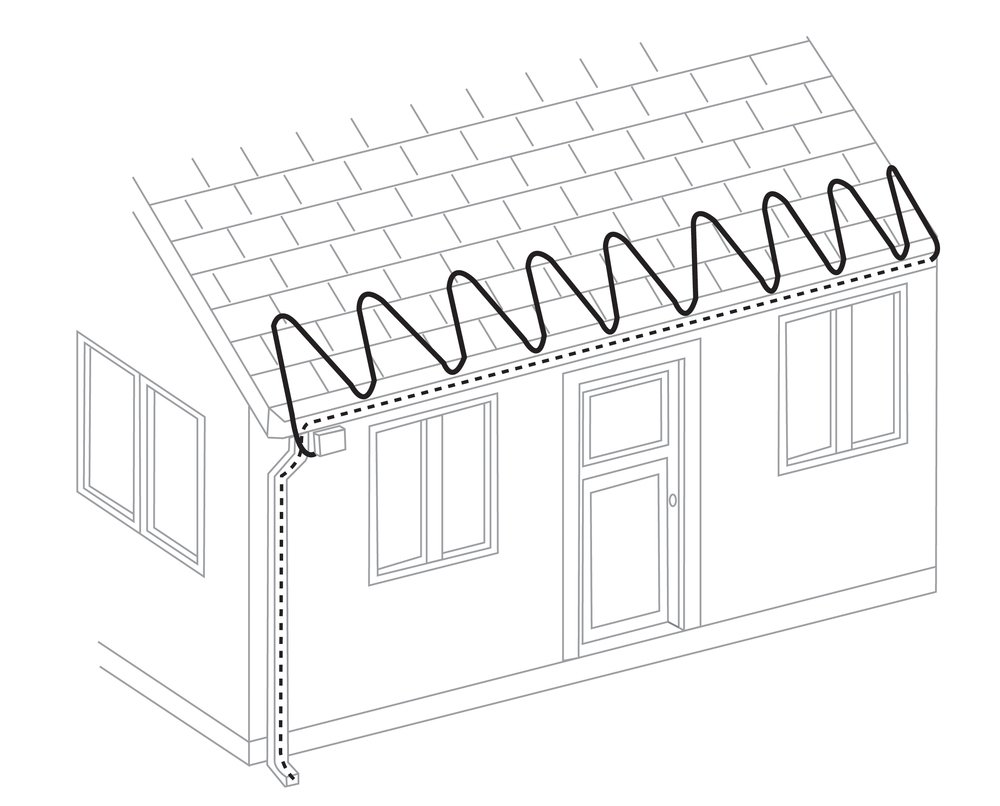
Roof and gutter heat tape is designed to maintain drainage channels, not clear the entire roof of snow and ice. A system may run along eaves, gutters, downspouts, and other drainage locations. Select a cable and attachment method approved for the roof material, and follow the specified layout, controls, circuit limits, and electrical protection.
See a roof and gutter deicing system in action
This walkthrough shows the layout of a pre-assembled roof and gutter heat tape kit. Confirm that the kit is approved for your roof and follow its current installation instructions.
Plan your roof and gutter deicing system
Constant wattage plug-in kits and self-regulating cut-to-length heat tape have different compatibility and installation requirements. Select the cable for the roof material, drainage layout, design conditions, and controls. Cut-to-length cable must stay within specified circuit limits.
Two free resources make it easier to spec the right cable and get a price:
- PRO Pocket Guide: Roof & Gutter — Self-Regulating vs. Constant Wattage Cable — a quick-reference guide for trade professionals, contractors and installers on when to quote self-regulating versus constant wattage heating cable.
- Roof & Gutter Deicing Quotation Form — send us your roof, gutter and downspout measurements and we will put together a custom quote and installation plan.
And while you are preparing the rest of your property for winter, see how outdoor radiant heating makes life easier in winter by keeping driveways, walkways and steps clear of snow and ice.
Explore heat tape for roofs and gutters for product selection and installation planning.
Have Questions About Your Project?
Our team of Radiant Experts is ready to help!
Stay Updated
Get the latest radiant heating news and tips delivered to your inbox.


Comments