
Snow Melting for Asphalt Surfaces
Asphalt is a popular and cost-effective surface for snow melting systems. Heating cables are laid on the base course and paved over—driveways, parking areas, walkways, and more stay clear of snow and ice all winter.
Why Asphalt is Great for Snow Melting
Excellent Heat Absorption
Asphalt's dark colour absorbs and retains heat, helping snow melting systems work efficiently.
High Temperature Rating
Our cables are rated to 450°F, easily withstanding asphalt's 330°F installation temperature—always use electric, never hydronic.
Works for Any Application
Driveways, parking areas, walkways, ramps, loading docks—any asphalt surface can be heated.
Eliminate Slip Hazards
Asphalt becomes dangerously slick when icy. A snow melting system keeps surfaces clear and safe automatically.
No Salt, No Damage
Eliminate chemical deicers that accelerate asphalt deterioration and harm surrounding landscaping.
Affordable to Operate
Systems run only during snow events. A typical residential driveway costs a few dollars per snow event to operate.
10-Year Warranty
All WarmlyYours snow melting cables and mats are backed by a 10-year manufacturer warranty.
Increase Property Value
A heated driveway or parking area is a premium feature that adds lasting value and curb appeal.
How Snow Melting Works in Asphalt
Snow melting cables are laid on the compacted base course (or on a binder layer of asphalt) and then paved over with 2–3 inches of finished asphalt. When snow falls, the system heats the asphalt from within, melting snow and ice on contact.
Because asphalt is installed hot (up to 330°F), only electric heating cables should be used—hydronic tubes will melt. WarmlyYours cables and mats are rated to 450°F, making them the ideal choice.
You can choose full coverage for complete snow elimination, or an economical tire-track layout that keeps just the wheel paths clear. Both options work with manual timers or automatic snow/temperature sensors.
Learn More About Snow MeltingFree SmartPlan
Get a custom installation plan for your asphalt project in just 1 business day.


"I'll design a custom snow melting layout for your project, complete with cable spacing, electrical requirements, and a full quote."


When to Install Snow Melting in Asphalt
Because the snow melting system is embedded within the asphalt itself, the best time to install is when a surface is being created, redone, or expanded.
These projects are typically undertaken from late spring to late fall. Contractors prefer warmer temperatures of 50°F and above as they have more time to work with the asphalt. At 40°F, a contractor has only 25 minutes to work with a 2" thick asphalt installation.
The heating element must be installed approximately 2–3" beneath the finished surface. The thinness of our mats (5/16") means minimal impact on overall surface depth.
Because electric systems are modular, they can easily be expanded in the future if you decide to heat additional sections.
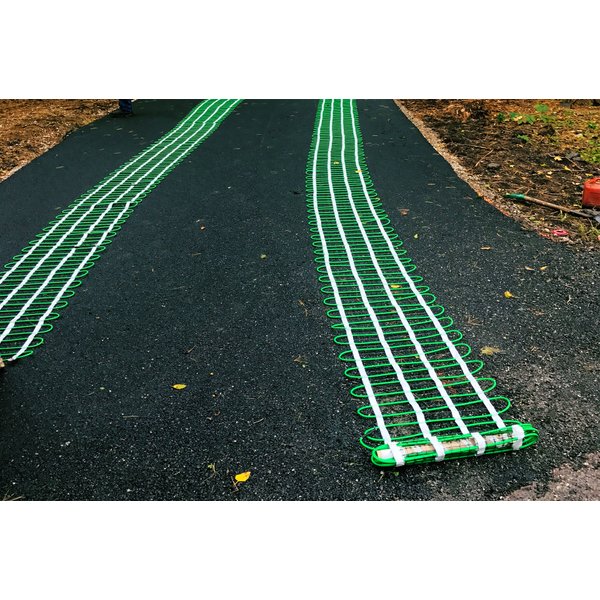
Full Coverage vs. Tire Tracks
You can choose to have your entire asphalt surface covered with snow melting, but one popular alternative is to simply heat tire tracks.
This economical option helps cut down on both installation and operating costs, while still providing great functionality.
Tire track coverage works by installing two sets of heating elements, typically 2 feet wide and the length of the driveway, which will keep the surface passable even in heavy snowfalls.
How to Install Snow Melting in Asphalt
The construction of any quality asphalt surface involves several layers. In a heated installation, one of the layers includes 5/16" thick snow melting mats or cables. Here's what the process looks like:
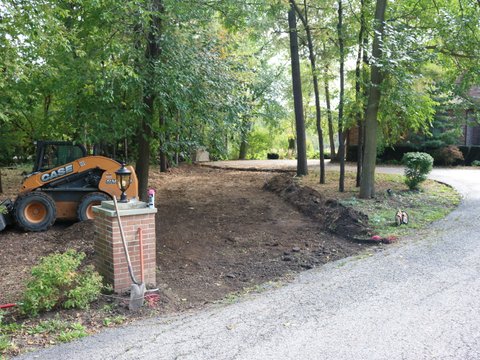


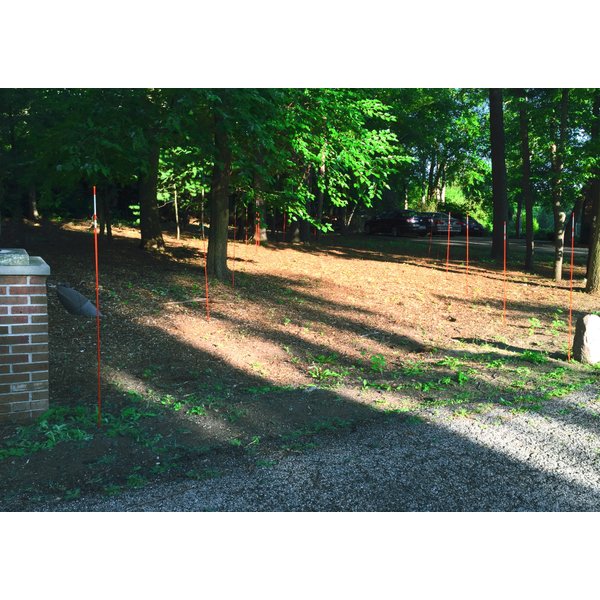
Step 1. Excavate and Compact the Ground
Prior to digging, contact a local utility locating firm to make sure your project won't hit any gas, water, or electrical lines. Excavate and tamp down a solid base of soil.
Tip: A front-loader and steamroller make quick work of this step.
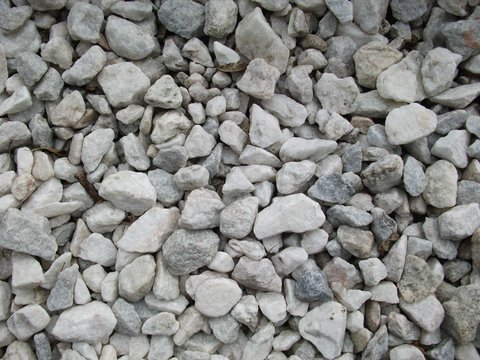
Step 2. Add Compacted Gravel Base
Compacted gravel provides a stable base while allowing effective drainage. For most residential applications, we recommend 4" to 8" of compacted gravel.
The secret to a long-lasting asphalt surface is a good, strong layer of compacted gravel.
Step 3. Base Coat of Asphalt (1.5"–2")
A quality installation has a base coat poured and spread before the final layer. This increases longevity and is required for any asphalt surface with snow melting.
We recommend this layer be between 1.5" and 2" deep.
Step 4. Dry-Fit the Snow Melting System
With the base layer down, lay out your snow melting mats to verify everything fits according to your WarmlyYours SmartPlan.
Test your system with an ohmmeter at every stage to ensure proper function and warranty coverage.
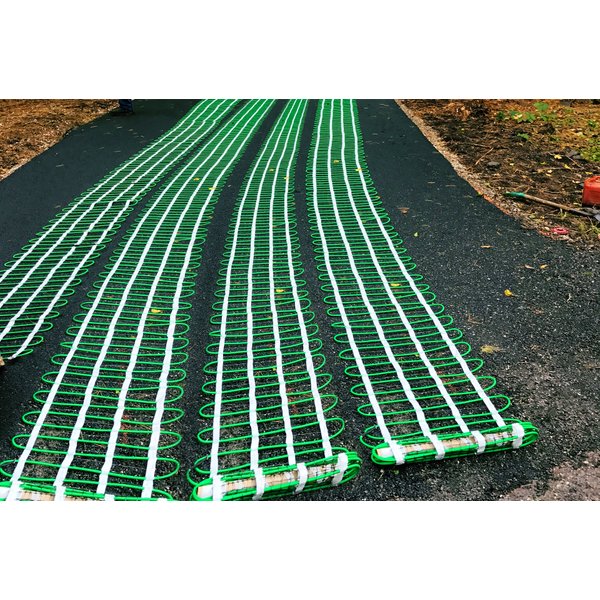
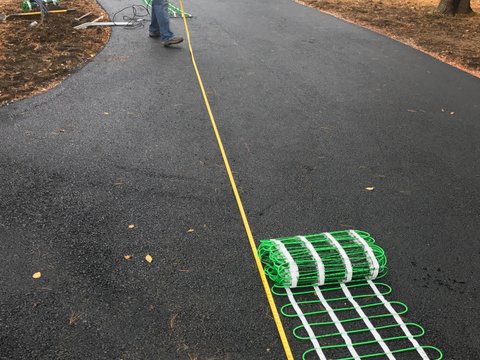
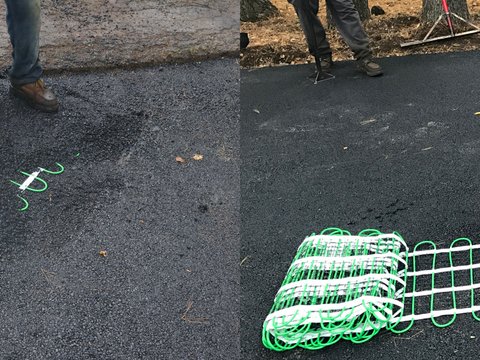
Step 5. Lay Out the Snow Melting Mats
Secure the end with a large scoop of asphalt or a stake into the binder coat. Only unroll a few feet at a time to maintain proper spacing.
Ensure the manufacturer's splice is embedded in asphalt—a common mistake is leaving it exposed.
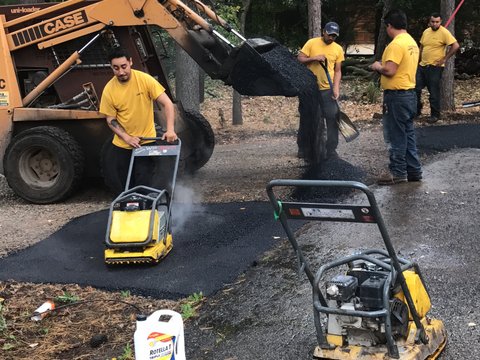
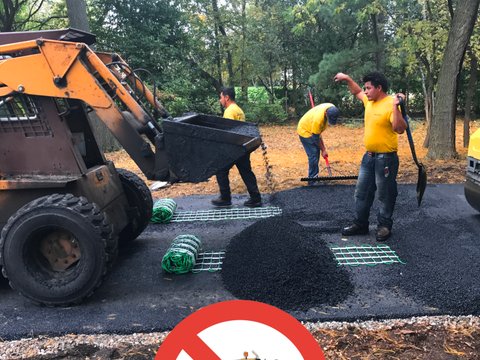
Step 6. Spread Asphalt Over the Mats (2"–3")
All spreading should be done with hand tools. Never use mechanized asphalt pavers as they can damage the heating element.
This "finished asphalt" layer should be between 2" to 3" deep.
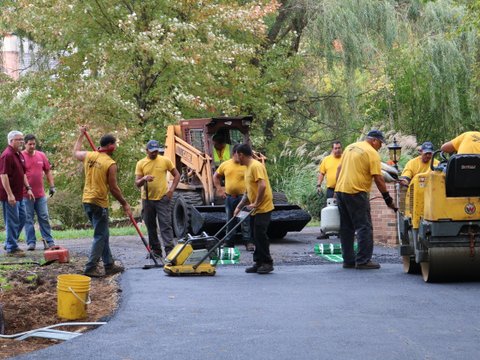
The Finished Surface
Once the heating element is embedded in 2"–3" of finished asphalt, it's safe to use traditional surfacing methods and steamrollers.
Just add snow! Monitor your system during the first few snowfalls to see if any adjustments are needed.
Snow Melting Products for Asphalt
Both mats and cables work great for asphalt installations. Mats offer faster installation while cables provide maximum flexibility for tire-track layouts and custom shapes.

Maximum Heat Density for Heavy Snowfall (3" spacing)
Ideal for heavy snowfall regions (60+ inches annually) or high-traffic commercial areas. The 3-inch cable spacing delivers maximum heat density (~50 watts/sq.ft) for the fastest snow melting performance. Best for: Northern climates, steep driveways, loading docks, emergency exits, and areas requiring rapid clearing.
Features
- Maximum Heat Output: Approximately 50-watts per sq. ft with 3" cable spacing for fastest snow melting
- Best for Heavy Snowfall: Recommended for regions with 60+ inches of annual snowfall or when rapid melting is critical
- Even Heating: Pre-attached heating elements in a serpentine pattern with consistent 3" spacing ensures uniform coverage
- Fast and Easy Installation: Cut-and-turn design makes installation faster than cables while providing maximum heat density
- Installation Support: Free SmartPlan™ installation plans, 24/7 phone support, and a 10-year limited warranty
Optimal Performance & Energy Balance (4" spacing)
The versatile choice for moderate snowfall regions (30-60 inches annually). The 4-inch cable spacing provides an optimal balance of melting performance (~39 watts/sq.ft) and energy efficiency. Best for: Most residential driveways, walkways, and patios in typical winter climates.
Features
- Balanced Heat Output: Approximately 39-watts per sq. ft with 4" cable spacing for optimal performance and efficiency
- Best for Moderate Snowfall: Recommended for regions with 30-60 inches of annual snowfall—our most popular choice
- Even Heating: Pre-attached heating elements in a serpentine pattern with consistent 4" spacing ensures uniform coverage
- Fast and Easy Installation: Cut-and-turn design makes installation faster than cables while balancing cost and performance
- Installation Support: Free SmartPlan™ installation plans, 24/7 phone support, and a 10-year limited warranty

Maximum Flexibility at a Minimal Cost
WarmlyYours Snow Melt Cables offer a high heat output solution to keep your driveway, walkway, or patio snow-free. Embeddable in concrete, asphalt, or under pavers, these cables provide a flexible and cost-effective alternative to mats. Choose from a variety of voltages and lengths to suit your outdoor heating needs, ensuring safe, dry surfaces all winter long. Benefit from our 10-year warranty and 24/7 customer support for peace of mind.
Features
- High Heat Output: This embeddable electric heating cable provides 12-watts of heat per linear foot (nearly 50-watts per sq. ft.)
- Embeddable in Concrete, Asphalt, or in Mortar Under Pavers: Installing a cable-based snow melting system within a new driveway, walkway, or patio means you can enjoy snow/ice free outdoor surfaces all year
- Cost-Effective and Flexible: Snow melting cables are an less expensive (but more time consuming) alternative to snow melting mats and they provide maximum flexibility to cover round driveways, cornered patios, or outdoor stairs
- Wide Variety of Voltages: We offer snow melting cables in 120, 208, 240, and 277 voltages and in a range of different lengths
- Installation Support: WarmlyYours offers free SmartPlan™ installation plans, 24/7 phone support, and a 10-year limited warranty

Controls for Asphalt Snow Melting
WarmlyYours offers controls ranging from simple manual timers to fully automatic systems that detect snowfall and activate on their own.
Important for asphalt installations: Slab sensors (embedded temperature/moisture sensors) are NOT recommended for use with asphalt due to the high installation temperatures. Instead, we recommend aerial sensors that detect precipitation and temperature from above ground.
Multi-zone controllers allow the system to heat in separate zones instead of all at once, useful for projects with limited power availability while cutting energy consumption.
For a full comparison of available controls and sensors, see our comparison chart.
Shop ControlsAsphalt Surfaces You Can Heat
Snow melting systems work in any asphalt surface. Explore the most common applications:


Asphalt vs. Other Surfaces for Snow Melting
All three major surface types work with snow melting systems, but each has different installation requirements:
| Concrete | Asphalt | Pavers & Stone | |
|---|---|---|---|
| Installation Method | Cables embed directly in the pour | Cables laid on base course, asphalt poured over | Cables in sand or mortar bed under pavers |
| Thermal Efficiency | Excellent—concrete retains heat | Good—asphalt absorbs heat quickly | Good—depends on paver thickness |
| Best For | Driveways, walkways, patios, stairs | Driveways, parking areas, walkways | Patios, walkways, driveways |
| Sensor Options | Slab sensors + aerial sensors | Aerial sensors only | Aerial sensors only |
| Surface Finishes | Stamped, stained, polished, brushed, exposed aggregate | Standard asphalt | Brick, stone, cobblestone, interlocking |
| Learn More | Concrete | You're here | Pavers & Stone |
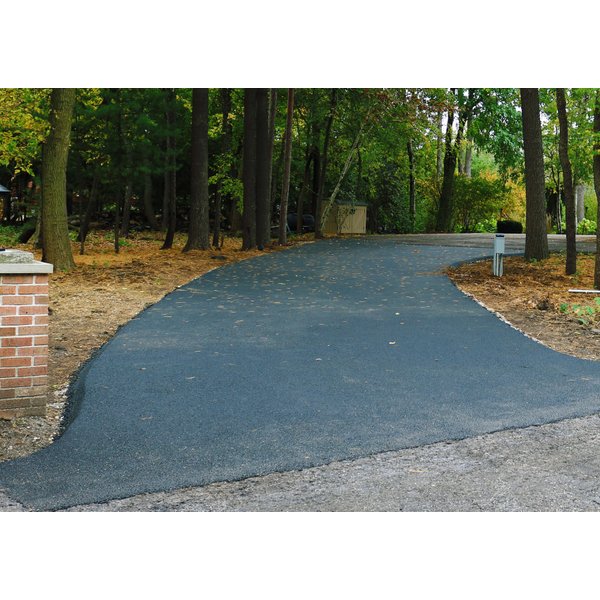
Asphalt Snow Melting Projects
See how homeowners and contractors installed snow melting systems in asphalt driveways, parking areas, and more.
")

")


 (4)")

Documents & Articles
-
 4 min
4 min Victoria
Feb 25, 2026
Victoria
Feb 25, 2026
-
 4 min
Victoria
Feb 25, 2026
4 min
Victoria
Feb 25, 2026
-
 3 min
Victoria
Feb 25, 2026
3 min
Victoria
Feb 25, 2026
-
 3 min
3 min Stephanie
Feb 25, 2026
Stephanie
Feb 25, 2026
-
 5 min
Victoria
Sep 10, 2013
5 min
Victoria
Sep 10, 2013
Consult with a Snow Melting Expert
Have questions about heating your asphalt driveway, parking area, or walkway? Our experts will respond within 1 business day.
Typically respond within 1 business day