
")
In This Article
Tile lippage is a costly and common issue that can undermine your reputation as a pro. When combined with electric radiant floor heating, the risk increases—but with the right techniques and tools, you can guarantee perfectly level tile floors every time.
This guide covers critical subfloor preparation, proper installation of heating systems, and the use of mechanical leveling tools to help you deliver flawless results that impress clients and avoid callbacks.
What Causes Tile Lippage?
Tile lippage occurs when adjoining tiles have uneven heights, leading to an unsightly and potentially hazardous floor. Several factors contribute to this issue:
- Uneven subfloor: Variations in the subfloor’s flatness cause tiles to sit at different levels.
- Inconsistent mortar or self-leveling compound: Insufficient or uneven application can create high or low spots.
- Defective or warped tiles: Tiles that are bowed or irregular in thickness increase the risk of lippage.
- Poor lighting or rushed installation: Improper inspection and haste can cause unnoticed unevenness.
- Radiant floor heating: If the heating element isn’t fully encapsulated in mortar or leveling compound, it can lift tiles unevenly.
Leveling the Subfloor
Step 1 in any tile or radiant heating installation is preparing the subfloor. This means removing any debris so that you have a clean, clear area to work with. For plywood subfloors, secure any loose boards to prevent unevenness. For concrete, use a grinder to smooth out imperfections.
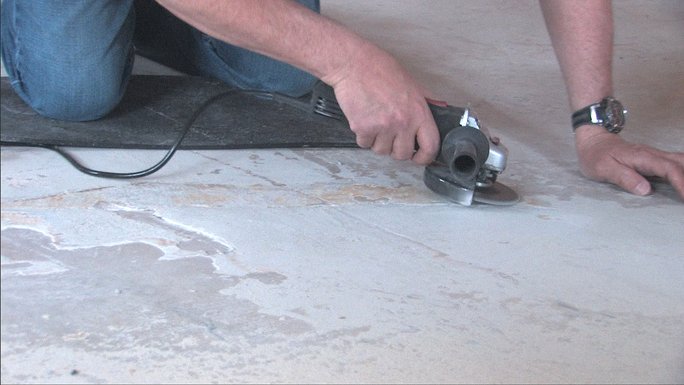
Proper subfloor leveling is critical when installing radiant heating systems to avoid tile lippage and ensure long-lasting results.
Managing Radiant Heating Systems
When radiant floor heating is involved, it’s crucial to securely attach the heating system to the subfloor. Use at least ¾ inch of dry pack mortar or 3/8 inch of self-leveling compound over the system, as recommended by the 2016/2017 NTCA Reference Manual.
This ensures the heating system remains firmly in place without lifting, providing a consistent and level barrier between the tile and heating element. Proper encapsulation is key to preventing tile lippage and ensuring a durable installation.
Controlling Tile Lippage with Mechanical Leveling Systems
Even with a flat subfloor and properly encapsulated radiant heat, large-format tile can still be tricky. Mechanical leveling systems, such as the Spin Doctor tile lippage control system, give you precise control over tile height during installation.
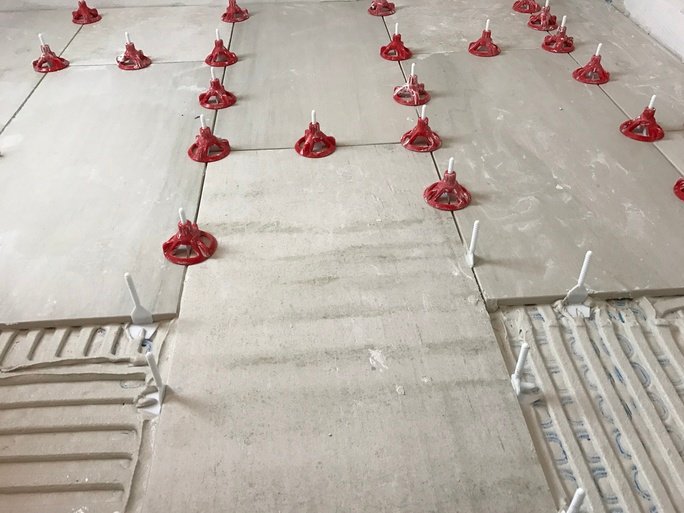
Spin Doctor uses breakaway threaded spacer posts and free-spinning caps. You place the posts at tile edges, then twist the caps down with just two fingers until they’re flush with adjoining tiles. If a tile is sitting high or low, a quick adjustment on the cap brings it into plane.
Once the mortar has cured, the posts and caps are removed with a rubber mallet—or even a firm kick—leaving a flat, professional-looking tile surface. Because the system acts as both a spacer and a lippage control tool, it’s a win-win for installers working over radiant floor heating.
Pro Checklist: Avoiding Lippage with Radiant Floor Heat
Check and level the subfloor thoroughly before installation.
Secure the radiant heating system firmly to prevent lifting.
Use recommended mortar or self-leveling compound depths to fully encapsulate heating elements.
Employ mechanical leveling systems for large-format or tricky tile layouts.
Inspect tile placement under proper lighting before grouting.
Ready to Become Part of the Installer Community?
Are you a trade professional or installer working with radiant floor heating and tile? Join our WarmlyYours PRO program to connect with industry experts, access exclusive resources, and grow your business.
Become a WarmlyYours PROFrequently Asked Questions
What is the best way to level a subfloor before installing radiant floor heating?
Clean the surface thoroughly, fix any loose boards (for plywood), and grind down high spots (for concrete). Use a quality self-leveling compound or dry pack mortar to create a flat, stable base before installing the heating system.
Can I install radiant floor heating over an uneven subfloor?
It’s not recommended. An uneven subfloor can cause heating mats or cables to lift, leading to tile lippage, cold spots, and potential system damage. Proper leveling is crucial for a safe, long-lasting installation.
How thick should the mortar or self-leveling compound be over the heating system?
Follow industry guidelines: typically ¾ inch of dry pack mortar or 3/8 inch of self-leveling compound to fully encapsulate the heating element and provide a level surface for tile installation.
What tools help ensure a level subfloor for radiant heating?
Use a long level or straightedge, laser level, and a quality grinder for concrete. Self-leveling compounds and trowels help fill low spots efficiently and create a smooth, even surface.
How do I prevent tile lippage when installing radiant floor heat?
Ensure the subfloor is flat, fully encapsulate heating mats or cables with mortar or leveling compound, and use mechanical leveling systems during tile installation, especially with large-format tile.
Can self-leveling concrete be used with electric floor heating systems?
Yes, self-leveling concrete is often recommended to create a smooth, level surface over heating elements. Just follow the manufacturer’s instructions for minimum thickness and curing time before tiling.
How long does it take for mortar or leveling compound to cure before tiling?
Cure times vary by product, but most mortars and self-leveling compounds require 24 to 72 hours before tiling. Always follow the specific manufacturer’s guidelines printed on the bag.
What are common mistakes to avoid when preparing the subfloor for radiant heating?
Skipping debris removal, not fixing loose boards, ignoring high or low spots, and failing to fully embed the heating system are common mistakes. Each of these can lead to lippage, cold spots, or premature system failure.
How does subfloor material (concrete vs plywood) affect radiant heating installation?
Concrete subfloors typically need grinding and patching to achieve flatness, while plywood subfloors require secure fastening and may need an underlayment. Both must be properly leveled before installing radiant heating to ensure even heat and a flat tile surface.
Have Questions About Your Project?
Our team of Radiant Experts is ready to help!

Related Articles

Porcelain Tile: The New Gold Standard?

How to Install Floor Heating under Tile

DIY Radiant Floor Heating and Tile Flooring Guide

How to Prevent Tile Cracks When Installing Radiant Floor Heating
Stay Updated
Get the latest radiant heating news and tips delivered to your inbox.
Comments