Heating Beyond Tile: LVT, Engineered Wood & Carpet
Did you know radiant floor heating is no longer reserved just for traditional tile floors?
In this technical session, WarmlyYours experts Mary Godawa and Anatoly share how to bring radiant warmth to virtually any room. You will discover the essential physics of non-tile heating, key temperature thresholds, and how to safely incorporate radiant comfort beneath luxury vinyl tile, engineered hardwood, and carpet.
Watch this detailed presentation to master the following non-negotiable installation techniques:
- 🌡️ Critical floor temperature limits and using thermostat floor protection settings to prevent floor damage
- 💡 Rigid embedment requirements using TempZone Mat and self-leveling cement for click-lock LVT and laminate
- 🏠 Floating assemblies utilizing Environ foil mats paired with ThermalSheet underlayment for engineered wood and carpet
- ⚡ Step-by-step electrical testing procedures using digital multimeters and continuous Circuit Check monitors
- ✅ Preserving flooring manufacturer warranties through humidity control, proper R-values, and backup sensor installation
By learning these proven installation strategies, you can expand home comfort into basements, bedrooms, and living spaces while protecting your flooring investment for years to come.
Chapters
- 0:00Introduction and Webinar Overview
- 2:09Non-Negotiable Rules for Non-Tile Floors
- 4:07Luxury Vinyl Plank Installation Methods
- 8:15Laminate Flooring Installation Options
- 11:35Engineered and Nail-Down Wood Floors
- 15:14Floor Sensors and Humidity Considerations
- 17:05Heating Under Carpet and Layout Planning
- 24:22Thermostats, Sensors, and GFCI Setup
- 27:16Electrician and Installer Responsibilities
- 29:10Electrical Testing and Multimeter Checks
- 32:32Viewer Questions and Answers
- 41:57WarmlyYours Support and Closing Remarks
Hello and good afternoon, everyone. My name is Mary Godawa, and I'm your sales manager at WarmlyYours. Today with me, I have Anatoly, our tech support manager. Good afternoon, guys. Welcome.
What are we going to learn today? Today we've got a great bunch of topics. First, we're going to talk about the non-negotiable physics. Anatoly, what are those? Those are temperature thresholds, right?
We don't want to exceed certain temperatures for certain flooring. R-value limits—we don't want to trap the heat or put excessive layers on top of the heating systems. We'll talk about different types of LVT, resilient flooring, engineered wood, floating floors. What else?
Well, they all kind of sound the same. They often get the generic label of laminate, but they are all a little bit different. We'll go into engineered and floating-style floors, as well as a nail-down assembly. We'll cover the standard for laminate and our floating floor style where you do not have to embed, versus when you do have to embed the heating system under leveling cement. We're even going to get into carpet.
Yeah, a lot of people forget you can heat carpet. Carpet heating is another great application we're going to teach you about. Lastly, we're going to talk about warranty defense, making sure that the system stays under your manufacturer's warranties, along with all the steps and protocols you need to take along the way.
Exactly. What I think people forget all the time, Anatoly, is that flooring nowadays is not just tile for floor heating. We do all types of flooring. If you walk on it, we'll heat it. I think people are missing the big picture by not offering floor heating with other types of flooring.
I'm going to say that's about 85%, would you say? I would say yes. Every day there's new flooring and new finishes that people want to match. Historically, there's this myth that you cannot heat carpet or laminate because everybody is so used to thinking, "Tile is cold, so I'm going to heat tile." People totally forget about the other opportunities.
So we're going to tell you all about these other opportunities and what you need to know about the 4 non-negotiable rules for heating non-tile floors. Our first rule is always the floor temperature limit. Our floor temperature limit on non-tile floors is typically around 85 degrees. That is subject to change for select brands—sometimes it's around 81 or 82—but generally that 85-degree range is pretty common for most non-tile flooring.
Always check your flooring manufacturer's requirements. This leads right into the next topic: temperature setbacks. You never want to shock that floor in any way. Each flooring manufacturer will give you different requirements, whether it's the floor limit or temperature setbacks.
You really want to follow your specific brand and model of flooring. When it comes to setbacks, you don't want to set that floor to 90 degrees for multiple days during the daytime, and then suddenly leave for the weekend, turn it off completely so the floor drops to 45 degrees, and then come back and crank it to 90 again. Those types of floors probably would not like that, so follow your manufacturer guidelines and set it accordingly.
We're also going to talk a little bit about R-value. You might hear about R-value for insulation in your walls or ceilings, but R-value in flooring helps us understand how the heat will transfer—whether it comes up through your flooring versus being sucked down into your subfloors. We'll also talk about eliminating trapped heat, meaning no big heavy area rugs, no solid-bottom fish tanks, or large bookcases that will trap the heat.
We'll get into that a little more later. Just make sure that floor is open so it generates heat up into the room, and you're going to be set.
Absolutely. Here's our first one: luxury vinyl. Rigid support is mandatory. In the old days, people sometimes thought of vinyl as sheet vinyl that was very bendy and pliable, coming in a big roll.
That's not what we're talking about. We're talking more about LVP tile or plank flooring. People often ask, "Can I just roll out your heat mat—the green mesh mat—and click and lock my floor in place right over the top of it?" That seems so easy, but unfortunately, that is not the right way to do it.
That is an absolute no-no. Tell us more about the physical failure of that. You're dealing with a floor where the core material is vinyl. It becomes flexible at a certain point, whether from temperature, prolonged traffic, or just five years down the road, and it starts to absorb any uneven points on the floor.
That's really the key to think about. If you go through the installation guidelines and requirements for any vinyl product, you will find that the manufacturer wants the floor to be absolutely flat and level. Only then can the flooring be properly installed. Therefore, you cannot install it directly over an Environ system that has wires in it. Over time, those wires will create bumps, and some planks may not click together properly because the surface is not flat.
Your simple solution is to use the TempZone Mat. The TempZone Mat can be covered with self-leveling cement. After you cover it, you have a perfectly flat surface to work with.
Here is a good example of a cross-section showing a luxury vinyl click-and-lock floor system embedded over a half-inch layer of self-leveling cement. What's great about this is that once you encapsulate the whole system and it's dry, you can begin to walk on it and install your flooring. However, you're going to wait a little while before you turn the heat on. You want to install it layer by layer correctly and ensure you follow the guidelines from the flooring manufacturer. The vinyl company might ask you to cover the heating system with 1.5 inches or 5/8 inch of self-leveling cement, or they may phrase it as creating a 5/8-inch separation.
That is your guideline for how much self-leveling cement to use over the product. At the end of the day, you want to follow both sets of guidelines—and we'll probably repeat this many times today. You want to follow the WarmlyYours floor heating manual for your product, where we recommend a minimum coverage of 3/8 of an inch, but at the same time, you must follow the guidelines from your flooring manufacturer.
The best of both worlds gives you the most correct installation. When we're talking about pouring self-leveling cement, we also want to talk about the flatness factor. As we mentioned, getting the boards to click and lock in place is important. If your floor is uneven to start with, you'll want to make sure it's level before you even begin.
What's also important to bring up is that in this busy day and age, installers may call in and simply say, "Hey, I'm installing a floating floor." We need more information so we can suggest and design the right product for you, because the word "floating" doesn't specify what application or product should be used. We are actually going to dive into those different options in just a couple of slides.
What we're showing here is a cross-section for laminate flooring: Option A, direct floating. We'll get into another option later. Option A is what we call an "Environ sandwich," where you have a layer of click-and-lock floating laminate floor over the Environ Mat. Under that Environ Mat, you see a layer of ThermalSheet. We use that quarter-inch underlayment to provide a cushion underneath the heating mat so the wires aren't crimped or stepped on.
Plus, it gives you a place to route your lead wires and sensor. Another good point here is that laminate flooring may have a specific temperature limitation. If it's 85 degrees, or 86, you can easily set that up on your thermostat in seconds because all of our thermostats have that floor protection setting.
It can be a preset for laminate with a standard limit or a custom setting that you enter. A great feature on specific models like our nSpire Touch units is laminate floor protection. If you select that setting, it sets the limits properly and prevents the temperature from rising faster than 10 degrees per hour. If your flooring requires that, we have it covered in the thermostat. Here is Option B.
This is also for laminate flooring, but this is the embedded style. You're going to find this is very common with these floating types of flooring. Most manufacturers consider this the tried-and-true method. When you pour that nice layer of self-leveling cement, your whole system is encapsulated.
There are a few tips to keep in mind when pouring self-leveling cement. Don't forget to use a primer. Make sure the flooring installers know they cannot walk around in spiked shoes, because they don't want to damage the heating wires. When working with self-leveling cement, installers often use squeegees or rakes. Everyone needs to be mindful that there is a heating system with cables sitting exposed.
You don't want someone to install the mat, pour the self-leveling underlayment, and then have a third person come in to finish it and damage the product. Everybody on the job site needs to be aware of what is being installed. To add to what you were saying, Mary, an added benefit of a fully embedded system is flexibility. If you install laminate flooring and decide three years later that the tone is too dark and you want a lighter laminate, your heating system is safely embedded. You can pull up the old laminate and install a new one.
You could put carpet over it, or virtually any new flooring you want. That's the added benefit of embedded systems. Now we're getting into wood floors.
When it comes to wood floors, there's a science to the species, cuts, and widths. Your flooring manufacturers will be able to guide you, but we can talk about stability. When picking a wood floor to go over radiant heat, choose the most stable woods possible: white oak, American cherry, walnut, or mesquite—hardwoods with low shrinkage. Unstable woods are lighter, softer woods like maple and birch, which are more susceptible to heat and humidity. When it comes to plank width, if you use solid wood, try to stick to a maximum width of about 3 inches; for engineered wood, stick to around 5 inches.
That will give you a proper installation. Engineered wood floors are also usually floating, though they can sometimes be glued down. If it's floating, you can install it over the Environ floor system. This is a dry assembly. Once again, looking at this cross-section, we have either a wood or concrete subfloor, ThermalSheet, the Environ Mat, and then your flooring over the top.
Kind of just click and lock right over the Environ system once again. Yep. I think one thing I like that you pointed out about glue, the very important distinction for the Environ system that we are discussing right now, would be that once again, we're talking of course about floating application. But nothing should ever be glued to the Environ product, right? So it's a fully floating setup.
You're not gluing, you're not nailing down anything. It's a fully floating setup from the very bottom to the very top. Very nice. And this is again sort of a similar cross-section where we're talking about that quarter-inch— I'm sorry, half-inch layer of self-leveling cement there. So we're kind of just showing your subfloor, your Primer, your very thin TempZone Mat, and then your layer of self-leveling.
You do want to make sure that you are watching out for any little nails or vents in your floor. If you have any registers, you want to make sure you're putting a dam up so when you pour that leveling cement, it doesn't run all over the place. Yeah, essentially anybody who's working with self-leveling cement would be prepping for that. But yeah, you want to set a border. You want to set the parameters so when you pour self-leveling cement, it's not running away from you.
Right. And for nail-down, that's going to be even more important, right? Because if you have a nail-down floor, the way that you would have to do it— obviously you can't nail into the electric heating element, or that'd be pretty bad. But you would lay out sleepers or furring strips every, say, 8 to 12 inches on center. The heating mat or cable would go in between.
And then you would still level it off with some self-leveling cement. Yeah, very simple installation. You pretty much work in sections, like nice little channels or bays between the sleepers. I think the funny fact here is I feel like carpet heating and nail-down wood flooring heating are the top two applications that people would think of the least. Right.
Because it's like, a nail-down application, how are you going to install floor heating and nail? Yes, it is possible. You just need to follow the right guidelines. Same with carpet; there's a specific product just for that. Absolutely.
All right, and here's a nice little picture of our floor temperature sensor. So this is very important when you're doing any type of flooring that is not tile. Relative humidity is what we're going to talk about here. When you're thinking about, let's say, an engineered or even a hardwood floor, this time of year in the winter when it's January outside and it's really dry, you may have to think about monitoring that humidity in your room by getting a little humidity gauge. You may need to run a humidifier if it's really, really dry in those certain months. We don't want you to have any gapping in your floor or anything like that.
And opposite in the summertime, we don't want that relative humidity to be too high in your room. Exactly, exactly. You really just need to— again, we're always going to go back to those specific guidelines that come from your flooring brand or your flooring model, right? They will have specific limitations, or sometimes it might be written in the warranty disclaimer, right? There are specific temperature limits, and there are specific humidity limits.
They are there for a reason. I mean, it's a natural material, it's a natural wood floor, so you need to maintain those to your best ability to prolong that flooring. And then you can see where we're cutting away a little channel to recess that probe tip in there just a little bit. That's always why you need an underlayment as well—to give it a little channel for that tip of the sensor.
As said, essentially you're getting two sensors, so pick one spot for one sensor, and a slightly different area or different spot for your backup sensor. I feel like we'll cover that a few times today, but between both, only one sensor gets connected. The second wire just gets coiled up and secured in the box for any potential future use. Good advice, good advice. Oh, look at that, there we go.
Here we are showing you some heating under carpet. So when you heat under carpet, there are a few things you should definitely keep in mind. Number one is your code. Yeah, this is for the folks in the USA. Unfortunately, for our Canadian friends, you cannot heat under carpet.
So sorry for you. But we can do this under carpet here, and what you're seeing here on this little video is somebody doing a carpet seam and being very careful not to damage the heating mats. You can see he's pulling along something to help guide him so he can make that seam. We're also going to say, you know, carpet always has a carpet padding, right? Yeah, yeah.
So you can see it in blue right there. Definitely you want to make sure that you're picking a good pad, something that's going to have a higher R-value, especially if you're over concrete, like if you're in your basement or something. You want to pick something with a 6 to 8-pound-per-cubic-foot density, so like a nice, good rubberized polyurethane pad with a high R-value. And then you want a low R-value for your actual flooring over the top to let that heat come up through. Yeah, just to make it simple, think of R-value as the insulation value, right? So you want to insulate below because you don't need the heat to go down.
You want to minimize that insulation or minimize that R-value above. The heat will be transferred in a very easy, streamlined direction into your flooring. Also, we want to make sure that you are keeping away from the edges of the room a little bit. So it's kind of important to know that you have tack strips whenever you're doing a stretched-in type of carpeting, and those carpet installers use those knee kicker tools. You want to make sure that they don't accidentally grab onto your heating mat and damage it, because that would be terrible.
So be sure that you're staying away from the walls a little bit. And then we get this question once in a while for glue-down carpet tiles. Glue-down flooring, whether it be carpet tiles or glue-down engineered wood, we're going to go back to that same wet installation method using embedment with the self-leveling cement. Exactly. Like I mentioned earlier, you cannot glue to Environ.
So even though you may think, "Oh, it's carpet," because it needs to be glued, you cannot do that over an Environ system. But of course, again, we have a way to do that with a TempZone product that's going to get embedded. Thank you. So here we are showing you the layers again. There's the underlayment with the rebound pad there.
We have the Environ floating foil mat system over the top, and then your carpet. So it's just an easy carpet sandwich right there. That's what we like to call it. It's pretty easy; it's pretty straightforward.
This has no adhesives, no self-leveling. It's a great way to add some extra comfort to those basement rooms, the game rooms where the kids like to lie on the floor and play video games or whatever. This is just a really good product that people forget to offer on their upsells when they're offering not just flooring solutions, but home comfort solutions. Yeah, for me personally, it just makes those colder rooms with carpets suddenly usable, warm, and comfortable.
And again, that just connects to this whole myth that you cannot heat carpet, and these rooms just notoriously stay cold until you or your contractor find out that WarmlyYours has a product for it. Just install it, and now that basement becomes a warm, comfortable basement—it kind of becomes the main room. Yeah, more entertaining in that room for sure. All right, so when we're talking about wall-to-wall carpet, as I just said, we do need to stay off the walls a bit.
Some things to keep in mind: here you see on this image of the SmartPlan, we have a room that is 12 feet by 9 feet. So we came in off the edges approximately a foot all around. Most people are going to have a sofa or some TV or entertainment stuff around the edges of the room. But you want to make sure to tell us the real dimensions of the room, not just the heated space dimensions, because obviously we could get that wrong if we had that mixed up. We don't want to go too big or too small.
So let us know when you're giving us dimensions which is the heated space versus the overall room space. Yeah, we need to know what we are receiving, right? I mean, sometimes a 12 by 9 is just a 12 by 9, but it can be treated differently, just like Mary said, right? Is it the overall room dimensions? Is it the heated area dimensions?
Is it the room dimensions before the drywall, which would be even worse, right? Those details are important. But just like you've seen in the video, that carpet stretching may be taking place on just two sides of the room, or on any side of the room. If you have specific directions or you know that information, let us know. That way we can maybe give more space there and reduce the space in another area that actually needs to be heated.
Something else I'll point out on this slide too while we're here: the heating mats are stock sizes, so these are not custom-made pieces. We do our best to try to fit your room with the best size piece for your space without it being too big or too small. I would also state that this is the cut-and-turn style. Don't look at this and think you're getting six different mats here. Good point.
Good point. Yeah, I want to make sure people understand that this heating roll here on this drawing looks to be 1.5 feet wide by 40 linear feet. If you added up all of those runs, what you're doing there is unrolling it 6'8" on the first run. You'll cut the foil in between, never cutting that heating element, and just flip it back and go the other direction: 6'10", 6'10", and then 6'6", 6'6", 6'6", all the way to 6'8" until you're done. Some people ask us, "Why are they different intervals, Anatoly?"
Yeah, that's a very popular question. I actually had that two weeks ago. The main reason for that is because you can only flip one direction or the other at a certain footage, right? So you cannot just suddenly cut the mat exactly where the wire goes and make it 6'9" or 6'11". That's why you're seeing each run slightly different until it gets to a point where we only have three runs to go, and we can do 6'6" two times and a 6'8", and you're going to finish the mat right there.
And this is why we say even for a simple rectangular room, you should still send us a floor plan, because figuring that out on your own sometimes is a little more difficult than what it looks like on paper. Yeah, guess what's going to happen if you start with 6'6" and do all of these runs at 6'6"? You're going to end up with about 10 inches or so of extra matting that may not fit. The same thing if you go 6'10" for all the runs: your last run is probably going to be a bit too short.
And also, even if you bought for the room without the floor plan and you tried to figure it out on your own, you might think, "Well, maybe I can go closer than just a foot away. If I went four inches away, that's enough room for the tack strip sometimes." But then you're really going to be short of material in that room, right? Right.
So always double-check. Leave the planning to us. We've done this for many years, and we know how to make it simple for you, even for a rectangle.
All right, moving on to controls, the sensors, and the GFCIs. The thermostats we're showing here are the nSpire Touch, the nSpire Touch WiFi, and we have the nJoy as well. These are all thermostats that will monitor the ambient air temperature as well as maintain a floor protection limit. We mentioned the backup sensors. Very important, very important.
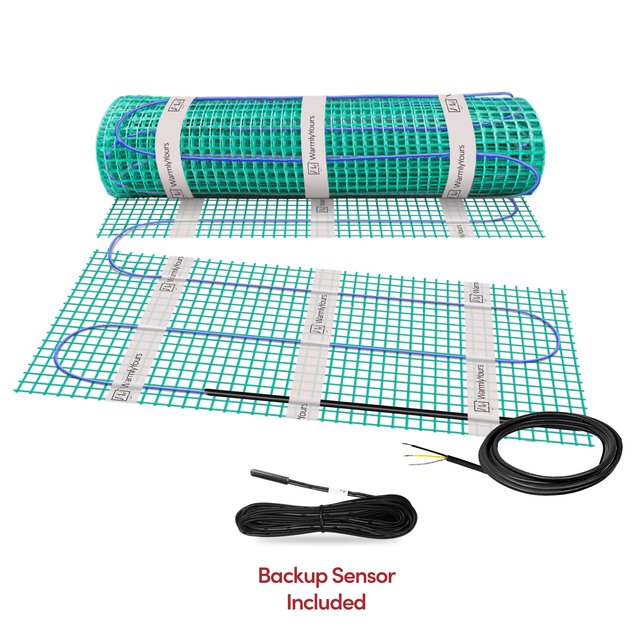
A backup sensor is just a little peace of mind. It gives you that Murphy's Law protection: if you have it, you'll never need it. We now include one extra complimentary sensor with every heating mat or cable you get. Your other sensor is located inside the actual thermostat box from the thermostat manufacturer. You're going to put both thermostat sensors in the installation at the time you're installing the flooring, and only connect one at a time.
If you ever need it, it's very simple. Just pull the face of the thermostat off, undo the wires in the back, and you're back in business. A one-minute fix, instead of redoing the whole flooring or a section of the flooring.
Another important topic or consideration here is that any thermostat can operate in two different modes. You can see and control your air temperature, and you can see and control your floor temperature that comes directly from the sensor. So let's just say it's a basic, regular installation and all you really care about is running and controlling the floor temperature. You know your floor is comfortable for you at 80 degrees, so you just set it at 80 and it runs. That's great, that's your simple approach.
There are applications where you're using the floor heating as a primary heating source. Primary heating source means you really want to control your room temperature—how your room feels. So you would switch the setting to control the room temperature. But the great thing about the thermostats we offer is that when you're setting the room temperature, your thermostat in the background still enforces that floor protection limit. So again, very important, connecting back to all these floorings we were talking about.
Let's say you come back from an extended weekend away. Your room is cold—it's 60 degrees—and you raise the room temperature to 72. Theoretically, that would mean the floor needs to run on maximum power and maximum temperature to warm it up and bring it up. It will do that, but it will still enforce the floor protection limit. That's very critical. That's just an extra peace of mind knowing that your floor is protected with those limits.
Yeah. And we'll mention the GFCI on these, too. All of our thermostats come with a built-in GFCI, so we want to make sure that you inform the electricians that you do not need a breaker with a GFCI, because the two could have interference and nuisance trip each other. Just use a standard circuit breaker in the panel, and your thermostat will be protected all by itself. Yep, very simple.
Okay, here we go. This is the protocol for when you are talking to your electrician versus your flooring professional, what happens, and who does what. It's really the electrician who is going to need to do the rough-in for you with the double-deep gang box, single mud ring, and the two conduits. You're going to make sure that you have a home run from your panel where the circuit breaker box is back to your thermostat location in your room.
Yep. Your flooring person is going to do the floor prep, whether that means ripping out the old stuff, putting in the new stuff, and making sure it's clean and ready before it can receive the floor heating. Maybe leveling the floor as well, which is another very important piece. I feel like we're either going to talk about that in a couple of slides or we maybe covered that before, but especially for those embedded installations, you always want to level the floor before you install the heating.
You never want to let your flooring pro install a heating mat and skip a step because they need to pour self-leveling cement. They might say, "Oh, I'm going to pour self-leveling cement after the heating mat. I'm going to level my floor." It sounds theoretically right, but if it's an unlevel floor, you now have 3/8 of an inch of self-leveling in one corner, but an inch and a half in another corner.
Guess what's going to be cold? Yeah, uneven levels, uneven heating. One section feels cold, another section is running normal. You don't want to do that. Level it first.
Level it first, because there's no going back to fix that later. The last thing you want to make sure of, too, is the electrical check, and this is super, super important. This is what helps us know that the system was verified and has been checked, that it has the right breaker size, and the right voltage. We didn't take 240 volts to a 120 system. We don't want to do that.
Right? We want to make sure that everything is operationally correct according to the SmartPlans. And to do that, you're going to take your multimeter. Yeah, grab a multimeter.
It needs to be a digital meter. Test it. I always like to say test it before and after every major step of your installation, whatever that is. Pulling the box out of the UPS truck, if it was damaged during delivery, you need to test it. You need to know you are starting your installation with the right product that is not damaged.
Test it before you start installing it. Test it before that self-leveling goes in. Test it before the flooring goes in. Whatever work was done in the location—maybe the HVAC guy came in and started cutting floor vents, right?
I mean, there's just so many different possibilities. You want to make sure it's tested. In between, the Circuit Check is connected, so it's going to buzz anytime it is damaged. Right. So is it just one test, Anatoly?
You have different products. First of all, the sensor needs to get tested on the 20K scale. Your heating mat needs to be tested. If you have a larger basement system that has four different mats, you need to test each mat individually. You never wire them together or just test it by connecting to the thermostat, which is another big thing I feel like we want to talk a little bit about.
Every time we say, especially in tech support, "Test your system," a lot of installers or homeowners may assume that testing just means, "Hey, I'm going to connect it to the thermostat, turn it on, and raise the temperature." Yes, that qualifies as a final test of the product, but you cannot do that when it's partially installed. For our reference here, we're talking about digital multimeter resistance ohms testing. And we want to make sure that we understand that the Circuit Check, or the little continuity tester, is just a monitor. It's not really testing much; it's really just monitoring it.
Think of it as a little babysitter just hanging out to let you know if something goes wrong, so that you can stop and be alerted. One important or kind of funny thing about the Circuit Check is that it's buzzing for a reason when there is a problem. The last thing you want to do when the system is installed and it suddenly starts buzzing because somebody accidentally cut or nicked the wire is just go to the Circuit Check and say, "Oh, it's buzzing, I'm going to turn it off." Then, three days later when the floor gets powered up, it's tripping the ground fault. It's buzzing for a reason.
It's not buzzing for you to shut it off. It's buzzing so you stop, inspect what was done, inspect the area where some work was maybe done recently, and potentially test it to find where the problem is. Exactly.
We got a few questions today. Yes, lots of questions. That's a popular topic, absolutely. Our first question was more or less about how manufacturers are working on improvements to allow radiant heat directly under their flooring.
Well, most of them allow it, but sometimes it's going to require that half-inch separation. You are always going to check with your manufacturer on which way is best for that flooring choice. Or choose a different type of flooring, Chip. That would be my next choice. Shop around.
There are so many out there. There's going to be one that will allow you to install it the way you'd like to install it. Correct. And if we're talking about direct installation over a heating system—over an Environ system, maybe, if that's what Chip is asking—at the end of the day, it comes back to those material basics. Like we said on the second or third slide, right?
It's a vinyl-based material. You cannot change it. It's going to get soft; it's going to get flexible. If you install it on something that has wires, like an Environ product, something is going to happen. That's the reason we do not recommend, and flooring companies do not recommend, installing it that way.
Right. Jerry asked about residential basements on concrete and engineered wood flooring systems. Anytime you're installing over a concrete slab, whether it be your basement or a sunroom that you added on with a concrete slab foundation, you're going to first insulate yourself from that slab by using ThermalSheet or cork or something to get you up off that slab. Very important. I would call it a mandatory step.
You don't want to heat your basement concrete and anything beneath it. You want to separate it and just heat the floor. We want to make sure that we don't disappoint the residents using it, where they think, "Oh, I'm getting this really warm floor, it's going to be so nice and cozy," but they put it right on the concrete. Then you get a callback next January when it's 30 below and they're not getting that basement very warm. Don't skip that insulation step.
What else do we have here? The next question is from Jim. What does Jim say here? "How does heat affect LVP over time, what is the max temperature, and how do you control it at that level?" Well, I think we answered that a few times with the floor protection limit.
Yeah, use the floor protection limit. That way, it will not affect it over time if you follow your manufacturer guidelines and set it correctly. There should be no effect on it. Right. And in regards to what the maximum temperature is, once again, there's no standard number across all companies or manufacturers.
You need to follow the guidelines from each brand or even each model of the flooring. Don't rely on a Google search or an AI response giving you some specific number, because your flooring might be a few degrees off. If that flooring is unstable at higher temperatures, you never want to exceed that. For sure.
Tanya asks here, "Can one control or thermostat control multiple surfaces?" We get that question a lot. It's a good idea in general, right? You don't want to have lots of controls and lots of devices in the rooms. We all get that in this day and age.
We don't want to walk around and click on different things. But a tile floor heated with a 15-watt system and a tile that transfers that heat very quickly from an element to the floor versus, let's call it, an Environ system with carpet on top—these are two different systems with different wattages. That's 15 watts per square foot for tile and 12 watts per square foot for Environ with carpet. So two different wattages, meaning the amount of power you supply, and two different flooring materials. One absorbs and retains heat and transfers that heat into the surface quickly, and the other heats up—
Slower and gentler. Slow and gentle, but at the same time it doesn't retain heat. So at the end of the day, remember another big thing: one thermostat means one sensor. Where are you going to place that sensor? If you place it in a tiled bathroom floor, you're going to have that faster response, and it's going to retain heat faster.
So it's going to hit the limit and stay there while maybe that carpet system is still slowly heating up. Mm-hmm. And the other way around, if you place the sensor into the carpeted area, it's still trying to get up to temperature while that bathroom floor is at 95 degrees now. Yeah. So I think the simple answer is: never mix those.
Yeah, get a dedicated thermostat for a dedicated room with its own floor type. Right, absolutely. We really find that pairing up big rooms with small rooms just doesn't seem to work—even if it's the same flooring type sometimes. Usually, if you're trying to do multiple rooms, a lot of times it's best to put them on separate circuits. What else? We have one from Carol here.
Carol is interested in installs under carpet, wood, etc. Any data on comparative performance? Energy efficiency? Yeah. And compared to forced air heating?
Well, I will tell you the comfort factor is there. You get that really cozy feeling with radiant floor warming because it's not pushing that forced air on you. It's not that dry air that kinds of dries out your nose in the wintertime. You get that really enveloping warmth, as I like to call it. That's coming from the sales side.
I mean, I always tell people it's kind of like the same type of heat you get from a fireplace, right? Of course, it's not going to be as hot or as fast as a fireplace, but you just feel that heat because it's essentially radiant heat. You're getting infrared waves warming up your body and warming up the objects in the room. But to talk a little bit about comparing it to forced air heating, think of them as two different systems. Floor heating heats—the element itself heats the floor, and that floor heats everything in the room directly.
Mm-hmm. With forced air heating, you're heating the air somewhere in your furnace, and that air needs to travel through your whole house to get to, let's say, the basement, where it's probably already lost a big chunk of that heat and energy before it even starts blowing air into the room. Mm-hmm. So when it comes purely to efficiency, floor heating is virtually 100% efficient because all of the electrical energy used goes directly into the floor. Yeah.
I feel like there's not much more I can say about that. Well, if you're interested in operating costs too, we also offer operating cost calculators. If it's a very big home where you really want to know what your operating costs are, we do put a rough estimate right on your quote, but we can also get into more detail with you on your specific project. Yeah, yeah, for sure. And we have a question from Greg: "How to avoid overheating a room on a mild day?"
"And concrete retains heat for a long time." Good question again. First of all, how do you avoid overheating a room on a mild day? Going back to the thermostat setup, like we were saying, there are two modes of operation: room temperature mode and floor temperature mode. So if you are specifically concerned about controlling the room temperature,
you set it to room temperature mode, set the temperature to the level you want, and essentially it runs as a normal thermostat. Yeah. You set it for 70 degrees, and it's never going to overshoot or overheat that room from that set point. And when it comes to concrete, we weren't sure if we're talking about a main concrete slab that retains heat for a long time. Yes, we do have a system for slab heating.
So yeah, you technically can heat the slab and it will retain heat for a long time. You'll have a system that might be slower to heat up, but it retains heat. It's a perfect system for situations where you're really just maintaining a consistent temperature all day long. Right. But in case you're asking about concrete or a self-leveling cement that's embedding the TempZone, yes, just like we were mentioning a couple of minutes ago, if it's a TempZone system covered with self-leveling cement, you shut it off and it's still going to be warm for a significant amount of time.
That's why those systems don't need to be cycled very often—because they retain heat. You turn it on for 10 to 15 minutes, it builds up that heat, and then it just cycles on and off. Absolutely. Those are all great questions, everybody. Very good questions.
All right, so WarmlyYours offers engineered SmartPlans and 24/7 field support. You can get your free SmartPlan CAD takeoff within 24 hours from when you send us your room plan or dimensions. You're going to get a really nice installation plan layout. You saw a clip of that on one of the other slides, so you know it looks really professional.
It's something you can use for your own guidance, you can share it with all the trade pros involved, and it's going to help you sell that job. You also get a dedicated account manager, so that is another bonus with WarmlyYours.
We have a great team of reps here that is dedicated to helping you make sure your project goes smoothly, educating you along the way, and answering all of these trade questions that we're going through. So if you missed something, we have someone here to help you at all times. Yeah, and 24/7 tech support, right? You're trying to get that installation started on Saturday morning at 7:00 AM, and maybe the room dimensions changed and you're running a little long with the cable. Give us a call.
Don't just try to find a solution on the fly. We'll help you the best we can with a solution and get the project going. Absolutely. So to close, I want to say thank you very much for sticking with us. We will also be offering you some resources.
The resources coming your way will be emailed to you. You're going to get a full PDF of the slides from this webinar today. Hey, we can turn it into a show at some point! Yeah, and then we're also going to send you a rewards coupon too, so that will be good for your next project.
Be on the lookout for that rewards coupon coming from Julia, our owner, and you're going to get a full copy of this recorded webinar. In case anybody wasn't able to join us live, you can always go back and rewatch it. So I think that wraps it up for us. Yeah, good topic. Thanks to everyone for staying with us.
Take care, everyone. Bye. See ya.
Bonjour et bon après-midi à tous. Je m'appelle Mary Godawa et je suis votre gestionnaire des ventes chez WarmlyYours. Aujourd'hui, j'ai avec moi Anatoly, notre gestionnaire du soutien technique. Bon après-midi, les amis. Bienvenue.
Qu'allons-nous apprendre aujourd'hui? Nous avons un excellent éventail de sujets. D'abord, nous allons parler des lois de la physique non négociables. Anatoly, de quoi s'agit-il? Ce sont les seuils de température, n'est-ce pas?
Nous ne voulons pas dépasser certaines températures pour certains revêtements de sol. Les limites de valeur R : nous ne voulons pas emprisonner la chaleur ni ajouter des couches excessives par-dessus les systèmes de chauffage. Nous parlerons de différents types de LVT, de revêtements souples, de bois d'ingénierie et de planchers flottants. Quoi d'autre?
Eh bien, tout cela semble un peu pareil. On leur donne souvent l'étiquette générique de stratifié, mais ils sont tous un peu différents. Nous aborderons les planchers d'ingénierie et de type flottant, ainsi que l'assemblage cloué. Nous verrons la norme pour le stratifié et notre style de plancher flottant où il n'est pas nécessaire d'enrober le système, par opposition aux cas où vous devez enrober le système de chauffage sous un ciment autonivelant. Nous allons même parler du tapis.
Oui, beaucoup de gens oublient qu'on peut chauffer un tapis. Le chauffage sous tapis est une autre excellente application dont nous allons vous parler. Enfin, nous parlerons de la protection de la garantie, c'est-à-dire s'assurer que le système demeure conforme aux garanties de votre fabricant, ainsi que toutes les étapes et tous les protocoles à suivre en cours de route.
Exactement. Ce que les gens oublient tout le temps, Anatoly, c'est qu'aujourd'hui, le chauffage de plancher ne se limite pas à la céramique. Nous chauffons tous les types de revêtements. Si vous marchez dessus, nous pouvons le chauffer. Je pense que les gens passent à côté de l'essentiel en n'offrant pas le chauffage de plancher avec d'autres types de revêtements.
Je dirais que ça représente environ 85 %, tu es d'accord? Oui, je dirais que oui. Chaque jour, il y a de nouveaux revêtements et de nouvelles finitions que les gens veulent agencer. Historiquement, il existe ce mythe voulant qu'on ne puisse pas chauffer un tapis ou un stratifié, parce que tout le monde est tellement habitué à penser : « La céramique est froide, alors je vais chauffer la céramique. » Les gens oublient complètement les autres possibilités.
Nous allons donc vous parler de toutes ces autres possibilités et de ce que vous devez savoir sur les 4 règles non négociables du chauffage des planchers autres que la céramique. Notre première règle est toujours la limite de température du plancher. Notre limite de température pour les planchers autres que la céramique est généralement d'environ 85 °F. Elle peut varier pour certaines marques — parfois autour de 81 ou 82 °F —, mais en général, cette plage de 85 °F est assez courante pour la plupart des revêtements autres que la céramique.
Vérifiez toujours les exigences du fabricant de votre revêtement de sol. Cela nous amène directement au sujet suivant : les abaissements de température. Vous ne voulez jamais faire subir un choc au plancher, de quelque façon que ce soit. Chaque fabricant de revêtement donnera des exigences différentes, qu'il s'agisse de la limite de plancher ou des abaissements de température.
Vous devez vraiment suivre les consignes de votre marque et de votre modèle précis de revêtement. En ce qui concerne les abaissements, vous ne voulez pas régler le plancher à 90 °F pendant plusieurs jours en journée, puis partir soudainement pour la fin de semaine, l'éteindre complètement de sorte que le plancher chute à 45 °F, et revenir pour le remonter à 90 °F. Ces types de planchers n'apprécieraient probablement pas, alors suivez les lignes directrices de votre fabricant et réglez en conséquence.
Nous allons aussi parler un peu de la valeur R. Vous avez peut-être entendu parler de la valeur R pour l'isolation de vos murs ou de vos plafonds, mais la valeur R d'un revêtement de sol nous aide à comprendre comment la chaleur se transmettra — si elle monte à travers votre revêtement plutôt que d'être aspirée vers le bas dans vos sous-planchers. Nous parlerons aussi de l'élimination de la chaleur emprisonnée, c'est-à-dire pas de gros tapis épais, pas d'aquariums à fond plein ni de grandes bibliothèques qui emprisonneraient la chaleur.
Nous y reviendrons un peu plus tard. Assurez-vous simplement que le plancher est dégagé pour que la chaleur monte dans la pièce, et tout sera parfait.
Absolument. Voici notre premier sujet : le vinyle de luxe. Un support rigide est obligatoire. Autrefois, les gens pensaient parfois au vinyle en feuille, très souple et malléable, vendu en grand rouleau.
Ce n'est pas de cela dont nous parlons. Nous parlons plutôt des carreaux ou des lames LVP. Les gens demandent souvent : « Puis-je simplement dérouler votre tapis chauffant — le tapis en mailles vertes — et emboîter mon plancher directement par-dessus? » Cela semble si facile, mais malheureusement, ce n'est pas la bonne façon de procéder.
C'est absolument à proscrire. Parle-nous davantage de la défaillance physique que cela entraîne. Vous avez affaire à un plancher dont le matériau de l'âme est le vinyle. Il devient flexible à un certain point, que ce soit à cause de la température, de la circulation prolongée ou simplement après cinq ans, et il commence à absorber tous les points inégaux du plancher.
C'est vraiment l'élément clé à considérer. Si vous parcourez les lignes directrices et les exigences d'installation de n'importe quel produit en vinyle, vous constaterez que le fabricant exige que le plancher soit parfaitement plat et de niveau. C'est seulement à cette condition que le revêtement peut être installé correctement. Par conséquent, vous ne pouvez pas l'installer directement sur un système Environ qui contient des fils. Avec le temps, ces fils créeront des bosses, et certaines lames pourraient ne pas s'emboîter correctement parce que la surface n'est pas plane.
Votre solution simple consiste à utiliser le tapis TempZone. Le tapis TempZone peut être recouvert de ciment autonivelant. Une fois qu'il est recouvert, vous obtenez une surface parfaitement plane sur laquelle travailler.
Voici un bon exemple de coupe transversale montrant un système de plancher de vinyle de luxe à emboîtement enrobé sous une couche de ciment autonivelant d'un demi-pouce. Ce qui est formidable, c'est qu'une fois que vous avez encapsulé tout le système et qu'il est sec, vous pouvez commencer à marcher dessus et à installer votre revêtement. Cependant, vous devrez attendre un certain temps avant de mettre le chauffage en marche. Vous devez procéder couche par couche correctement et vous assurer de suivre les lignes directrices du fabricant du revêtement. Le fabricant de vinyle pourrait vous demander de recouvrir le système de chauffage de 1,5 pouce ou de 5/8 de pouce de ciment autonivelant, ou encore l'exprimer comme la création d'une séparation de 5/8 de pouce.
C'est votre guide pour déterminer la quantité de ciment autonivelant à utiliser sur le produit. En fin de compte, vous devez suivre les deux ensembles de directives — et nous allons probablement le répéter bien des fois aujourd'hui. Vous devez suivre le manuel de chauffage de plancher WarmlyYours pour votre produit, dans lequel nous recommandons un recouvrement minimal de 3/8 de pouce, mais en même temps, vous devez respecter les directives de votre fabricant de revêtement.
Le meilleur des deux mondes vous donne l'installation la plus correcte. Quand nous parlons de couler du ciment autonivelant, nous voulons aussi parler du facteur de planéité. Comme nous l'avons mentionné, il est important que les lames s'emboîtent bien en place. Si votre plancher est inégal au départ, vous devez vous assurer qu'il est de niveau avant même de commencer.
Il est aussi important de souligner que, dans le rythme effréné d'aujourd'hui, les installateurs peuvent appeler et dire simplement : « Bonjour, j'installe un plancher flottant. » Nous avons besoin de plus d'information pour pouvoir vous suggérer et concevoir le bon produit, car le mot « flottant » ne précise pas quelle application ou quel produit doit être utilisé. Nous allons justement explorer ces différentes options dans quelques diapositives.
Ce que nous montrons ici est une coupe transversale pour un plancher stratifié : option A, flottant direct. Nous verrons une autre option plus tard. L'option A est ce que nous appelons un « sandwich Environ », où vous avez une couche de plancher stratifié flottant à emboîtement sur le tapis Environ. Sous ce tapis Environ, vous voyez une couche de ThermalSheet. Nous utilisons cette sous-couche d'un quart de pouce pour offrir un coussin sous le tapis chauffant afin que les fils ne soient pas pincés ni piétinés.
De plus, elle vous donne un endroit où acheminer vos fils de raccordement et la sonde. Un autre bon point ici : le plancher stratifié peut avoir une limite de température précise. Si elle est de 85 °F, ou de 86, vous pouvez facilement la régler sur votre thermostat en quelques secondes, parce que tous nos thermostats ont ce réglage de protection du plancher.
Il peut s'agir d'un préréglage pour le stratifié avec une limite standard ou d'un réglage personnalisé que vous entrez. Une fonction formidable sur certains modèles, comme nos appareils nSpire Touch, est la protection du plancher stratifié. Si vous sélectionnez ce réglage, il définit correctement les limites et empêche la température de monter à plus de 10 °F par heure. Si votre revêtement l'exige, le thermostat s'en occupe. Voici l'option B.
Elle s'applique aussi au plancher stratifié, mais il s'agit cette fois du style enrobé. Vous constaterez que c'est très courant avec ces types de planchers flottants. La plupart des fabricants considèrent cette méthode comme éprouvée. Lorsque vous coulez cette belle couche de ciment autonivelant, tout votre système est encapsulé.
Voici quelques conseils à garder à l'esprit lors de la coulée de ciment autonivelant. N'oubliez pas d'utiliser un apprêt. Assurez-vous que les installateurs de revêtements savent qu'ils ne peuvent pas circuler avec des chaussures à crampons, car ils ne veulent pas endommager les fils chauffants. Lorsqu'ils travaillent avec du ciment autonivelant, les installateurs utilisent souvent des raclettes ou des râteaux. Tout le monde doit garder en tête qu'un système de chauffage dont les câbles sont exposés est en place.
Vous ne voulez pas que quelqu'un installe le tapis, coule la sous-couche autonivelante, puis qu'une troisième personne vienne la finir et endommage le produit. Tous ceux qui sont sur le chantier doivent savoir ce qui est en train d'être installé. Pour ajouter à ce que tu disais, Mary, un avantage supplémentaire d'un système entièrement enrobé est la flexibilité. Si vous installez un plancher stratifié et décidez trois ans plus tard que le ton est trop foncé et que vous voulez un stratifié plus clair, votre système de chauffage est enrobé en toute sécurité. Vous pouvez retirer l'ancien stratifié et en installer un nouveau.
Vous pourriez y mettre un tapis, ou pratiquement n'importe quel nouveau revêtement que vous voulez. C'est l'avantage supplémentaire des systèmes enrobés. Passons maintenant aux planchers de bois.
En ce qui concerne les planchers de bois, il y a toute une science derrière les essences, les coupes et les largeurs. Les fabricants de revêtements pourront vous guider, mais nous pouvons parler de stabilité. Lorsque vous choisissez un plancher de bois à installer sur un chauffage radiant, optez pour les bois les plus stables possible : le chêne blanc, le merisier américain, le noyer ou le mesquite — des bois francs à faible retrait. Les bois instables sont les bois plus légers et plus tendres comme l'érable et le bouleau, qui sont plus sensibles à la chaleur et à l'humidité. Pour ce qui est de la largeur des lames, si vous utilisez du bois massif, essayez de ne pas dépasser environ 3 pouces; pour le bois d'ingénierie, visez environ 5 pouces.
Cela vous donnera une installation adéquate. Les planchers de bois d'ingénierie sont aussi habituellement flottants, bien qu'ils puissent parfois être collés. S'il est flottant, vous pouvez l'installer sur le système de plancher Environ. Il s'agit d'un assemblage à sec. Encore une fois, si on regarde cette coupe transversale, nous avons un sous-plancher de bois ou de béton, le ThermalSheet, le tapis Environ, puis votre revêtement par-dessus.
On emboîte simplement le tout directement sur le système Environ, encore une fois. Oui. J'aime que tu aies souligné la question de la colle, une distinction très importante pour le système Environ dont nous parlons en ce moment : encore une fois, nous parlons évidemment d'une application flottante. Mais rien ne doit jamais être collé sur le produit Environ, n'est-ce pas? C'est donc un montage entièrement flottant.
Vous ne collez rien, vous ne clouez rien. C'est un montage entièrement flottant, de tout en bas jusqu'à tout en haut. Très bien. Et voici encore une coupe transversale semblable où l'on parle de cette couche d'un quart de pouce — pardon, d'un demi-pouce — de ciment autonivelant. On montre donc votre sous-plancher, votre apprêt, votre tapis TempZone très mince, puis votre couche d'autonivelant.
Vous devez vous assurer de surveiller les petits clous ou les bouches d'air dans votre plancher. Si vous avez des registres, vous devez installer une digue pour que, lorsque vous coulez ce ciment de nivellement, il ne se répande pas partout. Oui, essentiellement, quiconque travaille avec du ciment autonivelant se prépare à cela. Mais oui, vous devez établir une bordure. Vous devez délimiter le périmètre pour que, lorsque vous coulez le ciment autonivelant, il ne vous file pas entre les doigts.
Exact. Et pour un plancher cloué, c'est encore plus important, n'est-ce pas? Parce que si vous avez un plancher cloué, la façon dont il faudrait procéder — évidemment, vous ne pouvez pas clouer dans l'élément chauffant électrique, ce serait plutôt fâcheux. Mais vous poseriez des lambourdes ou des fourrures, disons tous les 8 à 12 pouces entre axes. Le tapis ou le câble chauffant se place entre les deux.
Et vous nivelleriez ensuite le tout avec un peu de ciment autonivelant. Oui, une installation très simple. On travaille essentiellement par sections, dans de petits canaux ou des baies entre les lambourdes. Je pense que le fait amusant ici, c'est que le chauffage sous tapis et le chauffage sous plancher de bois cloué sont les deux applications auxquelles les gens penseraient le moins. Exact.
Parce que, pour une application clouée, on se demande comment installer un chauffage de plancher et clouer. Oui, c'est possible. Il suffit de suivre les bonnes directives. Même chose pour le tapis : il existe un produit précis pour cela. Absolument.
Très bien, et voici une belle petite image de notre sonde de température de plancher. C'est donc très important lorsque vous faites n'importe quel type de revêtement autre que la céramique. Nous allons maintenant parler de l'humidité relative. Lorsque vous pensez, disons, à un plancher d'ingénierie ou même à un plancher de bois franc, en cette période de l'année, en hiver, quand on est en janvier et qu'il fait très sec dehors, vous devrez peut-être penser à surveiller l'humidité de votre pièce en vous procurant un petit hygromètre. Vous devrez peut-être faire fonctionner un humidificateur s'il fait vraiment très sec durant ces mois. Nous ne voulons pas que vous ayez d'espaces entre les lames de votre plancher ou quoi que ce soit du genre.
Et à l'inverse, en été, nous ne voulons pas que l'humidité relative soit trop élevée dans votre pièce. Exactement, exactement. Il faut simplement — encore une fois, nous allons toujours revenir à ces directives précises qui viennent de la marque ou du modèle de votre revêtement, n'est-ce pas? Elles comportent des limites précises, ou parfois c'est écrit dans l'avis de la garantie, n'est-ce pas? Il y a des limites de température précises et des limites d'humidité précises.
Elles sont là pour une raison. Je veux dire, c'est un matériau naturel, c'est un plancher de bois naturel, alors vous devez les respecter du mieux possible pour prolonger la durée de vie de ce plancher. Et vous pouvez voir qu'on découpe un petit canal pour encastrer légèrement l'extrémité de la sonde. C'est aussi pourquoi vous avez besoin d'une sous-couche : elle permet de ménager un petit canal pour l'extrémité de la sonde.
Comme on l'a dit, vous obtenez essentiellement deux sondes. Choisissez donc un endroit pour une sonde, et un endroit légèrement différent pour votre sonde de secours. Je pense que nous allons le répéter plusieurs fois aujourd'hui, mais des deux, une seule sonde est raccordée. Le second fil est simplement enroulé et fixé dans la boîte en vue d'un usage futur éventuel. Bon conseil, bon conseil. Oh, regardez ça, voilà.
Ici, nous vous montrons du chauffage sous tapis. Lorsque vous chauffez sous un tapis, il y a quelques éléments à garder absolument à l'esprit. Le premier est votre code. Oui, cela s'adresse aux gens des États-Unis. Malheureusement, pour nos amis canadiens, il n'est pas permis de chauffer sous un tapis.
Désolés pour vous. Mais nous pouvons le faire sous un tapis ici, et ce que vous voyez dans cette petite vidéo, c'est quelqu'un qui fait un joint de tapis en prenant bien soin de ne pas endommager les tapis chauffants. Vous pouvez voir qu'il tire sur quelque chose pour se guider afin de réaliser ce joint. Nous allons aussi préciser que le tapis comporte toujours une sous-couche, n'est-ce pas? Oui, oui.
Vous pouvez la voir en bleu, juste là. Vous devez absolument vous assurer de choisir une bonne sous-couche, quelque chose qui aura une valeur R plus élevée, surtout si vous êtes sur du béton, par exemple dans votre sous-sol. Vous voulez choisir une sous-couche d'une densité de 6 à 8 livres par pied cube, donc une bonne sous-couche de polyuréthane caoutchouté avec une valeur R élevée. Et ensuite, vous voulez une faible valeur R pour votre revêtement par-dessus afin de laisser la chaleur monter. Oui, pour simplifier, pensez à la valeur R comme à la valeur d'isolation, d'accord? Vous voulez donc isoler en dessous, parce que la chaleur n'a pas besoin d'aller vers le bas.
Vous voulez minimiser cette isolation, ou minimiser cette valeur R, au-dessus. La chaleur sera transférée dans une direction très simple et directe vers votre revêtement. De plus, nous voulons
Hola y buenas tardes a todos. Mi nombre es Mary Godawa y soy su gerente de ventas en WarmlyYours. Hoy me acompaña Anatoly, nuestro gerente de soporte técnico. Buenas tardes, chicos. Bienvenidos.
¿Qué vamos a aprender hoy? Hoy tenemos un gran conjunto de temas. Primero, vamos a hablar de la física no negociable. Anatoly, ¿cuáles son? Son los umbrales de temperatura, ¿verdad?
No queremos exceder ciertas temperaturas para ciertos pisos. Los límites del valor R: no queremos atrapar el calor ni poner capas excesivas encima de los sistemas de calefacción. Hablaremos de diferentes tipos de LVT, pisos resilientes, madera de ingeniería y pisos flotantes. ¿Qué más?
Pues todos suenan más o menos parecido. A menudo reciben la etiqueta genérica de laminado, pero todos son un poco diferentes. Veremos los pisos de ingeniería y de tipo flotante, así como el ensamble clavado. Cubriremos el estándar para laminado y nuestro estilo de piso flotante donde no es necesario embeber el sistema, frente a cuando sí hay que embeber el sistema de calefacción bajo cemento autonivelante. Incluso vamos a hablar de la alfombra.
Sí, mucha gente olvida que se puede calentar la alfombra. La calefacción bajo alfombra es otra gran aplicación de la que les vamos a hablar. Por último, hablaremos de la defensa de la garantía, para asegurarnos de que el sistema se mantenga dentro de las garantías de su fabricante, junto con todos los pasos y protocolos que deben seguir en el camino.
Exactamente. Lo que creo que la gente olvida todo el tiempo, Anatoly, es que hoy en día el piso radiante no es solo para loseta. Trabajamos con todo tipo de pisos. Si lo pisas, lo calentamos. Creo que la gente no está viendo el panorama completo al no ofrecer calefacción por piso con otros tipos de piso.
Yo diría que eso es cerca del 85%, ¿no crees? Yo diría que sí. Todos los días hay pisos nuevos y acabados nuevos que la gente quiere combinar. Históricamente existe el mito de que no se puede calentar alfombra o laminado, porque todos están muy acostumbrados a pensar: "La loseta es fría, así que voy a calentar la loseta". La gente olvida por completo las otras oportunidades.
Así que les vamos a contar todo sobre estas otras oportunidades y lo que necesitan saber sobre las 4 reglas no negociables para calentar pisos que no son de loseta. Nuestra primera regla siempre es el límite de temperatura del piso. Nuestro límite de temperatura del piso en pisos que no son de loseta suele ser de alrededor de 85 grados. Esto puede cambiar en ciertas marcas (a veces ronda los 81 u 82), pero en general ese rango de 85 grados es bastante común para la mayoría de los pisos que no son de loseta.
Siempre revisen los requisitos del fabricante de su piso. Esto nos lleva directamente al siguiente tema: las reducciones de temperatura programadas. Nunca quieren someter el piso a un choque térmico de ninguna manera. Cada fabricante de pisos les dará requisitos distintos, ya sea el límite del piso o las reducciones de temperatura.
Realmente deben seguir la marca y el modelo específico de su piso. En cuanto a las reducciones, no quieren dejar el piso a 90 grados durante varios días en horario diurno, y de pronto irse de fin de semana, apagarlo por completo para que el piso baje a 45 grados, y luego regresar y subirlo otra vez a 90. A ese tipo de pisos probablemente no les gustaría eso, así que sigan las indicaciones de su fabricante y programen en consecuencia.
También vamos a hablar un poco del valor R. Quizá hayan oído del valor R para el aislamiento de muros o techos, pero el valor R en los pisos nos ayuda a entender cómo se transferirá el calor: si sube a través del piso o si se va hacia abajo, hacia el contrapiso. También hablaremos de eliminar el calor atrapado, es decir, nada de tapetes grandes y pesados, peceras de base sólida o libreros grandes que atrapen el calor.
Hablaremos de eso un poco más adelante. Solo asegúrense de que el piso esté despejado para que el calor se genere hacia el cuarto, y con eso estarán listos.
Absolutamente. Aquí está el primero: vinilo de lujo. El soporte rígido es obligatorio. Antiguamente, la gente a veces pensaba en el vinilo como vinilo en hoja, muy flexible y maleable, que venía en un rollo grande.
De eso no estamos hablando. Hablamos más bien de loseta o tablones LVP. La gente suele preguntar: "¿Puedo simplemente desenrollar su malla calefactora, la malla verde, y encajar mi piso encima?". Parece muy fácil, pero lamentablemente esa no es la forma correcta de hacerlo.
Eso es un rotundo no. Cuéntanos más sobre la falla física que eso provoca. Se trata de un piso cuyo material central es vinilo. En cierto punto se vuelve flexible, ya sea por la temperatura, el tránsito prolongado o simplemente cinco años después, y empieza a absorber cualquier punto disparejo del piso.
Eso es realmente lo clave en lo que hay que pensar. Si revisan las guías y los requisitos de instalación de cualquier producto de vinilo, verán que el fabricante quiere que el piso esté absolutamente plano y nivelado. Solo así se puede instalar correctamente el piso. Por lo tanto, no se puede instalar directamente sobre un sistema Environ que tiene cables. Con el tiempo, esos cables crearán protuberancias, y algunos tablones quizá no encajen bien porque la superficie no está plana.
Su solución sencilla es usar el TempZone Mat. El TempZone Mat se puede cubrir con cemento autonivelante. Después de cubrirlo, tienen una superficie perfectamente plana con la que trabajar.
Aquí hay un buen ejemplo de una sección transversal que muestra un sistema de piso de vinilo de lujo de clic y encaje embebido bajo una capa de media pulgada de cemento autonivelante. Lo bueno de esto es que, una vez que encapsulan todo el sistema y se seca, pueden empezar a caminar sobre él e instalar su piso. Sin embargo, deben esperar un poco antes de encender el calor. Quieren instalarlo capa por capa correctamente y asegurarse de seguir las indicaciones del fabricante del piso. La empresa del vinilo podría pedirles cubrir el sistema de calefacción con 1.5 pulgadas o 5/8 de pulgada de cemento autonivelante, o podrían expresarlo como crear una separación de 5/8 de pulgada.
Esa es su guía de cuánto cemento autonivelante usar sobre el producto. Al final del día, quieren seguir ambos conjuntos de indicaciones, y probablemente lo repetiremos muchas veces hoy. Deben seguir el manual de calefacción por piso de WarmlyYours para su producto, donde recomendamos una cobertura mínima de 3/8 de pulgada, pero al mismo tiempo deben seguir las indicaciones del fabricante de su piso.
Lo mejor de ambos mundos les da la instalación más correcta. Cuando hablamos de verter cemento autonivelante, también queremos hablar del factor de planitud. Como mencionamos, es importante lograr que las tablas encajen en su lugar. Si su piso está disparejo desde el principio, deben asegurarse de nivelarlo antes de comenzar.
También es importante mencionar que, en estos tiempos tan ocupados, los instaladores a veces llaman y simplemente dicen: "Oye, estoy instalando un piso flotante". Necesitamos más información para poder sugerir y diseñar el producto adecuado para ustedes, porque la palabra "flotante" no especifica qué aplicación o producto se debe usar. De hecho, vamos a profundizar en esas diferentes opciones en un par de diapositivas.
Lo que mostramos aquí es una sección transversal para piso laminado: Opción A, flotante directo. Veremos otra opción más adelante. La Opción A es lo que llamamos un "sándwich Environ", donde hay una capa de piso laminado flotante de clic y encaje sobre el Environ Mat. Debajo de ese Environ Mat, ven una capa de ThermalSheet. Usamos ese bajo piso de un cuarto de pulgada para dar un amortiguamiento debajo de la malla calefactora, de modo que los cables no se aplasten ni se pisen.
Además, les da un lugar por donde pasar los cables de alimentación y el sensor. Otro punto a favor es que el piso laminado puede tener una limitación de temperatura específica. Si es de 85 grados, o 86, pueden configurarlo fácilmente en su termostato en segundos, porque todos nuestros termostatos tienen esa función de protección del piso.
Puede ser un ajuste preestablecido para laminado con un límite estándar o un ajuste personalizado que ustedes ingresen. Una gran función en modelos específicos como nuestras unidades nSpire Touch es la protección para piso laminado. Si seleccionan ese ajuste, configura los límites correctamente y evita que la temperatura suba más rápido de 10 grados por hora. Si su piso lo requiere, el termostato lo tiene cubierto. Aquí está la Opción B.
Esta también es para piso laminado, pero es el estilo embebido. Verán que es muy común con este tipo de pisos flotantes. La mayoría de los fabricantes lo consideran el método probado y comprobado. Cuando vierten esa buena capa de cemento autonivelante, todo el sistema queda encapsulado.
Hay algunos consejos que deben tener en cuenta al verter cemento autonivelante. No olviden usar un primer. Asegúrense de que los instaladores del piso sepan que no pueden caminar con zapatos de clavos, porque no quieren dañar los cables calefactores. Al trabajar con cemento autonivelante, los instaladores suelen usar jaladores y rastrillos. Todos deben tener presente que hay un sistema de calefacción con cables expuestos.
No quieren que alguien instale la malla, vierta el autonivelante y luego llegue una tercera persona a terminar y dañe el producto. Todos en la obra deben estar al tanto de lo que se está instalando. Para añadir a lo que decías, Mary, un beneficio adicional de un sistema totalmente embebido es la flexibilidad. Si instalan piso laminado y deciden tres años después que el tono es muy oscuro y quieren un laminado más claro, su sistema de calefacción está embebido de forma segura. Pueden levantar el laminado viejo e instalar uno nuevo.
Podrían poner alfombra encima, o prácticamente cualquier piso nuevo que quieran. Ese es el beneficio adicional de los sistemas embebidos. Ahora pasemos a los pisos de madera.
Cuando se trata de pisos de madera, hay una ciencia detrás de las especies, los cortes y los anchos. Los fabricantes de sus pisos podrán orientarlos, pero podemos hablar de la estabilidad. Al elegir un piso de madera para instalar sobre calefacción radiante, escojan las maderas más estables posible: roble blanco, cerezo americano, nogal o mezquite, maderas duras con poca contracción. Las maderas inestables son las más ligeras y suaves, como el arce y el abedul, que son más susceptibles al calor y la humedad. En cuanto al ancho del tablón, si usan madera sólida, traten de no pasar de un ancho máximo de unas 3 pulgadas; para madera de ingeniería, quédense en alrededor de 5 pulgadas.
Eso les dará una instalación adecuada. Los pisos de madera de ingeniería también suelen ser flotantes, aunque a veces se pueden pegar. Si es flotante, se puede instalar sobre el sistema de piso Environ. Este es un ensamble en seco. Una vez más, viendo esta sección transversal, tenemos un contrapiso de madera o concreto, ThermalSheet, el Environ Mat y luego su piso encima.
Simplemente se encaja con clic justo sobre el sistema Environ, otra vez. Sí. Creo que algo que me gustó de lo que señalaste sobre el pegamento, y es una distinción muy importante para el sistema Environ del que hablamos ahora, es que, de nuevo, hablamos por supuesto de una aplicación flotante. Pero nada debe pegarse nunca al producto Environ, ¿verdad? Es una instalación completamente flotante.
No se pega ni se clava nada. Es una instalación completamente flotante desde lo más profundo hasta lo más alto. Muy bien. Y esta es, de nuevo, una sección transversal similar donde hablamos de esa capa de un cuarto de pulgada... perdón, de media pulgada de cemento autonivelante. Aquí solo mostramos su contrapiso, su primer, su TempZone Mat muy delgado y luego su capa de autonivelante.
Deben fijarse bien en cualquier clavito o ducto en el piso. Si tienen rejillas, asegúrense de poner un dique para que, al verter ese cemento nivelante, no se corra por todos lados. Sí, básicamente cualquiera que trabaje con cemento autonivelante se prepararía para eso. Pero sí, deben poner un borde. Deben establecer los límites para que, al verter el cemento autonivelante, no se les escape.
Correcto. Y para instalación clavada, eso será aún más importante, ¿verdad? Porque si tienen un piso clavado, la forma en que tendrían que hacerlo, obviamente no se puede clavar en el elemento calefactor eléctrico, porque sería bastante malo, es colocar polines o tiras de bastidor cada, digamos, 8 a 12 pulgadas a centros. La malla o el cable calefactor iría entre ellos.
Y luego igualmente nivelarían con un poco de cemento autonivelante. Sí, una instalación muy sencilla. Básicamente se trabaja por secciones, como pequeños canales o compartimientos entre los polines. Creo que el dato curioso aquí es que siento que la calefacción bajo alfombra y la calefacción bajo piso de madera clavado son las dos aplicaciones en las que la gente menos pensaría. Cierto.
Porque es como: en una aplicación clavada, ¿cómo vas a instalar calefacción por piso y clavar? Sí, es posible. Solo hay que seguir las indicaciones correctas. Igual con la alfombra; hay un producto específico solo para eso. Absolutamente.
Muy bien, y aquí hay una buena imagen de nuestro sensor de temperatura del piso. Esto es muy importante cuando se instala cualquier tipo de piso que no sea loseta. La humedad relativa es de lo que hablaremos aquí. Cuando piensan en, digamos, un piso de ingeniería o incluso de madera dura, en esta época del año, en invierno, cuando es enero afuera y todo está muy seco, quizá tengan que pensar en monitorear la humedad en su cuarto con un pequeño medidor de humedad. Quizá necesiten usar un humidificador si está muy, muy seco en esos meses. No queremos que se formen separaciones en su piso ni nada por el estilo.
Y a la inversa, en verano, no queremos que la humedad relativa en el cuarto sea demasiado alta. Exactamente, exactamente. Realmente solo necesitan, de nuevo, siempre vamos a volver a esas indicaciones específicas de la marca o del modelo de su piso, ¿verdad? Tendrán limitaciones específicas, o a veces podría estar escrito en el descargo de responsabilidad de la garantía, ¿cierto? Hay límites de temperatura específicos y límites de humedad específicos.
Están ahí por una razón. Es decir, es un material natural, es un piso de madera natural, así que deben mantener esos parámetros lo mejor posible para prolongar la vida del piso. Y ahí pueden ver cómo estamos cortando un pequeño canal para ahogar un poco la punta de la sonda. Por eso siempre se necesita también un bajo piso: para dar un pequeño canal a esa punta del sensor.
Como se dijo, básicamente reciben dos sensores, así que elijan un lugar para un sensor y un área o punto ligeramente distinto para su sensor de respaldo. Siento que lo repetiremos varias veces hoy, pero entre ambos, solo se conecta un sensor. El segundo cable simplemente se enrolla y se guarda en la caja para cualquier posible uso futuro. Buen consejo, buen consejo. Oh, miren eso, ahí está.
Aquí les mostramos calefacción bajo alfombra. Cuando calientan bajo alfombra, hay algunas cosas que definitivamente deben tener en cuenta. Número uno es su código. Sí, esto es para quienes están en Estados Unidos. Lamentablemente, para nuestros amigos canadienses, no se puede calentar bajo alfombra.
Lo sentimos mucho por ustedes. Pero aquí sí podemos hacerlo bajo alfombra, y lo que ven en este pequeño video es a alguien haciendo una unión de alfombra y teniendo mucho cuidado de no dañar las mallas calefactoras. Pueden ver que va jalando algo que le ayuda a guiarse para hacer esa unión. También vamos a decir que la alfombra siempre lleva un bajo alfombra o bajo tapete, ¿verdad? Sí, sí.
Ahí lo pueden ver en azul. Definitivamente quieren asegurarse de elegir un buen bajo alfombra, algo que tenga un valor R más alto, especialmente si está sobre concreto, como en un sótano o algo así. Quieren elegir algo con una densidad de 6 a 8 libras por pie cúbico, como un buen bajo alfombra de poliuretano hulado con un valor R alto. Y luego quieren un valor R bajo para su piso real encima, para dejar que el calor suba. Sí, para simplificarlo, piensen en el valor R como el valor de aislamiento, ¿cierto? Quieren aislar por debajo porque no necesitan que el calor se vaya hacia abajo.
Quieren minimizar ese aislamiento o ese valor R por encima. El calor se transferirá en una dirección muy fácil y directa hacia su piso. Además, queremos asegurarnos de que se mantengan un poco alejados de los bordes del cuarto. Es importante saber que hay tiras de agarre (tack strips) cada vez que se instala alfombra estirada, y esos instaladores de alfombra usan esas herramientas de patada de rodilla (knee kickers). Quieren asegurarse de que no agarren accidentalmente su malla calefactora y la dañen, porque eso sería terrible.
Así que asegúrense de mantenerse un poco alejados de los muros. Y luego recibimos de vez en cuando esta pregunta sobre losetas de alfombra pegadas. Los pisos pegados, ya sean losetas de alfombra o madera de ingeniería pegada, volverán al mismo método de instalación húmeda mediante embebido con cemento autonivelante. Exactamente. Como mencioné antes, no se puede pegar sobre Environ.
Así que aunque piensen: "Ah, es alfombra", porque necesita pegarse, no se puede hacer eso sobre un sistema Environ. Pero, por supuesto, de nuevo, tenemos una forma de hacerlo con un producto TempZone que se va a embeber. Gracias. Aquí les mostramos las capas de nuevo. Está el bajo piso con el bajo alfombra de rebote ahí.
Tenemos el sistema de malla de lámina flotante Environ encima, y luego su alfombra. Es simplemente un sándwich de alfombra fácil. Así nos gusta llamarlo. Es bastante fácil, bastante directo.
No tiene adhesivos ni autonivelante. Es una excelente forma de agregar un poco de comodidad extra a esos cuartos de sótano, los cuartos de juegos donde a los niños les gusta acostarse en el piso a jugar videojuegos o lo que sea. Es realmente un buen producto que la gente olvida ofrecer en sus ventas adicionales cuando ofrecen no solo soluciones de pisos, sino soluciones de confort para el hogar. Sí, para mí personalmente, simplemente hace que esos cuartos más fríos con alfombra de pronto sean utilizables, cálidos y cómodos.
Y, de nuevo, eso se conecta con todo este mito de que no se puede calentar la alfombra, y estos cuartos se quedan notoriamente fríos hasta que ustedes o su contratista descubren que WarmlyYours tiene un producto para eso. Simplemente se instala y ese sótano se convierte en un sótano cálido y cómodo;
Dzień dobry wszystkim. Nazywam się Mary Godawa i jestem kierownikiem sprzedaży w WarmlyYours. Dziś jest ze mną Anatoly, nasz kierownik wsparcia technicznego. Dzień dobry, Anatoly. Witamy.
Czego dziś się dowiemy? Mamy dla Państwa świetny zestaw tematów. Najpierw omówimy niepodlegające negocjacjom zasady fizyki. Anatoly, co to takiego? To progi temperatur, prawda?
Nie chcemy przekraczać określonych temperatur dla określonych podłóg. Limity oporu cieplnego (wartości R) – nie chcemy zatrzymywać ciepła ani układać nadmiernej liczby warstw na systemach grzewczych. Omówimy różne rodzaje LVT, podłóg elastycznych, drewna warstwowego i podłóg pływających. Co jeszcze?
Wszystkie brzmią podobnie. Często trafiają pod ogólną etykietę laminatu, ale każda z nich jest trochę inna. Zajmiemy się podłogami warstwowymi i pływającymi, a także montażem przybijanym. Omówimy standardowe rozwiązanie dla laminatu i nasz styl podłogi pływającej, w którym nie trzeba zatapiać systemu, oraz przypadki, gdy system grzewczy trzeba zatopić pod masą wyrównującą. Poruszymy nawet temat wykładziny dywanowej.
Tak, wiele osób zapomina, że wykładzinę też można ogrzewać. Ogrzewanie wykładziny to kolejne świetne zastosowanie, o którym Państwa poinformujemy. Na koniec porozmawiamy o ochronie gwarancji, czyli o tym, jak dopilnować, by system pozostawał objęty gwarancjami producenta, wraz ze wszystkimi krokami i procedurami, które trzeba po drodze wykonać.
Dokładnie. Anatoly, ludzie ciągle zapominają, że w ogrzewaniu podłogowym dziś nie chodzi już tylko o płytki. Obsługujemy wszystkie rodzaje podłóg. Jeśli można po tym chodzić, możemy to ogrzać. Myślę, że ludzie nie widzą pełnego obrazu, skoro nie oferują ogrzewania podłogowego z innymi rodzajami podłóg.
Powiedziałbym, że to około 85%, zgodzisz się? Tak, zgodzę się. Każdego dnia pojawiają się nowe podłogi i nowe wykończenia, do których ludzie chcą dopasować ogrzewanie. Od dawna funkcjonuje mit, że nie można ogrzewać wykładziny ani laminatu, bo wszyscy są przyzwyczajeni do myślenia: „Płytki są zimne, więc ogrzeję płytki”. Ludzie zupełnie zapominają o innych możliwościach.
Opowiemy więc o tych innych możliwościach i o tym, co trzeba wiedzieć o 4 niepodlegających negocjacjom zasadach ogrzewania podłóg innych niż płytki. Pierwsza zasada to zawsze limit temperatury podłogi. Limit temperatury podłogi dla podłóg innych niż płytki wynosi zwykle około 85 stopni. W przypadku niektórych marek może się to zmieniać – czasem to około 81 lub 82 – ale ogólnie zakres 85 stopni jest dość powszechny dla większości podłóg innych niż płytki.
Zawsze sprawdzajcie Państwo wymagania producenta podłogi. To prowadzi wprost do kolejnego tematu: obniżania temperatury. Nigdy nie należy poddawać podłogi żadnemu szokowi termicznemu. Każdy producent podłóg poda inne wymagania, zarówno co do limitu temperatury podłogi, jak i obniżania temperatury.
Naprawdę trzeba stosować się do zaleceń dla konkretnej marki i modelu podłogi. Jeśli chodzi o obniżanie temperatury, nie należy ustawiać podłogi na 90 stopni przez wiele dni w ciągu dnia, a potem nagle wyjechać na weekend, całkiem ją wyłączyć, tak by temperatura spadła do 45 stopni, a po powrocie znów podkręcić ją do 90. Tego typu podłogi prawdopodobnie by to nie spodobało, więc trzeba przestrzegać wytycznych producenta i ustawić ogrzewanie odpowiednio.
Powiemy też trochę o wartości R. Być może słyszeli Państwo o wartości R dla izolacji ścian lub sufitów, ale w przypadku podłóg wartość R pomaga zrozumieć, jak będzie przenoszone ciepło – czy pójdzie w górę przez podłogę, czy zostanie wciągnięte w dół do podłoża. Omówimy również unikanie zatrzymywania ciepła, czyli żadnych dużych, ciężkich dywanów, akwariów z litym dnem ani dużych regałów, które zatrzymują ciepło.
Wrócimy do tego nieco później. Wystarczy upewnić się, że podłoga jest odsłonięta, aby ciepło mogło unosić się do pomieszczenia, i wszystko będzie w porządku.
Zdecydowanie. Oto pierwszy temat: winyl luksusowy. Sztywne podparcie jest obowiązkowe. Dawniej ludzie czasem kojarzyli winyl z winylem w arkuszach, bardzo giętkim i elastycznym, dostępnym w dużych rolkach.
Nie o tym mówimy. Mówimy raczej o podłogach LVP w postaci płytek lub desek. Ludzie często pytają: „Czy mogę po prostu rozwinąć waszą matę grzewczą – tę zieloną siatkową – i zatrzasnąć podłogę na swoim miejscu bezpośrednio na niej?”. Wydaje się to takie łatwe, ale niestety to nie jest właściwy sposób.
To absolutnie zabronione. Opowiedz nam więcej o tym, jak dochodzi do uszkodzenia. Mamy do czynienia z podłogą, której rdzeń jest winylowy. W pewnym momencie staje się on elastyczny – z powodu temperatury, długotrwałego ruchu albo po prostu po pięciu latach – i zaczyna wchłaniać wszelkie nierówności podłoża.
To naprawdę kluczowa kwestia. Jeśli przejrzą Państwo wytyczne montażu i wymagania dla dowolnego produktu winylowego, przekonają się, że producent wymaga, aby podłoże było absolutnie płaskie i równe. Dopiero wtedy podłogę można prawidłowo zamontować. Dlatego nie można jej układać bezpośrednio na systemie Environ, w którym są przewody. Z czasem te przewody utworzą wybrzuszenia, a niektóre deski mogą się nie zatrzaskiwać prawidłowo, ponieważ powierzchnia nie jest płaska.
Proste rozwiązanie to użycie maty TempZone. Matę TempZone można pokryć samopoziomującą masą cementową. Po jej pokryciu otrzymuje się idealnie płaską powierzchnię do pracy.
Oto dobry przykład przekroju przedstawiającego system podłogi z luksusowego winylu z zatrzaskowym połączeniem, zatopiony w półcalowej warstwie samopoziomującej masy cementowej. Zaletą jest to, że po zatopieniu całego systemu i wyschnięciu masy można po niej chodzić i układać podłogę. Jednak przed włączeniem ogrzewania trzeba chwilę poczekać. Należy układać warstwa po warstwie, prawidłowo, i upewnić się, że przestrzega się wytycznych producenta podłogi. Producent winylu może wymagać pokrycia systemu grzewczego 1,5 cala lub 5/8 cala samopoziomującej masy cementowej, albo sformułować to jako wykonanie separacji 5/8 cala.
To jest Państwa wskazówka co do ilości samopoziomującej masy cementowej nad produktem. Ostatecznie trzeba przestrzegać obu zestawów wytycznych – i pewnie powtórzymy to dziś wiele razy. Trzeba stosować się do instrukcji ogrzewania podłogowego WarmlyYours dla danego produktu, w której zalecamy minimalne pokrycie 3/8 cala, a jednocześnie trzeba przestrzegać wytycznych producenta podłogi.
Połączenie obu daje najpoprawniejszy montaż. Skoro mówimy o wylewaniu samopoziomującej masy cementowej, trzeba też porozmawiać o czynniku płaskości. Jak wspomnieliśmy, ważne jest, aby deski się zatrzaskiwały. Jeśli podłoga od początku jest nierówna, trzeba się upewnić, że zostanie wypoziomowana jeszcze przed rozpoczęciem prac.
Ważne jest też, że w dzisiejszych czasach, gdy wszyscy są zajęci, monterzy czasem dzwonią i po prostu mówią: „Hej, montuję podłogę pływającą”. Potrzebujemy więcej informacji, aby móc zaproponować i zaprojektować odpowiedni produkt, ponieważ samo słowo „pływająca” nie określa, jakie zastosowanie ani jaki produkt należy wybrać. Zagłębimy się w te różne opcje już za kilka slajdów.
Pokazujemy tu przekrój podłogi laminowanej: opcja A, bezpośrednio pływająca. Inną opcję omówimy później. Opcja A to tak zwana „kanapka Environ”, w której warstwa pływającej podłogi laminowanej na zatrzask leży na macie Environ. Pod tą matą Environ widać warstwę ThermalSheet. Używamy tej ćwierćcalowej podkładki, aby zapewnić amortyzację pod matą grzewczą, żeby przewody nie zostały zagięte ani nadepnięte.
Dodatkowo daje ona miejsce na poprowadzenie przewodów zasilających i czujnika. Kolejna ważna uwaga: podłoga laminowana może mieć określone ograniczenie temperatury. Jeśli wynosi ono 85 stopni lub 86, można to w kilka sekund ustawić w termostacie, ponieważ wszystkie nasze termostaty mają ustawienie ochrony podłogi.
Może to być ustawienie wstępne dla laminatu ze standardowym limitem lub ustawienie niestandardowe, które Państwo wprowadzą. Świetną funkcją w niektórych modelach, takich jak nasze urządzenia nSpire Touch, jest ochrona podłogi laminowanej. Po wybraniu tego ustawienia termostat prawidłowo ustawia limity i zapobiega wzrostowi temperatury szybszemu niż 10 stopni na godzinę. Jeśli Państwa podłoga tego wymaga, termostat to zapewnia. Oto opcja B.
To również dotyczy podłogi laminowanej, ale w stylu zatopionym. Przekonają się Państwo, że jest to bardzo częste przy tego typu podłogach pływających. Większość producentów uważa to za sprawdzoną metodę. Gdy wyleje się tę ładną warstwę samopoziomującej masy cementowej, cały system zostaje zatopiony.
Przy wylewaniu samopoziomującej masy cementowej warto pamiętać o kilku wskazówkach. Nie zapominajmy o gruntowaniu. Należy upewnić się, że monterzy podłogi wiedzą, iż nie mogą chodzić w butach z kolcami, bo mogliby uszkodzić przewody grzewcze. Podczas pracy z samopoziomującą masą cementową monterzy często używają ściągaczy i grabi. Wszyscy muszą pamiętać, że leży tam odsłonięty system grzewczy z kablami.
Nie chcemy, aby ktoś zamontował matę, wylał podkład samopoziomujący, a potem wszedł trzeci człowiek, by to wykończyć, i uszkodził produkt. Wszyscy na budowie muszą wiedzieć, co jest montowane. Dodam do tego, co powiedziałaś, Mary: dodatkową zaletą w pełni zatopionego systemu jest elastyczność. Jeśli zamontują Państwo laminat i po trzech latach uznają, że kolor jest zbyt ciemny i chcą jaśniejszy laminat, system grzewczy jest bezpiecznie zatopiony. Można zerwać stary laminat i położyć nowy.
Można położyć na nim wykładzinę albo praktycznie dowolną nową podłogę. To dodatkowa zaleta systemów zatopionych. Przechodzimy teraz do podłóg drewnianych.
Jeśli chodzi o podłogi drewniane, istnieje cała nauka o gatunkach, sposobach cięcia i szerokościach. Producenci podłóg doradzą Państwu w tym zakresie, ale możemy porozmawiać o stabilności. Wybierając drewnianą podłogę na ogrzewanie podłogowe, należy wybierać jak najbardziej stabilne drewno: dąb biały, czereśnię amerykańską, orzech lub mesquite – twarde gatunki o niskim skurczu. Niestabilne gatunki to lżejsze, bardziej miękkie drewno, takie jak klon i brzoza, które są bardziej podatne na działanie ciepła i wilgoci. Jeśli chodzi o szerokość desek, w przypadku drewna litego należy trzymać się maksymalnej szerokości około 3 cali, a dla drewna warstwowego około 5 cali.
Zapewni to prawidłowy montaż. Podłogi z drewna warstwowego również są zwykle pływające, choć czasem mogą być klejone. Jeśli jest pływająca, można ją zamontować na systemie podłogowym Environ. To montaż suchy. Ponownie, patrząc na ten przekrój, mamy drewniane lub betonowe podłoże, ThermalSheet, matę Environ, a na wierzchu podłogę.
Po prostu zatrzaskujemy ją bezpośrednio na systemie Environ, jak poprzednio. Tak. Podoba mi się, że zwróciłeś uwagę na klej – to bardzo ważne rozróżnienie dla systemu Environ, o którym teraz mówimy. Znowu mówimy oczywiście o zastosowaniu pływającym. Ale nic nigdy nie powinno być przyklejane do produktu Environ, prawda? To w pełni pływający układ.
Niczego się nie klei, niczego się nie przybija. To całkowicie pływający układ od samego dołu do samej góry. Bardzo dobrze. To znowu podobny przekrój, w którym mowa o tej ćwierćcalowej – przepraszam, półcalowej warstwie samopoziomującej masy cementowej. Pokazujemy więc podłoże, grunt, bardzo cienką matę TempZone, a potem warstwę masy samopoziomującej.
Trzeba uważać na wszelkie małe gwoździe lub otwory wentylacyjne w podłodze. Jeśli są kratki, należy zbudować tamę, aby wylewana masa wyrównująca nie rozlała się wszędzie. Tak, w zasadzie każdy, kto pracuje z samopoziomującą masą cementową, przygotowuje się na to. Ale tak, trzeba ustawić obrzeże. Trzeba wyznaczyć granice, aby wylewana masa samopoziomująca nie uciekała.
Właśnie. A przy montażu przybijanym jest to jeszcze ważniejsze, prawda? Bo przy podłodze przybijanej – oczywiście nie można wbijać gwoździ w elektryczny element grzejny, to byłoby bardzo złe – układa się legary lub łaty co, powiedzmy, 8 do 12 cali w osiach. Mata grzewcza lub kabel idą pomiędzy nimi.
A potem i tak wyrównuje się to samopoziomującą masą cementową. Tak, bardzo prosty montaż. Pracuje się w zasadzie w sekcjach, jak w małych kanałach lub polach między legarami. Zabawne jest to, że ogrzewanie wykładziny i ogrzewanie przybijanych podłóg drewnianych to chyba dwa zastosowania, o których ludzie myślą najrzadziej. Dokładnie.
Bo przy montażu przybijanym pojawia się pytanie: jak zamontować ogrzewanie podłogowe i przybijać gwoździe? Tak, to możliwe. Wystarczy przestrzegać właściwych wytycznych. To samo z wykładziną; jest do tego specjalny produkt. Absolutnie.
Dobrze, a oto zdjęcie naszego czujnika temperatury podłogi. Jest to bardzo ważne przy każdym rodzaju podłogi innym niż płytki. Porozmawiamy teraz o wilgotności względnej. Gdy myślimy na przykład o podłodze z drewna warstwowego albo nawet z drewna litego, w tej porze roku, zimą, gdy w styczniu na zewnątrz jest bardzo sucho, może być konieczne monitorowanie wilgotności w pomieszczeniu za pomocą małego higrometru. Może być też potrzebny nawilżacz, jeśli w tych miesiącach jest naprawdę bardzo sucho. Nie chcemy, aby w podłodze pojawiły się szczeliny ani nic podobnego.
A w lecie odwrotnie – nie chcemy, aby wilgotność względna w pomieszczeniu była zbyt wysoka. Dokładnie, dokładnie. Naprawdę trzeba po prostu – znowu zawsze wrócimy do konkretnych wytycznych od marki lub modelu podłogi, prawda? Mają one określone ograniczenia, a czasem może to być zapisane w zastrzeżeniach gwarancyjnych. Są określone limity temperatury i określone limity wilgotności.
Są one tam z konkretnego powodu. To materiał naturalny, naturalna drewniana podłoga, więc trzeba utrzymywać te parametry najlepiej, jak się da, aby przedłużyć jej trwałość. Widać tutaj, jak wycinamy mały kanał, aby nieco zagłębić końcówkę sondy. Dlatego zawsze potrzebna jest też podkładka – aby zapewnić mały kanał na końcówkę czujnika.
Jak wspomniano, w zasadzie otrzymuje się dwa czujniki, więc jeden czujnik umieszcza się w jednym miejscu, a zapasowy w nieco innym obszarze lub miejscu. Chyba omówimy to dziś kilka razy, ale z obu czujników podłączany jest tylko jeden. Drugi przewód po prostu zwija się i zabezpiecza w puszce na ewentualne przyszłe użycie. Dobra rada, dobra rada. O, proszę, już jest.
Pokazujemy tu ogrzewanie pod wykładziną. Przy ogrzewaniu pod wykładziną jest kilka rzeczy, o których zdecydowanie trzeba pamiętać. Numer jeden to przepisy. Tak, dotyczy to osób w USA. Niestety, dla naszych kanadyjskich przyjaciół ogrzewanie pod wykładziną nie jest dozwolone.
Bardzo nam przykro. Ale tutaj możemy to robić pod wykładziną, a na tym krótkim wideo widać, jak ktoś wykonuje łączenie wykładziny, bardzo uważając, aby nie uszkodzić mat grzewczych. Widać, że prowadzi za sobą coś, co pomaga mu wykonać to łączenie. Powiemy też, że pod wykładziną zawsze jest podkład, prawda? Tak, tak.
Widać go tam na niebiesko. Zdecydowanie trzeba się upewnić, że wybiera się dobry podkład, o wyższej wartości R, szczególnie na betonie, na przykład w piwnicy. Należy wybrać podkład o gęstości 6 do 8 funtów na stopę sześcienną, czyli dobry gumowany podkład poliuretanowy o wysokiej wartości R. A na wierzchu chcemy niskiej wartości R dla samej wykładziny, aby ciepło mogło przechodzić w górę. Dla uproszczenia: wartość R to wartość izolacji, prawda? Chcemy więc izolować od dołu, bo ciepło nie ma iść w dół.
Chcemy zmin