In This Article
You roll out of bed on a cold winter's morning, and your feet hit the cold hardwood floor. You run shivering to the shower, desperately hoping the water warms up quickly. Sound familiar?
This scenario is the reason why many homeowners install floor heating in their bedrooms. Instead of daily rude awakenings from the shock of cold floors, floor heating provides a warmer room environment while maintaining the attractive look and texture of a laminate or vinyl floor.
So, how do you install floor heating in a bedroom remodel?
In this post, we will give you step-by-step instructions for installing floor heating under both floating floors and vinyl tile floors, which are some of the most common flooring types used in bedroom remodels.
Because of the difference between engineered floors and vinyl tile, the method to install floor heating is slightly different if you are using floating laminate flooring or engineered floors vs installing luxury vinyl tile. We will give you step by step instructions for both, so if you are looking for installing under vinyl tile, scroll down to that header.
Preparing the Subfloor: Demolition and Cleanup
Demolition and cleanup is essential to any remodel, and floors are no different. When you have selected the rooms you want to install new floor heating in, remove and dispose of the old floor covering so that you can get down to the subfloor. Your subfloor will likely be a type of wood (such as compressed board) but it can also be cement board or even a cement slab. If you're installing a floor heating system on top of a cement slab, we definitely recommend the use of an insulating underlayment to create a thermal break which will prevent heat loss into the slab.

If needed, you may need to replace some or all of the subfloor, we recommend this DIY article on how to replace subflooring. Before you move onto the rest of the installation, make sure to clean the subfloor surface area, sand down any ridges that are too high, and fill in any holes in the subfloor.
Installing Under Floating Laminate Floors
Now that you have prepared the subfloor for installation, you need to install your electric floor heating system. In addition to the flooring material and the heating elements, you will need a thermostat with a floor sensor, underlayment, an ohmmeter, tape, and cutting instruments (utility knife or utility-grade scissors). For floating floors, you will be installing our Environ floor heating elements which are designed for this application (among others).
1. Test Materials
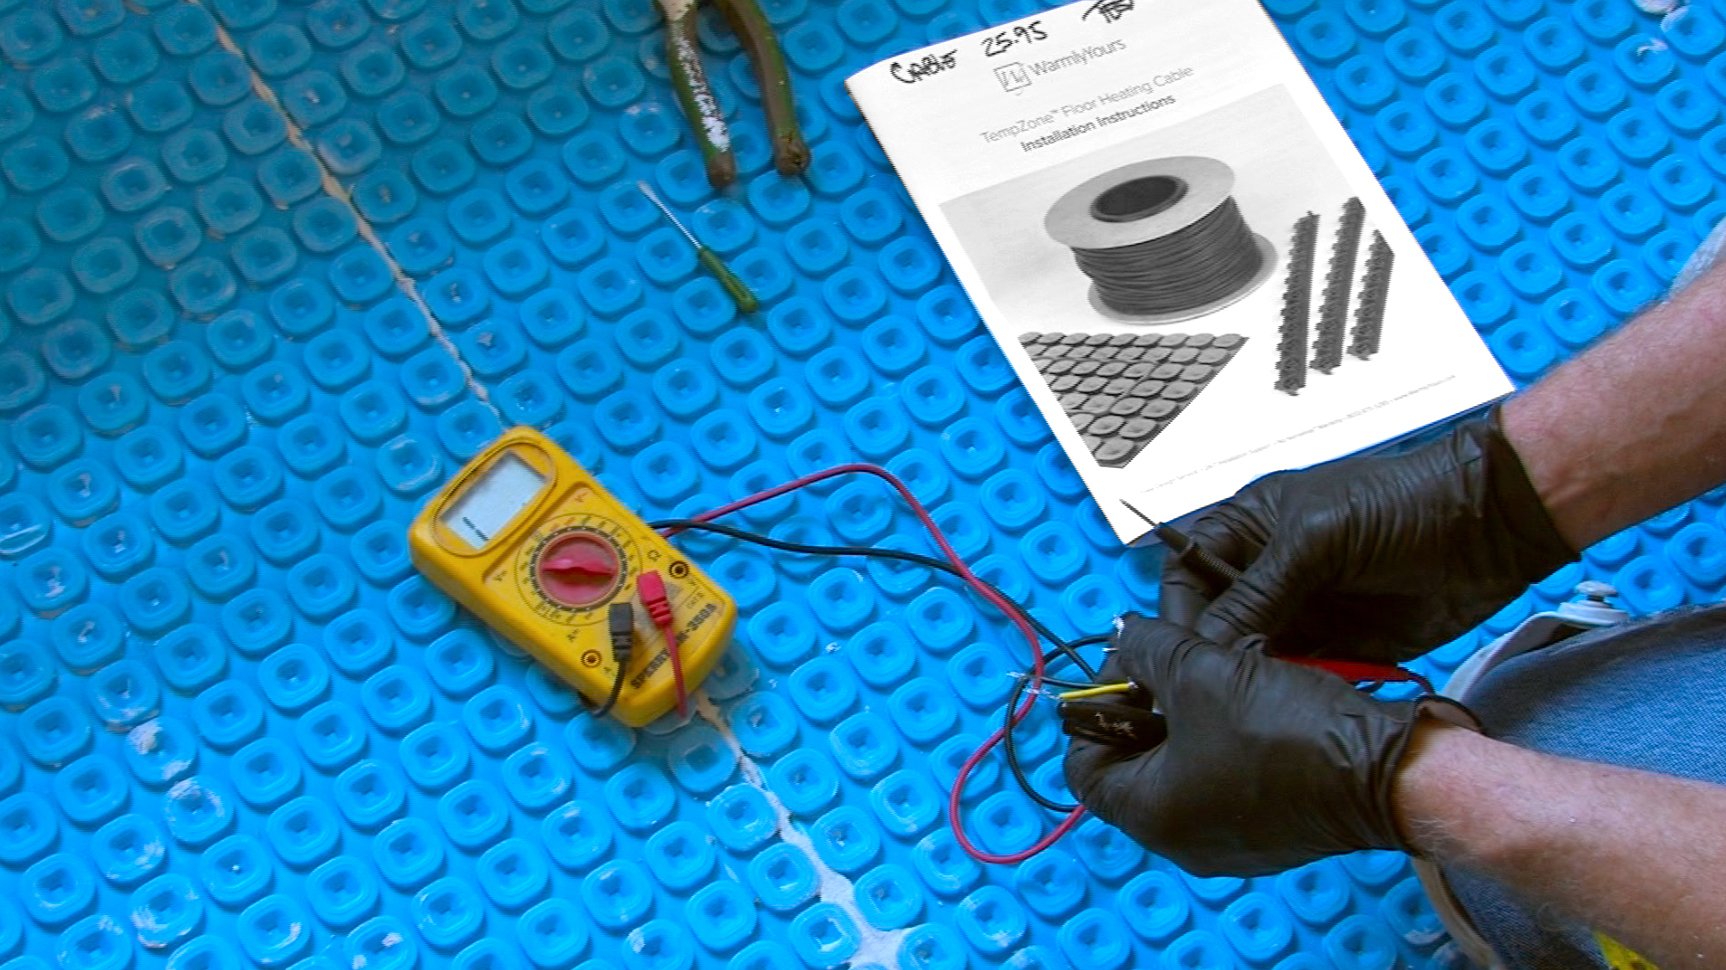
Since your electric floor heating will be installed under your floor, it is essential that you test it before you install it. The cold leads are the electrical cord that runs from the mat to your thermostat. Mats running on 240 volts, have red and black leads (with either a braided or green ground). Mats running on 120 Volts have yellow and black leads. Make certain that all your mats have the same lead color scheme; hooking up a 120 Volt to a 240 Volt system will cause significant problems, and vice versa.
Each mat's UL label has space to record your first reading and compare it to the factory recommended settings.
Since each room has a different number and layout of mats (according to your floor heating SmartPlan), test each mat and record the results.

2. Install Underlayment
Install the underlayment before you put down the mats. With floating floors, the electric heating mats go between the underlayment and the floor covering without the use of adhesives. The underlayment that we recommend for use with our Environ floor heating systems, which is our recommended system for floating floors, is cork. Besides helping improve the energy efficiency of the system, a cork underlayment also provides some cushioning for the heating wires. Additionally, the cork sheets we sell are thick enough that a channel can be cut into them so that the manufacturer's splice won't protrude out and potentially cause an uneven surface.
3. Position the Heating Elements
The next step will be to layout the Environ heating elements according to your WarmlyYours SmartPlan. If you're using Environ Flex Rolls, they can be installed using the "cut-and-turn" method.
Take care when cutting the Flex Rolls to not cut any heating wires, only the foil. To see this in action, you can watch our video tutorial on installing floating laminate floors.
4. Cut Channels for the Cold Lead/Manufacturer's Splice
Cut 1/2 inch wide strips in your underlayment to place the cold lead and manufacturer's splice in. These can be secured with duct tape. Then you will need to ensure that they all reach the box and test each mat again with your ohmmeter to ensure that there was no damage to the electrical system before you install the floor.
5. Install Flooring
At this point, you are ready to install your floating floor covering. Make sure to adhere to the manufacturer's guidelines during this stage.

6. Make Electrical Connections and Test One Final Time
Now it's time to connect the system. The final electrical connection should be done by a licensed electrician. It's important that they follow the instructions in your thermostat manual to attach the electrical wiring to the thermostat and ensure that there are good electrical connections and the system works.
Finally, test the heating elements one last time and record your readings.
Installing Under Luxury Vinyl Tile
While there are some similarities to installing bedroom underfloor heating beneath a floating laminate floor, there are some crucial differences when you are installing a Luxury Vinyl Tile (LVT) floor or any other floor on top of self-leveling cement. By embedding the heating elements in self-leveling cement, you'll achieve a flat surface to install the flooring on top of and, if you have relatively thin LVT, you won't have to worry the floor covering conforming around the cables from the heat.
1. Additional Floor Preparation
Because of the nature of liquid cement, you will need to both fill in any holes where liquid could seep out of the floor and prime the subflooring. This provides a base that you can lay your floor on.
2. Test Materials
For this install, we will be using the TempZone Flex Roll, which is our most popular floor heating element. Please note that this system has electrical data sheets that you need to keep in order to meet code requirements. One goes next to the breaker box and one is placed in the homeowner's installation manual. The sticker on the cold lead needs to be left within 3 inches of the thermostat for home inspections.
The color of the cords is the same schematic as the Environ mats: red and black are for 240 Volts, yellow and black are for 120 Volts. Test the wires with your ohmmeter and ensure they all meet the recommended readings on the product labeling. Your ohmmeter should read 0 or O/L from red and black to ground.
3. Roll Out Mats and the Place Floor Sensor
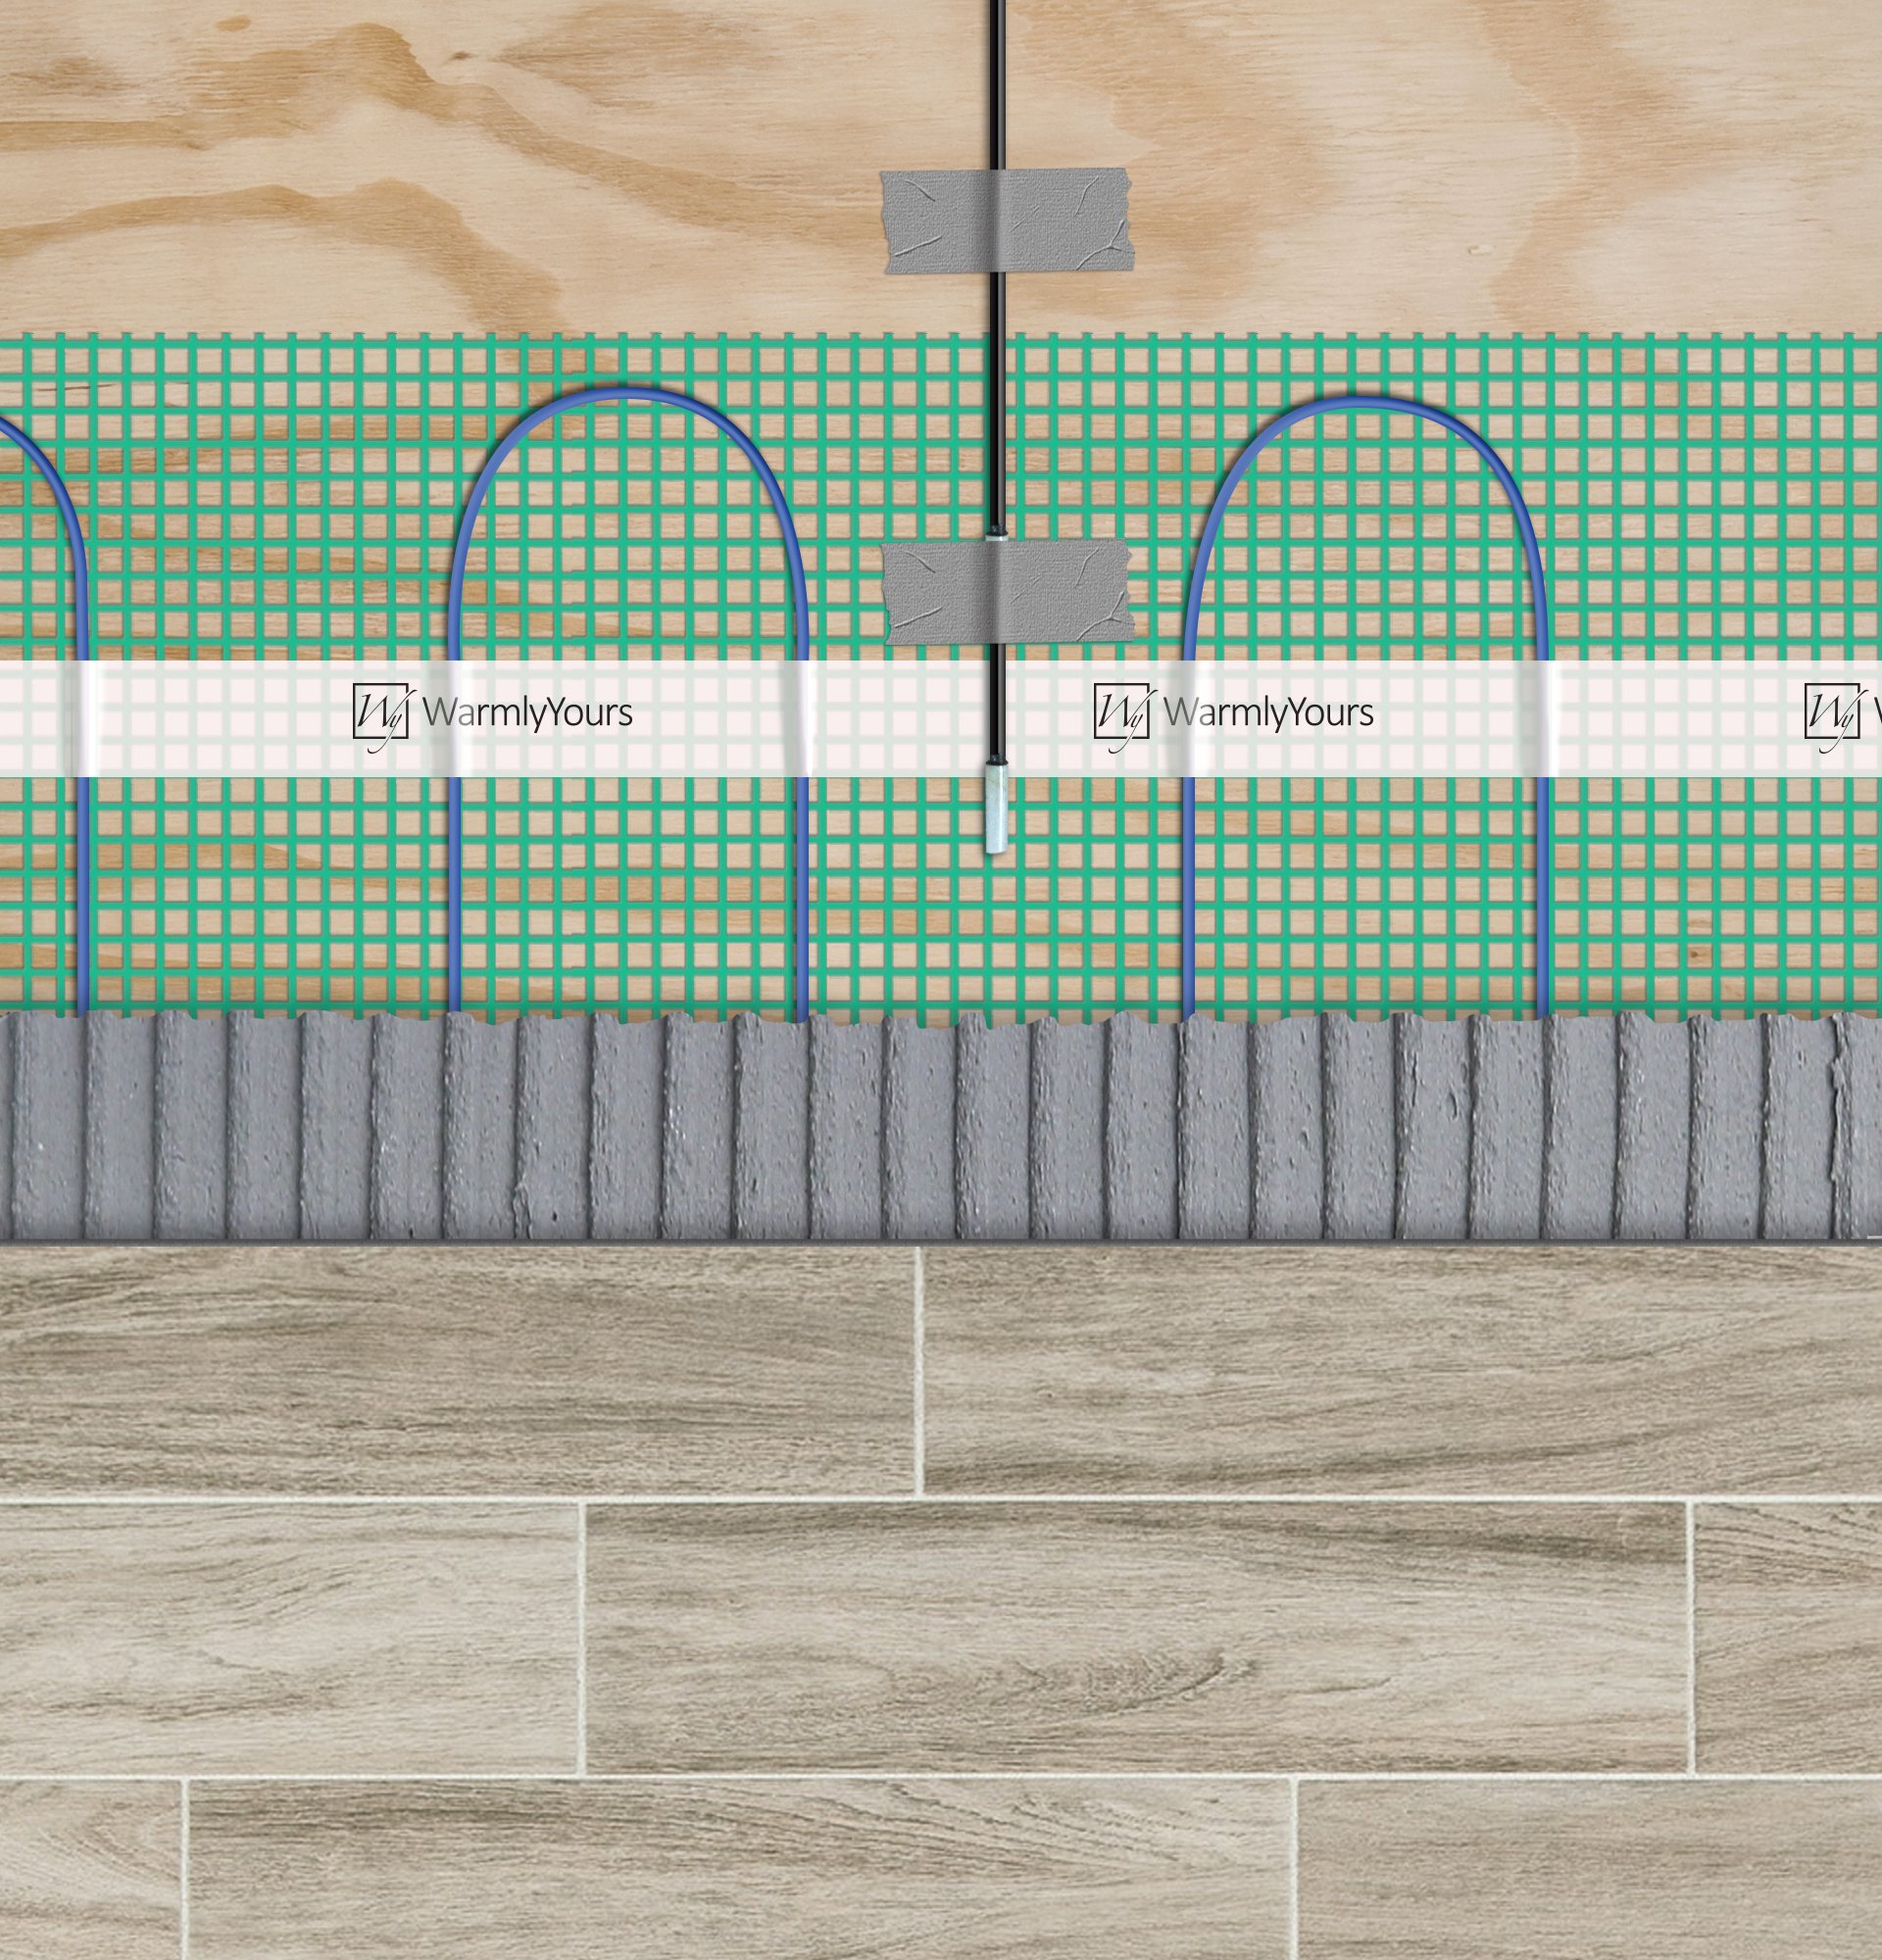
The TempZone flex rolls must be rolled out, according to your WarmlyYours SmartPlan, with the mesh on top and the wire facing the subfloor. This helps protect the heating cable from damage from above during installation.
When cut-and-turning the roll, make certain to never cut a heating wire, only cut the mesh and then gently move the roll to change directions.

The sensor needs to be about 6 inches into the heating area and evenly spaced between the wires. Make certain your sensor runs parallel to the wires. This placement will make sure you get the most consistent (and accurate) reading of the floor temperature for optimal performance for your heating system.
4. Attach Rolls to Subfloor
Using construction staples or hot glue, attach the mesh (never staple, strike or cut the heating wires in any of our products) to the subfloor. Use the amount needed to ensure that the product lies flat along the floor with consistent spacing.
5. Recheck Materials
Make sure to double-check that everything works and that the cords can reach your thermostat before moving to the next step. Recheck the ohms readings for all heating elements and record your readings.
6. Install Self-Leveling Cement
At this point, you can mix and pore the self-leveling cement according to its instructions. If you want to see what the pour process looked like on one of the heating installs we did recently, watch our video on installing floor heating in a luxury vinyl tile room.
After pouring the cement, you need to let it set/cure for the time recommended by the manufacturer. It's very important that you do not turn the heating system on before the adhesive has completely cured or it can become very brittle.
7. Install Flooring
Now is the time to install the floor covering according to the manufacturer's instructions.

8. Make Electrical Connections and Test Heating Elements
Your last steps are to have a licensed electrician make the final electrical connections for the system (connecting the heating elements to the thermostat) and then you or they can test the system with the ohmmeter and document the readings in the homeowner's copy of the installation manual.
Enjoy Your Warm Floor
You now have an installed heating system under your floor! Whether you are using it as a supplement to your forced air heating or as your primary heating for your room, you are ready to move onto the next stage: enjoying heated floors. Now, you can roll out of bed in the morning and enjoy comforting cozy heat as you begin your morning routine.
In addition to bedrooms, our electric floor heating systems can also be installed in any other room in the house and customized according to your needs. If you are ready to start pricing out your home remodel and planning the transformation of your cold bedroom into a friendly, warm environment, use our Radiant Floor Heating Quote Builder to estimate how much a floor heating system would cost for your own bedroom!
Have Questions About Your Project?
Our team of Radiant Experts is ready to help!
Stay Updated
Get the latest radiant heating news and tips delivered to your inbox.


