
Tech Tips: Wiring a Floor Sensor to a Thermostat
Expert Tips for Thermostat Sensor Wiring Simplified
Are you tired of enduring cold floors during chilly mornings? Want to make your home's heating system more efficient without the hefty price tag?
Our step-by-step guide to wiring a thermostat sensor for your radiant floor heating system is here to help. By following our instructions, you'll master the art of connecting your thermostat sensor, ensuring a cozy, energy-efficient home environment. Not only will you save on potential contractor fees, but you'll also enjoy the luxury of warm floors, enhancing your home's comfort and value.
In this video, we cover everything you need for a successful installation:
- 💡 Understand the wiring terminal block in your thermostat for seamless connections
- ✅ Learn how to use the provided tools for precise sensor wire installation
- 🔥 Discover tips for organizing wires for a neat, professional finish
- 🏠 Ensure your thermostat is ready for operation with easy-to-follow steps
- 🌡️ Maximize efficiency by properly utilizing sensor pins and terminals
By following these expert techniques, you'll transform your home into a haven of radiant warmth and enjoy the benefits of reduced energy consumption, increased home value, and unparalleled comfort.
Transcript
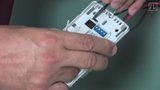
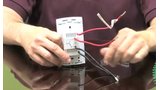
Today, we're going to discuss how to connect the thermostat sensor to our thermostat. On the back of the thermostat, you'll notice four wires. Two of these wires are connected to the circuit breaker, while the other two are designated for the heating system in the floor. However, our focus today will be on the connections for the thermostat sensor, which are located behind the faceplate of the unit.
The connections for the thermostat sensor are made on a small wiring terminal block situated at the bottom of the thermostat. Specifically, the sensor wires need to be connected to pins one and two, as pin number three is not utilized. When you examine the back of the sensor, you'll see that it has two wires that must be connected to terminals one and two.
To facilitate this connection, you'll need to feed the wires through the small holes located in the base of the thermostat. These holes are designed to allow you to route the wires into sections one and two, or Terminal 1 and 2, ensuring a secure connection. The thermostat package includes a small screwdriver, which is specifically provided for this purpose.
Using this screwdriver, you can make the necessary connections for your thermostat sensor. Once the sensor wire is properly connected, you can pull it out gently, allowing you to reattach the faceplate of the thermostat. After completing these steps, your thermostat will be ready for operation.
Aujourd'hui, nous allons voir comment connecter le capteur du thermostat à notre thermostat. À l'arrière du thermostat, vous remarquerez quatre fils. Deux de ces fils sont reliés au disjoncteur, tandis que les deux autres sont destinés au système de chauffage du plancher. Cependant, nous nous concentrerons aujourd'hui sur les connexions du capteur du thermostat, qui se trouvent derrière la plaque frontale de l'appareil.
Les connexions du capteur du thermostat se font sur un petit bornier de câblage situé au bas du thermostat. Plus précisément, les fils du capteur doivent être connectés aux broches 1 et 2, la broche 3 n'étant pas utilisée. Si vous examinez l'arrière du capteur, vous verrez qu'il comporte deux fils qui doivent être connectés aux bornes un et deux.
Pour faciliter cette connexion, vous devrez faire passer les fils par les petits trous situés à la base du thermostat. Ces trous sont conçus pour vous permettre d'acheminer les fils dans les sections un et deux, ou les bornes 1 et 2, afin d'assurer une connexion sûre. L'emballage du thermostat comprend un petit tournevis spécialement conçu à cette fin.
À l'aide de ce tournevis, vous pouvez effectuer les connexions nécessaires pour le capteur de votre thermostat. Une fois que le fil du capteur est correctement connecté, vous pouvez le retirer délicatement, ce qui vous permet de fixer à nouveau la plaque frontale du thermostat. Après avoir effectué ces étapes, votre thermostat sera prêt à fonctionner.
Hoy, vamos a discutir cómo conectar el sensor del termostato a nuestro termostato. En la parte trasera del termostato, verás cuatro cables. Dos de estos cables están conectados al disyuntor, mientras que los otros dos están destinados al sistema de calefacción del piso. Sin embargo, hoy nos centraremos en las conexiones para el sensor del termostato, que se encuentran detrás de la placa frontal de la unidad.
Las conexiones para el sensor del termostato se realizan en un pequeño bloque de terminales de cableado situado en la parte inferior del termostato. En concreto, los cables del sensor deben conectarse a las patillas uno y dos, ya que la patilla número tres no se utiliza. Al examinar la parte posterior del sensor, verá que tiene dos cables que deben conectarse a los terminales uno y dos.
Para facilitar esta conexión, tendrá que pasar los cables a través de los pequeños orificios situados en la base del termostato. Estos orificios están diseñados para permitirle pasar los cables por las secciones uno y dos, o terminales uno y dos, garantizando una conexión segura. El paquete del termostato incluye un pequeño destornillador, que se proporciona específicamente para este propósito.
Con este destornillador, podrá realizar las conexiones necesarias para el sensor del termostato. Una vez que el cable del sensor esté correctamente conectado, puede tirar de él suavemente, lo que le permitirá volver a colocar la placa frontal del termostato. Tras completar estos pasos, su termostato estará listo para funcionar.
Dzisiaj omówimy sposób podłączenia czujnika termostatu do naszego termostatu. Z tyłu termostatu widoczne są cztery przewody. Dwa z tych przewodów są podłączone do wyłącznika automatycznego, podczas gdy pozostałe dwa są przeznaczone do systemu ogrzewania podłogowego. Jednak dzisiaj skupimy się na połączeniach czujnika termostatu, które znajdują się za płytą czołową urządzenia.
Połączenia czujnika termostatu są wykonane na małej listwie zaciskowej okablowania znajdującej się w dolnej części termostatu. W szczególności przewody czujnika należy podłączyć do pinów jeden i dwa, ponieważ pin numer trzy nie jest używany. Po sprawdzeniu tylnej części czujnika można zauważyć, że ma on dwa przewody, które należy podłączyć do zacisków jeden i dwa.
Aby ułatwić to połączenie, należy przeprowadzić przewody przez małe otwory znajdujące się w podstawie termostatu. Otwory te zostały zaprojektowane tak, aby umożliwić poprowadzenie przewodów do sekcji pierwszej i drugiej lub zacisków 1 i 2, zapewniając bezpieczne połączenie. W zestawie z termostatem znajduje się mały śrubokręt, który jest przeznaczony specjalnie do tego celu.
Za pomocą tego śrubokręta można wykonać niezbędne połączenia czujnika termostatu. Po prawidłowym podłączeniu przewodu czujnika można go delikatnie wyciągnąć, umożliwiając ponowne przymocowanie płyty czołowej termostatu. Po wykonaniu tych czynności termostat będzie gotowy do pracy.
Related Resources
-
Video
How to Wire a Floor Sensor to a nSpiration Series Thermostat
Master the art of wiring a floor sensor to your nSpiration thermostat. Enjoy cozy, energy-efficient floors today! 🔥 Watch now!
-
Video
How to Wire A Floor Heating Thermostat
Master thermostat wiring for radiant floor heating. Boost comfort & efficiency today! 📈 Watch now for expert tips & tricks.
Related Questions
Showing all 4 questions
WarmlyYours has recently begun including floor sensors with our heating elements to help ensure customers will have everything they need for optimal operation of their radiant heating systems.
The sensor included with your floor heating element can be installed with the heating system (the sensor is equally spaced between runs of the heating wire--see your install manual for more info). Installing this sensor with your floor heating control will enable energy efficient operation of the floor warming system based on the floor temperature instead of the ambient room temperature.
We generally recommend that you install a second, unconnected backup floor sensor alongside the primary one. In the very unlikely event that your first floor sensor is damaged, this install method will save you from having to pry up flooring to replace a floor sensor. You simply disconnect the damaged sensor from the thermostat and connect the backup sensor.
In addition to the floor sensor that was included with your heating element, our nSpiration Series thermostats also come with a floor sensor. If you purchase both a heating element and an nSpiration Series thermostat from WarmlyYours, you'll have a primary and a backup floor sensor for your system.
A floor sensor is a critical component that monitors the actual temperature of your flooring material. It communicates directly with the thermostat to ensure your floors reach your desired comfort level without overheating. This precise control protects your flooring and maximizes energy efficiency by only heating when necessary.
Menu > Installer Settings > Sensor Application > Select Floor > Press checkmark to save.
See video here: https://www.warmlyyours.com/en-US/videos/switching-modes
Need Help with Your Project?
Our team of Radiant Experts are ready to help! Contact us about your project to get started.
Contact Us About Your Project