

Heat Tape for Pipes & Pipe Freeze Protection
Frozen pipes can restrict water flow and cause serious damage when they burst. WarmlyYours heat tape for pipes provides reliable pipe freeze protection for exposed or poorly insulated plumbing throughout your home.
Choose self-regulating heat tape—which adjusts wattage based on ambient temperature to minimize energy use—or our constant-wattage heating cable for pipes, a simple and economical DIY option.
Why Install Heat Tape for Pipes?
Choose heat tape and insulation for your pipe material, diameter, and lowest expected temperature. Operating cost depends on cable power, run time, and your electricity rate.
Prevent Burst Pipes
Frozen pipes that burst cause thousands in water damage. Heat tape keeps pipes above freezing so pressure never builds.
Keep Water Flowing
Maintain water supply to your home even in the coldest temperatures—no more frozen faucets or lost service.
Easy to Install
Install cable along the pipe using the layout, attachment method, and insulation specified in its installation manual.
Self-Regulating Options
Our self-regulating cable automatically adjusts heat output based on temperature, using only the energy it needs.
Safety Certified
cULus listed (self-regulating) and cUL/CSA/cETLus listed (constant wattage)—independently tested for safe operation.
Industry-Leading Warranty
10-year warranty on self-regulating cable and 2-year warranty on plug-in pipe heat tape kits. Inspect the installation before each heating season.
Heat Tape for Pipes Customer Reviews
We take pride in providing both exceptional service and great products. But don't just take our word for it, check out what some of our customers have had to say.


Heat Tape for Pipes
Choose PRO-Tect Self-Regulating Heat Tape for Pipes for cut-to-length pipe heating cable, or PRO-Tect Plug-In Heat Tape for Pipes for a preassembled system. Plug-in pipe heat cable uses 7 W/ft constant wattage with a built-in thermostat; self-regulating cable adjusts output with temperature. Confirm pipe material, insulation, voltage, and circuit requirements before ordering.
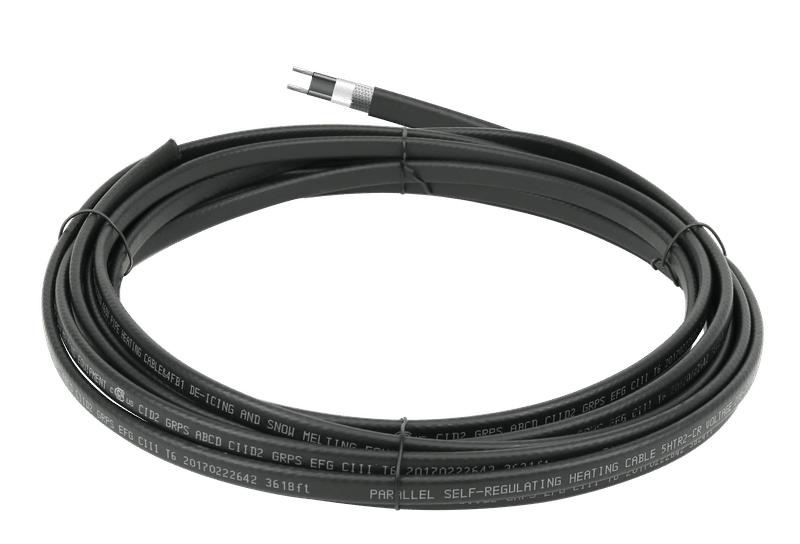
Self-regulating pipe heating cable — select wattage, voltage, and insulation for your installation
Self-regulating pipe heating cable — select wattage, voltage, and insulation for your installation
Features
- Cables spools length available in 50′, 100′, 250′, 500′ and 1,000′
- Options for 120, 208, 240, and 277 voltages
- Automatically varies wattage for optimal energy savings
- Can be overlapped or criss-crossed
- Safe: cUlus Listed
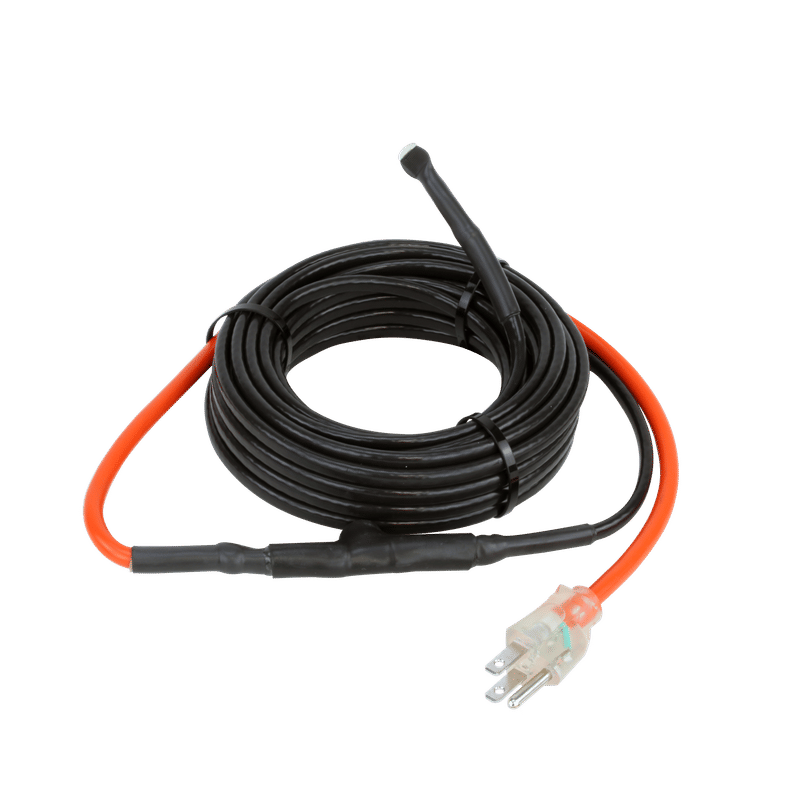
Preassembled pipe heating cable — 7 W/ft constant wattage, built-in thermostat
Preassembled pipe heating cable — 7 W/ft constant wattage, built-in thermostat
Features
- Easy plug-in operation with indicator light and integrated thermostat
- Available in 3′, 6′, 9′, 12′, 15′, 18′, 24′, 30′, 40′, 60′, and 80′ lengths
- Stops pipes from freezing at temps as low as -40°F/-40°C
- 7 watts per linear foot (constant wattage)
- Safe: cCSAus listed
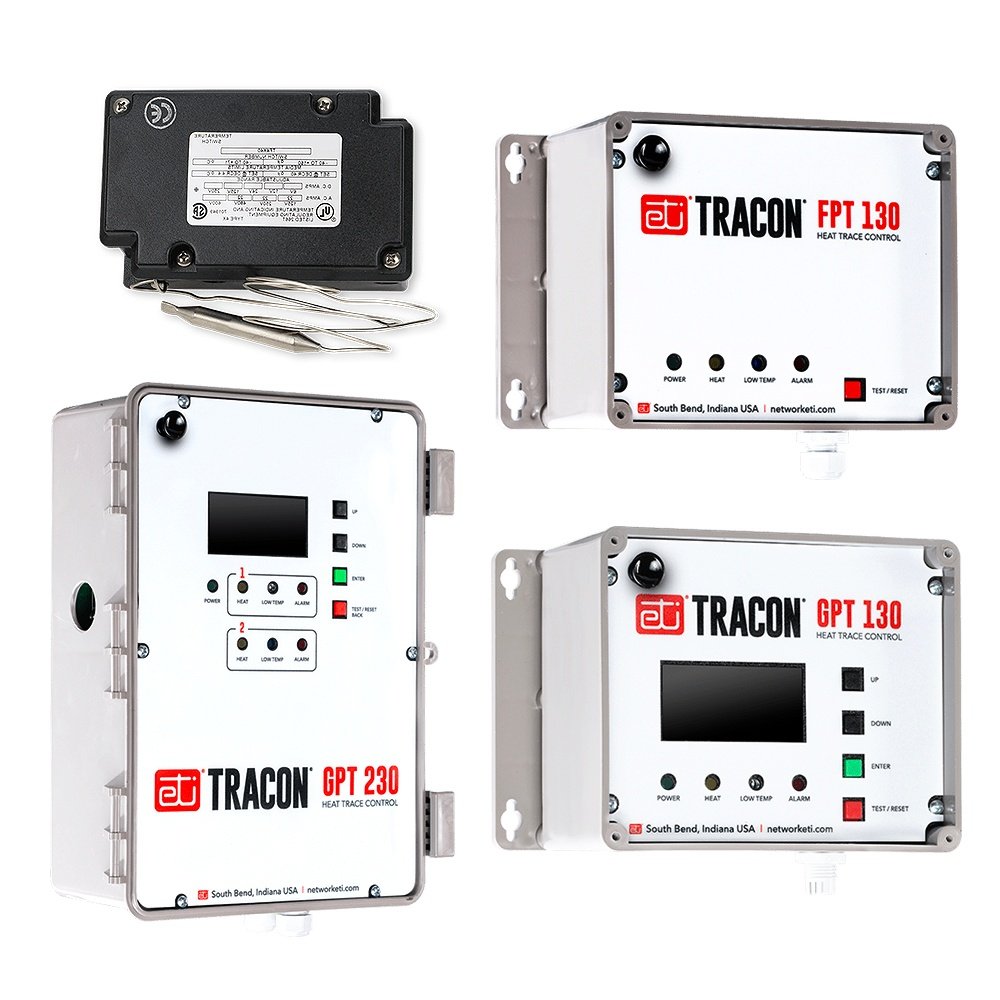
Get a Free Quote!
Provide us with measurements of the pipes you want to protect and receive a free quote within one business day.
How to Install Heat Tape for Pipes
The installation process will differ somewhat depending on which type of heat tape for pipes you select (constant wattage vs. self-regulating) so you should always defer to the specific installation instructions for that particular product type. However, here are some general steps:
Measure
It's important to measure both the length of the pipe and the width/diameter to ensure that your heating element is the correct size for the project.
Test
Check that the heating elements are working properly.
Clean
Make sure that the pipe and the area around it has been cleared of any debris or obstructions that might interfere with the installation. Cleaning the pipe will also make it easier to adhere the cable with fiberglass tape.
Dry-fit
It's a good idea to do a test fitting of the cable to make sure everything lines up properly. The layout of the pipe will depend on the product type and the type of pipe so make sure to refer to your installation instructions.
Secure
Once you're happy with the layout, you can secure the cable to the pipe (typically with a heat resistant tape like fiberglass tape).
Insulate
The next step is to wrap the pipe and the heating cable with insulation. This helps retain the heat generated by the tape, reducing energy consumption and ensuring more consistent protection.
Connect
The final step is to connect the system to its power supply. For our constant wattage kits, this is a simple plug-in. For the self-regulating product, we do recommend that a licensed electrician make the final connections.
Types of Heat Tape for Pipes
There are two main types of pipe freeze protection cables: self-regulating and constant wattage. Here's how they compare to each other.
Self-Regulating Heat Tape
Automatically adjusts its heat output based on the ambient temperature, increasing heat as temperatures drop and decreasing it as they rise.
Ideal for pipes that require variable heat output depending on environmental conditions.
Advantages:
Energy-efficient due to its ability to adjust heat output.
Reduces the risk of overheating and energy waste.
Disadvantages:
Generally more expensive upfront than constant wattage tape.
Final connections should be done by a licensed electrician (which generally involves added project costs).
Constant Wattage Heat Tape
Delivers a consistent amount of heat regardless of the surrounding temperature.
Best suited for situations where a steady and uniform heat output is required.
Advantages:
Simple and consistent heating, making it reliable in stable environments.
Typically less expensive than self-regulating options.
Disadvantages:
Can lead to higher energy consumption as it doesn't adjust to temperature changes.
May overheat if used in warmer conditions or improperly installed.
Choosing the Best Option for Your Needs
Consider Your Climate: For regions with fluctuating temperatures, self-regulating heat tape offers better adaptability and energy efficiency. In consistently cold environments, constant wattage heat tape might provide the steady protection needed.
Evaluate Installation Complexity: If you prefer a more straightforward installation process and consistent performance, constant wattage heat tape may be the best choice. For those looking for long-term energy savings and are comfortable with a more complex installation, self-regulating heat tape is ideal.
Assess Your Budget: Constant wattage heat tape is often more budget-friendly upfront, while self-regulating tape may save on energy costs over time, offering better long-term value.
Preventing Frozen Pipes: Additional Tips
In addition to installing a pipe freeze protection system, there is one primary action you can take to prevent a frozen pipe. Improve the insulation in the room that your pipe is located in. By improving the insulation, you will also help improve the efficiency of the heating system itself.
Upgrading a room's insulation can take a lot of different forms including adding spray insulation (if not present) or replacing outdated windows with more insulative ones. But whatever form it takes, these extra steps can greatly improve the performance of your heating system.
Videos
Documents

PDF

PDF
Heat Tape
Provides direct, consistent heat along the length of the pipe, preventing freezing even in extreme conditions. Available in self-regulating and constant wattage options to suit different climates and needs.
Directly heats the pipe, ensuring targeted and effective freeze prevention.
Provides precise heating exactly where needed
Works well in extremely cold conditions.
Maintains effectiveness even in sub-zero temperatures
Requires a generally more complex installation process.
May need professional installation for optimal results
Higher upfront cost compared to simpler insulation methods.
Initial investment is higher but provides active heating
Pipe Sleeves (Insulation)
Made from materials like foam or rubber, pipe sleeves provide insulation to keep pipes warm by trapping heat. Best suited for milder climates or as an additional layer of protection in combination with heat tape.
Easy to install and cost-effective for general pipe protection.
Simple DIY installation with minimal tools required
Provides energy-efficient insulation, reducing heat loss.
Passive protection that helps retain existing heat
Less effective in extremely cold conditions without supplemental heat.
May not provide sufficient protection in severe weather
Does not provide active heating, making it unsuitable for the coldest environments.
Relies solely on insulation without generating heat
Heating Lamps or Space Heaters
Used to warm the air around pipes, particularly in small, enclosed spaces like crawl spaces. Can be effective but inefficient and less targeted compared to heat tape.
Easy to set up and useful in emergency situations or temporary solutions.
Quick deployment when immediate protection is needed
Provides ambient heat, which can protect multiple pipes in a small area.
Covers a broader area with a single heat source
Less efficient and potentially unsafe if not used carefully.
Requires constant monitoring and safety precautions
Can be costly to run continuously and less effective for targeted pipe protection.
Higher operational costs and less precise heating
Frequently Asked Questions
Showing 10 of 13 questions
Follow the operating instructions for the exact cable and thermostat. A preassembled PRO-Tect pipe kit has a built-in thermostat; self-regulating cable adjusts its output but has separate system requirements. Neither feature removes the need for the specified electrical protection, correct insulation, and seasonal inspections. Disconnect damaged equipment and investigate tripped protection devices.
Heat tape is electrical equipment: improper installation, damaged cable, or misuse can cause fire or electric shock. Select cable approved for your pipe and location, follow its layout and insulation requirements, provide the specified electrical protection, and inspect it before each cold season. Do not use damaged equipment or overlap cable unless the exact product instructions permit it.
Pipe heat tape is intended for freeze prevention, not as a guaranteed way to thaw an already frozen pipe. A frozen pipe may be damaged. Have the plumbing assessed and thawed safely by a qualified professional; never use an open flame. Before future cold weather, verify cable selection, thermostat placement, insulation, and electrical protection.
Water in pipes begins to freeze at 32°F (0°C), but pipes typically don't freeze until sustained temperatures drop below 20°F (-6°C) for 6+ hours.Freezing timeline:
- 32°F (0°C): Water starts to freeze at the pipe surface
- 20°F (-6°C): Pipes in uninsulated areas freeze within 6 hours
- 0°F (-18°C): Pipes freeze rapidly (2–3 hours in uninsulated areas)
- Below -10°F (-23°C): Even insulated pipes risk freezing
Factors affecting freezing time:
- Pipe insulation (insulated pipes freeze slower)
- Water flow (running water freezes slower than stagnant water)
- Pipe location (exterior walls freeze faster than interior)
- Pipe material (copper conducts cold faster than PVC)
- Wind chill (wind accelerates heat loss)
High-risk conditions:
- Sustained temps below 20°F (activate heat tape)
- Wind chill below 0°F (increase heat tape runtime)
- Pipes in uninsulated areas (always use heat tape)
- Overnight freezes (pipes freeze while you sleep)
Protection threshold: Activate heat tape when temperatures are forecast to drop below 20°F for more than a few hours. Smart controls automate this process. Shop controls.
Some preassembled plug-in pipe heat-tape kits can be installed by a homeowner who can follow the complete product instructions. Cable type, pipe material, access, insulation, and electrical requirements determine whether a particular project is suitable. Do not use a generic spiral-wrapping pattern or cut, cross, or overlap cable unless the exact product instructions allow it. New circuits and hardwired connections require a qualified electrician where local rules specify one. Use the specified ground-fault protection. If the pipe is already frozen or damaged, have a qualified professional assess it before proceeding.
Heat tape can help prevent exposed water pipes from freezing when the system is correctly selected, installed, insulated, and controlled. Choose cable approved for the pipe material, diameter, location, and lowest expected temperature. Compatibility with copper, PVC, PEX, or other materials depends on the exact product; no single heat tape is suitable for every pipe. Follow the cable and pipe manufacturers’ instructions, provide the specified electrical protection, and inspect the installation before each cold season. Heat tape does not guarantee protection against every freeze condition or replace a properly designed plumbing installation.
Heat tape transfers electrical heat to a pipe to help keep its contents from freezing. Self-regulating cable changes its output as surrounding conditions change; constant-wattage cable produces its rated output while energized. A thermostat or specified control determines when the system runs. Cable routing, insulation, and thermostat placement depend on the product. Do not assume the cable should spiral around a pipe, or that it can be cut, crossed, or overlapped. Follow the selected cable’s installation manual and the pipe manufacturer’s temperature limits.
There is no universal service life for heat tape. Durability depends on the product, installation, exposure, operation, and maintenance; a warranty is not a prediction of how long a cable will operate. Inspect the cable, insulation, attachments, thermostat contact, and electrical protection before each cold season, following the manufacturer’s instructions. Stop using damaged equipment and replace it as directed. Check the warranty and maintenance instructions for the exact pipe-heating product rather than relying on a general lifespan estimate.
A pipe heat-tape project includes the heating cable or kit, required controls and connection accessories, approved insulation, and any electrical or installation work. Price depends on pipe length and material, cable type, access, voltage, and available circuits. A cable-only price is not an installed-project estimate. Measure the pipes and check the selected product’s requirements before ordering. For current product options and a quote covering your installation, visit our heat tape for pipes page.
For constant-wattage cable, estimate electricity cost as cable length × watts per foot ÷ 1,000 × energized hours × your price per kWh. For example, a 30-foot cable rated at 7 W/ft uses 1.68 kWh over eight energized hours. At an illustrative $0.20/kWh, that costs about $0.34. This is an example, not a typical daily bill. Thermostat cycling changes energized hours, and self-regulating cable changes output with conditions. Use the selected product’s ratings, local electricity rate, and expected runtime to estimate your installation.
Pipes freeze when water inside them is exposed to temperatures below 32°F (0°C) for extended periods, typically in poorly insulated areas like crawl spaces, attics, exterior walls, or unheated garages.Common causes of frozen pipes:
- Poor insulation (pipes in uninsulated walls, attics, or crawl spaces)
- Extreme cold (temperatures below 20°F for 6+ hours)
- Inadequate heat (unheated rooms, broken heating systems)
- Stagnant water (non-flowing water freezes faster than running water)
- Proximity to exterior walls (pipes on outside walls lose heat faster)
- Lack of protection (pipes without insulation or heat tape)
Why pipes freeze:
Water expands as it freezes, creating pressure inside the pipe. This pressure can rupture the pipe, causing water damage, mold, and costly repairs.Prevention strategies:
- Install heat tape (most effective for vulnerable pipes)
- Add insulation (pipe sleeves or foam wrap)
- Improve room insulation (seal cracks, upgrade windows)
- Keep pipes warm (maintain room temperature above 55°F)
- Allow water to flow (running water is harder to freeze)
Get a free quote to protect your most vulnerable pipes.
Heat tape and heating cable are common names for these electric heating products. The main difference is how they produce heat.
- Self-regulating cable: Heat output changes with local cable temperature. It still needs the controls, circuit protection, attachments, and insulation specified for the exact product and application. Self-regulating does not mean risk-free: damaged cable or incorrect installation can create an electrical or fire hazard.
- Constant wattage cable: Produces its rated watts per foot while energized. A thermostat or other specified control determines when it runs. Preassembled plug-in products have fixed lengths; follow the manual and do not cut or overlap them unless the exact product instructions permit it.
Choose a product approved for your pipe or roof material, location, voltage, and installation method. Pipe and roof products are not interchangeable. Compare installed cost and electricity use for your actual cable length, output, weather, and operating hours; there is no universal energy-savings percentage or payback period. Warranty length is not a guaranteed service-life estimate.
Compare Heat Tape for Pipes, Roofs & Gutters and follow the product installation manual.
Turn on heat tape when temperatures drop to 20°F (-6°C) or below and are expected to stay there for 6+ hours. For optimal protection, use automatic controls that activate cables based on temperature conditions.Manual operation:
- Turn on: When temps forecast to reach 20°F or below for extended periods
- Turn off: When temps rise above 40°F and stay there for 24+ hours
- Monitor: Check daily during cold snaps
Automatic operation (recommended):
- Thermostat control: Activates at preset temperature (typically 32–40°F)
- Smart control: Remote monitoring and weather-based activation
- Timer control: Set schedule for coldest overnight hours
Optimal operating temperatures:
- Below 20°F: Peak freezing risk (heat tape should run continuously)
- 20–32°F: Moderate risk (run heat tape, especially overnight)
- Above 32°F: Lower risk, but vulnerable pipes may still need protection
Operating tips:
- Start early: Turn on heat tape before temperatures drop for best results
- Run overnight: Pipes freeze most often during coldest overnight hours
- Extend runtime: Keep heat tape on until temps stay above 40°F for 24+ hours
- Don't turn off too early: Pipes can freeze during brief cold snaps
When to activate by region:
- Northern climates: October–April (extended winter season)
- Moderate climates: November–March (core winter months)
- Southern climates: December–February (occasional freezes)
Energy-saving tip: Smart controls can reduce operating costs by 30–50% by running cables only when needed. They monitor weather forecasts and activate automatically. Shop control options.
Emergency activation: If you forgot to turn on heat tape and temps drop suddenly, activate immediately and let water drip from faucets until pipes warm up.
Choosing Heat Tape for Your Project
Compare applications in our heat tape guide, or explore heat tape for roofs and gutters and snow melting for outdoor surfaces.