
Installing Snow Melting Cables | Radiant Heat Deicing
Effortless Snow Melting Under Bluestone Walkways
Are you tired of shoveling heavy snow and worrying about slippery, dangerous black ice outside your front door every winter?
In this video, Rob Robillard from A Concord Carpenter demonstrates how to install WarmlyYours snow melting cables beneath an elegant bluestone walkway and landing. This proven radiant heating solution automatically clears winter precipitation as soon as it hits the ground, saving you time while providing unmatched safety and peace of mind.
Watch the full walkthrough to discover the exact techniques used to achieve completely dry outdoor surfaces in freezing weather:
- 🔥 Looping heating cables three inches apart over wire mesh for even heat distribution across outdoor stone steps
- 💡 Running cables seamlessly through clipped concrete block corners without disturbing the finished masonry veneer
- ⚡ Installing the APS-3C snow melting and ice controller with an integrated manual override switch for total reliability
- 🌡️ Setting the slab sensor high temperature limit and hold-on timers to thoroughly dry the walkway and prevent black ice
By investing in an efficient snow melting system, you can protect your family from winter falls and permanently cross snow shoveling off your seasonal chore list.
Chapters
Transcript
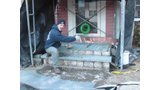
Where we're at now is we have taken the stone veneer and applied it to the sides and the risers of this landing. We've also put the first bluestone step on. Today, we're going to use this same stock, miter the corners, and do a perimeter with this stock. Then we're going to fill the middle with one big, square piece of bluestone. We're also going to lay this mesh on the walkway, and we're going to run the heat cables the long way by looping them 3 inches apart. If you remember from what we talked about the last time we were here, I clipped the corners of the concrete block so that I could run the cable down and we could apply these corner blocks.
They have corners cut out of them, and they go onto the corner like that. The cable runs behind that. There's plenty of room—tons of room—and it runs down behind this one, under and down behind this one, and it comes out right here. This is the heating cable that will continue the loop.
One thing that we also did for future reference, for future projects, is we installed a plastic pipe right here. It will run underneath the walkway. That's a conduit for future work, whether I'm running invisible fencing for a dog, some irrigation piping, wires, or anything. I have this conduit here so I don't have to disturb my walkway. We finished the project.
The WarmlyYours heating cables are installed under the walkway. The bluestone is installed. The landing is complete. We still need to tie in the house, and we also need to attach the snow sensor, which is going to go on the side of the house. The snow sensor works nice because any snow or freezing rain that touches the sensor turns on the system automatically, so you're saving energy.
It snowed here last night. We got about an inch and a half. When I came here this morning, this was completely dry. It was clear. Worked like a charm.
There was never any snow that accumulated; it just melted as it hit. We're down in the basement. This is the WarmlyYours control panel. This is called the APS3C. It's a snow melting and ice controller, and this is pretty much the brains of the whole system.
This is a relay box where all the power comes into and goes out to the different relays and things that control the heating cables. I had the electrician install this power switch, just a basic override switch. Nothing goes to this system until that light is turned on and the power is turned on. This is useful in an emergency to turn the power off or to service anything. It's also nice if I just want to control the system manually.
The system can be turned on by hitting the start button and it's on. But with the sensor, with this switch turned on and the sensor on, it'll turn on automatically as long as there's snow or freezing rain on the sensor. Then there's a timer here called hold-on time. WarmlyYours typically recommends 3 or 4 hours. You set that hold-on time, and then when the snow melts or clears off of the sensor outside, the system will stay on an additional 3 or 4 hours—up to 10 or down to 0 if you want—to continue to clear the ice.
It clears the walkway and even dries it so you don't get that black ice or slipperiness, which is nice. The high temperature limit is for the sensor that I placed in the slab, ensuring it will not allow the slab to get over a certain temperature, and I have this set for 40 degrees. We really don't need anything that much higher than that. We just need to melt the snow off above 32 degrees. So that's that.
That's the system in a nutshell. I really like this system. It worked, and it worked well. It was super easy to install. We installed this nice mounting board as well just to keep everything nice and clean.
The steps are right behind us. That's where we decided to mount everything, right where we wanted it. Super, super easy to install. Really nice product. I'm very impressed with it.
I'm Rob Robillard. You're at aconcordcarpenter.com, and we'll see you at the next review. Take care. Thanks, Rob.
Related Resources
-

PDF · SNOW-MELT-INSTALL-MANUAL-F
Snow Melting Installation Manual (English)
Snow Melt Installation Manual
-

PDF · SNOW-MELTING-SYSTEMS-THE-COMPLETE-PRO-INSTALLATION-GUIDE-FOR-WALKWAYS-PATIOS-THE-HYBRID-APPROACH-A
Snow Melting Systems: The Complete PRO Installation Guide for Walkways, Patios & the Hybrid Approach (English)
-
Video
A Concord Carpenter Installs Snow Melting Cable in Heated Stairs
Discover how to install snow melting systems for hassle-free, snow-free stairs. Enhance safety and efficiency today! 🌟 Watch now!
-
Page
Heated Stairs
-
Page
Heated Walkways
Related Questions
Showing all 2 questions
Absolutely! Snow melting is perfect for walkways, patios, and outdoor stairs. In fact, these are among the most popular applications because they provide maximum safety benefits.Walkways & Paths:
- Eliminates slip-and-fall hazards
- Improves accessibility for elderly/disabled residents
- Cost: $10–$20/sq.ft. installed
- View Walkway Design Guide
Outdoor Stairs:
- Critical safety upgrade (stairs are slip hazards)
- Prevents ice buildup on steps
- Cost: $15–$25/sq.ft. installed
- View Stair Design Guide
Patios:
- Extends outdoor entertaining season
- Melts snow for safe access
- Cost: $10–$22/sq.ft. installed
- View Patio Design Guide
Real-world example: A Hudson, MA homeowner installed snow melting on a paver walkway for $1.20/hour operating cost—providing safe winter access for wheelchair users. View the project.
A: Yes, WarmlyYours snow melting systems are designed specifically for installation under pavers and natural stone. Heating cables or mats—such as our Snow Melt Mats or Snow Melt Cables—are embedded in a sand or mortar bed beneath the surface, ensuring even heat distribution and reliable snow/ice melting performance.
Get a Free Snow Melting Quote
Our Radiant Experts are ready to help. Start with a free, no-obligation quote for your project.