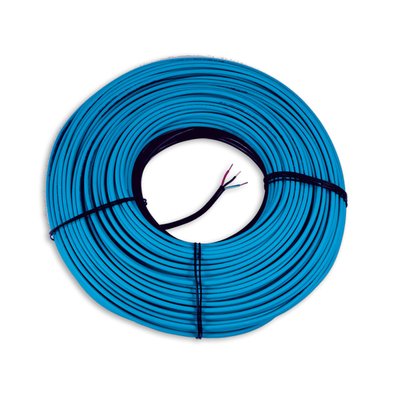
Slab Heating Cable 240V, 443 ft., 11.0A (WSHC-240-00443)
This product is discontinued.
This support page provides publications, manuals, specifications, videos, support articles, and common support questions
Support Questions
Showing 10 of 63 questions
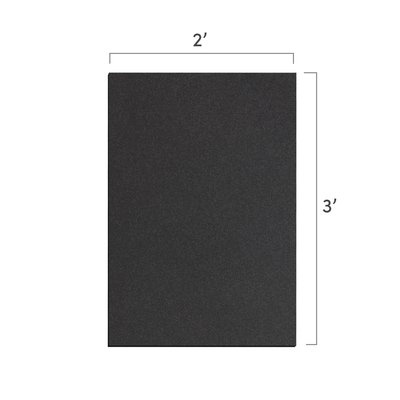
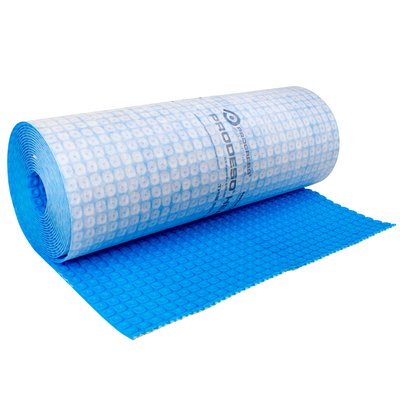
When installing electric floor heating over a concrete slab, an insulating underlayment like ThermalSheet is highly recommended to ensure efficient operation, faster heating times and warmer floor temperatures.
When WarmlyYours electric floor heating systems are being installed on a concrete slab, we strongly recommend adding a layer of insulation over the slab prior to installing the system. While our electric floor heating provides up to 25% more heating power per square foot than many of our competitors, the slab will always act as a "heat sink." Some of the heat that would otherwise be transferred to the flooring surface will remain in the slab, causing the floor’s surface temperature to be considerably lower. This is true with any electric radiant floor heating system.
When installed on top of a concrete slab without insulation, it is generally accepted that electric floor heating will take the chill away from the floor and provide a small amount of warmth. Adding insulation on top of the slab and beneath any electric radiant floor heating system will allow a greater percentage of the heat generated to transfer to the flooring surface. This results in greater efficiency and therefore faster warm up times, higher expected surface temperatures and lower energy usage. The floor will have the capacity to warm to a comfortable temperature, and in some cases can be employed as the primary heat source for that room.
The recommended types of insulation are natural cork, insulated tile backer boards and insulated underlayment, such as ThermalSheet™ synthetic cork.
The amount of amperage draw depends upon how large the area is that you are heating. For coverage of areas less than 30 square feet, a 120V Slab Heat system will draw less than 6 amps. If you have a larger area over 180 square feet of heated space, then you will need a larger breaker plus additional controls. No matter what the size of the area you choose to heat, we recommend a dedicated circuit for your electric radiant floor heating system.
The breaker and wire sizes are selected based on the total amperage of the WarmlyYours heating system connected to a single thermostat. This information is on the WarmlyYours heating system's installation plan, electrical plan, or UL label. Based on guidelines from the National Electrical Code: loads up to 16 Amps may utilize 12 gauge wire with a 20-Amp breaker, and loads up to 12 Amps - 14 gauge wire with a 15-Amp breaker. Local code and/or other factors may change these guidelines.
One thermostat can control multiple heating mats/cables as long as all the heating elements are using less than 15 amps:
TempZone™ will cover aprx. 120 sq. ft. for 120V systems and 240 sq. ft. for 240V systems on one thermostat.
Environ™ will cover aprx. 150 sq. ft. for 120V systems and 300 sq. ft. for 240V systems on one thermostat.
Slab Heat will cover aprx. 90 sq. ft. for 120V systems and 180 sq. ft. for 240V systems on one thermostat.
Yes. In addition to TempZone™ and Slab Heat, we also have specially sized Shower and Bench mats designed specifically for shower installation. They are all wet location listed for radiant floor heating in a shower.
Yes, Luxury Vinyl Tile (LVT) is typically installed over the embedded heating element using self-leveling cement (SLC). Many people choose to use SLC when installing tile over floor heating.
We do not suggest using thinset to encase the heating wires with LVT, as it is very difficult to get thinset completely flat.
WarmlyYours has recently begun including floor sensors with our heating elements to help ensure customers will have everything they need for optimal operation of their radiant heating systems.
The sensor included with your floor heating element can be installed with the heating system (the sensor is equally spaced between runs of the heating wire--see your install manual for more info). Installing this sensor with your floor heating control will enable energy efficient operation of the floor warming system based on the floor temperature instead of the ambient room temperature.
We generally recommend that you install a second, unconnected backup floor sensor alongside the primary one. In the very unlikely event that your first floor sensor is damaged, this install method will save you from having to pry up flooring to replace a floor sensor. You simply disconnect the damaged sensor from the thermostat and connect the backup sensor.
In addition to the floor sensor that was included with your heating element, our nSpiration Series thermostats also come with a floor sensor. If you purchase both a heating element and an nSpiration Series thermostat from WarmlyYours, you'll have a primary and a backup floor sensor for your system.
The requirements are determined as follows: plan on 20 watts per square foot (at 3" spacing) without a floor covering; or 15 watts per square foot (at 5" spacing, cable only) with a floor covering. To calculate approximate power requirements, multiply the square feet by either 20 or 15 (per the above), and then divide by the voltage (120V or 240V) to arrive at Amps.
Reflective insulation is not effective with conductive heating, which is how embedded floor heating and snow-melting systems transfer heat. To be effective, the reflective insulation surface needs to face an air space (air gap), which allows the reflected heat to be redirected.
An effective solution considers the insulating material's R-Value. This is the rating of a material's insulating properties. The "R" stands for "resistance" and refers to the material's resistance to heat flow, or temperature conduction.
You can control your slab heating system with any WarmlyYours nSpiration Series thermostat. Depending on the size of your project, you may also need to add a relay or nJoin power module.
Never cut, shorten or splice the heating cable itself; cutting it damages the system. Only the non-heating cold lead can be shortened, as your product’s manual allows. Order the size your SmartPlan™ specifies, because unused cable can’t be cut off.
Some mats let you cut the mesh, never the cable, to turn or reposition them: TempZone™ and Environ™ Flex Rolls and Slab Heat mats. TempZone™ Easy Mats and Custom Mats are made to size and must not be shortened or cut. TempZone™ Cable has no mesh: lay all of it at the spacing on your SmartPlan™.
Yes, many homeowners successfully install bathroom floor heating systems themselves. WarmlyYours provides detailed installation manuals, 24/7 technical support, and custom installation plans to guide you through the process. However, a licensed electrician is required to perform the final electrical connections and thermostat wiring to ensure safety and warranty compliance.
Yes — electric radiant floor heating can absolutely be installed in a tiny house on wheels (THOW). Here are the key considerations:
Power Supply
Electric radiant floor heating requires a 120V or 240V connection, which is the same standard shore power connection used at RV parks and tiny house communities. When plugged in, the system runs just like it would in a stationary home.
- Most WarmlyYours systems run on 120V or 240V
- A dedicated circuit is required — your electrician will add this during installation
- The system does not run on battery/solar alone without a significant battery bank and inverter
Subfloor Considerations
THOWs typically use a wood subfloor. WarmlyYours TempZone™ Cable or Flex Rolls can be installed in a thin mortar bed or self-leveling underlayment over the subfloor before your finish flooring goes down.
Weight
Electric radiant heating cables and mats are extremely lightweight — typically less than 0.5 lbs per square foot — so they add virtually no meaningful weight to a THOW trailer.
Insulation is Critical
For a THOW, insulating the subfloor from below is especially important to prevent heat loss through the trailer frame. WarmlyYours recommends installing rigid foam insulation beneath the heating system for maximum efficiency.
Get a free SmartPlan™ from WarmlyYours — our engineers will design a custom layout for your THOW floor plan at no charge.
Most of the installation — laying out the heating element, placing the floor sensor, and pouring self-leveling cement — can be completed as a DIY project by a competent homeowner. However, the final thermostat wiring connection must be completed by a licensed electrician in most jurisdictions.
WarmlyYours makes DIY installation easier with:
- SmartPlan® — a free custom layout service that maps out your exact cable placement, sensor location, and electrical requirements
- Circuit Check — a monitoring device that alerts you if the heating cable is damaged during installation
- 24/7 technical support — available throughout your installation
Always check local electrical codes before beginning any floor heating installation.
Yes, electric radiant floor heating can maintain a cozy 70°F even when outside temperatures drop well below zero. By heating the objects and people in a room directly, a properly sized and insulated system provides reliable, consistent warmth that outperforms traditional forced-air systems during extreme Midwestern winters.
Yes, but the tear-out is the real risk. Scan the floor with thermal imaging before demo to map the existing hydronic tubing, and never fasten or drill into it. Keep the two systems on fully independent controls so they cannot fight each other, and do not place the electric floor sensor directly above a hydronic loop — the false-high reading will short-cycle the electric system. Call PRO technical support at 800-875-5285 to review the assembly before ordering.
No. Electric floor heating cable is listed for installation under floor coverings only, and NEC 424.38(A) does not permit heating cable to be installed in walls. Running it vertically voids both the UL listing and the warranty. For warm towels and a little extra room heat, specify a heated towel rack, which is designed and listed for wall mounting.
Yes, radiant floor heating can be a primary heat source if its heat output exceeds the room's heat loss. For best results, we recommend using a 15-watt system, covering at least 80% of the floor, and ensuring the space is well-insulated. Use our Heat Loss Calculator to verify your specific needs.
In many cases, yes — electric radiant floor heating can serve as the primary heat source in a tiny house, particularly in mild to moderate climates. Here's what to consider:
When floor heating works as primary heat
- The tiny house is well-insulated (walls, roof, and subfloor)
- You live in a climate where winter temperatures rarely drop below 20°F (-7°C)
- The floor heating covers the majority of the open floor area
- Windows and doors are properly sealed and double-paned
How to check if it's enough
Use the free WarmlyYours Heat Loss Calculator. It calculates your tiny house's heat loss based on insulation values, climate zone, and square footage — then tells you whether a floor heating system can offset that loss.
In colder climates
In very cold climates (below -10°F / -23°C design temperatures), floor heating is best used as a supplemental heat source alongside a mini-split, wood stove, or propane heater. It will still dramatically improve comfort and reduce the load on your primary system.
Contact the WarmlyYours team for a free SmartPlan™ — a custom layout designed specifically for your tiny house floor plan.
Yes, bedroom floor heating can be a DIY project. Systems like TempZone Easy Mats or Environ Flex Rolls are designed for straightforward installation under various flooring types. While you can lay the heating elements and flooring yourself, you must hire a certified electrician to connect the system to power and install the thermostat.
Yes — insulating underlayment is strongly recommended when installing electric radiant floor heating over a concrete basement slab. Without it, a significant portion of the heat will conduct downward into the cold concrete rather than upward through the floor surface where you want it.
WarmlyYours recommends ThermalSheet® insulating underlayment for basement slab installations. It improves system efficiency, reduces operating costs, and helps the floor reach target temperature faster.
Skipping underlayment on a basement slab is one of the most common — and most costly — installation mistakes.
Yes, we strongly recommend installing insulation like ThermalSheet™ over concrete slabs. Concrete acts as a "heat sink," absorbing warmth that should go to your floor. Insulation directs the heat upward, significantly improving efficiency, reducing warm-up times, and allowing the system to function effectively as a primary heat source.
Underlayment is recommended for floating floors (laminate, LVP, wood) and installations over cold subfloors like concrete. It provides thermal insulation to prevent heat loss and improves system efficiency. For tile and stone, the system is typically embedded in thinset, so a separate underlayment is often unnecessary.
No separate GFCI breaker is required — every WarmlyYours thermostat has a built-in Class A (5mA) GFCI. Stacking a GFCI breaker on top of it is one of the most common causes of nuisance tripping. Run a dedicated breaker sized to the load at 80% continuous duty: a 15A circuit carries up to 1,440W at 120V, a 20A circuit up to 1,920W. Loads beyond the thermostat’s 15A rating need a power module or relay.
Turn the power (circuit breaker typically) to the thermostat off for 5 minutes and then back on to reset the thermostat.
If there is power to the thermostat and it still doesn't appear to work, then the next step toward a solution is to take Ohm measurements of the floor heating system.
This is done with a digital multi-meter that can select a low 200 Ohm (Ω) scale. To conduct this test, turn off the circuit breaker. Remove the thermostat completely from the wall and disconnect the wires connected to the LOAD connections at the back of the thermostat. Disconnect the ground wires from the house ground, and do the test shown on the links below. If you are uncomfortable doing this test, contact a qualified electrician.
Please follow one of these guides based on the type of heating system installed:
For a quick overview of the testing process:
Here is a video showing how the test is done
Here is a video showing how to locate and identify the floor heating wires
If the system still does not function, contact +1 (800) 875-5285 WarmlyYours Technical Support and provide the Ohm measurements for further assistance.
Single Conductor vs. Twin Conductor Identification
- A single conductor floor heating system is a loop of one core wire, it starts at the thermostat and ends at the thermostat - this is the original method of manufacturing heating cable. Most single conductor floor heating systems have the same color cold lead wire connected to both load terminals/pigtails of the thermostat. Some early single conductor floor heating systems were produced with a white and a yellow cold lead wire.
- A twin conductor floor heating system terminates two core wires at the end, both wires start at the thermostat - this is the current method of manufacturing heating cable. Most twin conductor floor heating systems will have two different colored cold lead wires, and one of these is black. The other wire in a WarmlyYours floor heating system is either yellow (120V system) or red (240V system). A few early Environ systems had two black cold lead wires.
Note:
- Not all heating cables are wired directly to the thermostat. It may have been necessary during installation to terminate the heating cable in a junction box, and then run a separate (contractor-supplied) wire from the junction box to the thermostat.
- WarmlyYours single conductor cold leads were produced with a 13‘ length at the start of the loop, and a 26‘ length at the end. The 120V floor heating systems had a yellow and a white label attached to the cold leads, and the 240V floor heating systems had a red and a white label attached.
- If you have a single conductor floor heating system and notice that one cold lead is thicker or feels hotter than the other, please contact technical support at +1 (800) 875-5285
To prepare a basement for radiant heating, ensure the concrete subfloor is level, clean, and free of debris. It is highly recommended to install an insulating underlayment, WarmlyYours ThermalSheet, over the slab to prevent heat loss into the ground. Finally, verify that your electrical panel has sufficient capacity for the system’s requirements.
The cost of radiant floor heating for a tiny house is very affordable — especially compared to a full-size home — because you're heating a much smaller area.
Typical Cost Breakdown
- Materials: A WarmlyYours electric floor heating system typically costs $8–$14 per square foot for the heating element, depending on the product (mat vs. cable) and coverage area.
- Thermostat: A programmable or smart thermostat adds approximately $100–$250.
- Installation labor: If hiring an electrician, expect $200–$500 for a tiny house, since the runs are short and the system is straightforward.
Example: 200 sq ft Tiny House
For a 200 sq ft tiny house (heating roughly 150 sq ft of open floor area after accounting for furniture), total installed cost is typically in the range of $1,500–$2,500 — a fraction of the cost of installing a forced-air or mini-split system.
Operating Costs
Electric radiant floor heating in a tiny house typically costs $0.50–$2.00 per day to operate, depending on your local electricity rate and how long the system runs. Use the WarmlyYours Energy Use Calculator to get a precise estimate for your space.
WarmlyYours also offers a Heat Loss Calculator to determine whether floor heating alone can serve as your primary heat source in a tiny house.
Operating costs for electric radiant floor heating in a basement depend on your local electricity rate, the size of the heated area, and how many hours per day the system runs.
As a real-world example, a finished basement playroom in Whitchurch-Stouffville, Ontario cost approximately $0.19 CAD per hour to operate — significantly less than running a portable electric space heater, and with whole-floor comfort rather than point-source heat.
In the US, typical operating costs range from $0.01–$0.15 USD per hour depending on system size and local electricity rates. Use the WarmlyYours Operating Cost Calculator to estimate your specific project.
Because radiant systems have a thermal lag, you should increase your thermostat set point 12-24 hours before an extreme cold snap arrives. This proactive adjustment, combined with ensuring your home is well-insulated, helps your system maintain a steady, comfortable temperature without struggling to catch up.
Electric radiant floor heating can serve as a primary heat source in a well-insulated basement, particularly for finished basement spaces used as living areas, playrooms, or home offices.
Unlike forced air systems, radiant heat warms objects and people from the floor up — which is especially effective in basements where cold radiates upward from the concrete slab. This makes it a more efficient and comfortable option than forced air in below-grade spaces.
For larger or poorly insulated basements, a heat loss calculation (available free through WarmlyYours SmartPlan®) will confirm whether the system can meet the full heating load or whether it should supplement an existing system.
Yes — radiant floor heating is one of the best heating solutions for tiny houses. Here's why it's such a natural fit:
- Space-saving design: Electric radiant heating cables or mats install directly under the floor, so there are no bulky radiators, baseboard heaters, or ductwork taking up precious square footage.
- Even, comfortable warmth: Heat rises uniformly from the floor up, eliminating cold spots — critical in a small space where every corner matters.
- Silent operation: No fans, no blowers, no noise — ideal for the minimalist tiny house lifestyle.
- Energy efficiency: Because tiny houses have a small footprint, the cost to heat them with electric radiant is very low. WarmlyYours' Energy Use Calculator can estimate your exact operating cost.
- Compatible with most floor types: Works under tile, stone, laminate, engineered hardwood, and luxury vinyl plank (LVP) — all popular in tiny homes.
WarmlyYours offers electric radiant floor heating systems that are easy to customize for any tiny house layout, including irregular shapes and small rooms.
Radiant floor heating can heat a sunroom if the space has high-quality insulation and double-pane glass. Since sunrooms have high heat loss, a 15-watt system is essential. In extremely cold climates or poorly insulated sunrooms, it is best used as a supplemental source to keep the floor comfortable.
Radiant heating is often more efficient because it eliminates the "blast and fade" cycles and noisy ductwork of forced-air furnaces. By providing steady, low-level heat that doesn't escape to the ceiling, it creates a more consistent "barefoot sanctuary" while potentially reducing your overall energy consumption.
Yes. Radiant heat warms people and objects directly instead of blowing heated air, so there’s no ductwork to lose heat through. Your cost in cold weather depends on insulation, how much area you heat and how long the system runs, so control it with a programmable thermostat.
For the same wattage and operating time, 120V and 240V electric floor heating use the same amount of energy and produce the same heat. A 240V system draws less current for the same wattage, which can accommodate a larger heated area on a suitable circuit. Choose the heating product and control voltage to match the supply, and have an electrician verify circuit capacity, wiring, and applicable code.
The best home features for cold climates include a simple gable roof to shed snow, covered entrances for protection, airtight triple-pane windows to prevent heat loss, and radiant heating systems. These features work together to maintain interior warmth, reduce energy bills by up to 25%, and ensure structural safety during harsh winters.
A heated concrete slab is compatible with most hard flooring types. Here's what works well and what to avoid:
- ✅ Tile & Stone — The best choice for a heated slab. Excellent heat conductor, highly durable, and completely unaffected by the temperature cycling of radiant heat.
- ✅ Polished or Stained Concrete — The slab itself becomes the finish floor — no additional flooring needed. Very popular in modern and industrial interiors.
- ✅ Luxury Vinyl Plank (LVP) — Works well over heated slabs; ensure the product is rated for use with radiant heat and has a combined tog rating of 1.0 or less.
- ✅ Engineered Hardwood — Compatible; the dimensional stability of engineered wood handles the mild temperature changes of a slab system well.
- ✅ Laminate — Compatible when rated for underfloor heating; keep slab temperatures below 85°F (29°C).
- ⚠️ Solid Hardwood — Use with caution; the slow, even heat of a slab system is gentler than other radiant types, but solid hardwood can still expand and contract. Consult your flooring manufacturer.
- ❌ Thick carpet with high tog underlayment — Not recommended; insulates the slab too heavily and significantly reduces heating efficiency.
Key Rule: Keep Slab Surface Temperature Below 85°F (29°C)
Most flooring manufacturers require the floor surface temperature to stay at or below 85°F (29°C). A floor-sensing thermostat — included with all WarmlyYours systems — monitors and maintains this automatically.
Not sure which system is right for your flooring type? Request a free SmartPlan™ or get an Instant Quote and our team will guide you.
WarmlyYours electric radiant floor heating is compatible with most flooring types commonly used in tiny houses:
- ✅ Tile & Stone — The best conductor of heat; ideal for bathrooms and kitchens in tiny homes.
- ✅ Luxury Vinyl Plank (LVP) — Very popular in tiny houses; compatible when the product has a thermal resistance (tog) rating of 1.0 or less.
- ✅ Laminate — Works well; look for laminate rated for use with underfloor heating.
- ✅ Engineered Hardwood — Compatible; solid hardwood is generally not recommended due to expansion and contraction.
- ✅ Carpet — Works for supplemental heat; thinner carpet with low tog ratings is preferred.
- ❌ Solid Hardwood — Not recommended; the heat can cause warping and cracking over time.
Key Tip: Check the Tog Rating
The tog rating measures a floor covering's thermal resistance. For radiant floor heating to work efficiently, the combined tog rating of your flooring and underlayment should be 1.5 tog or less. Always check with your flooring manufacturer.
Not sure if your flooring is compatible? The WarmlyYours team is happy to help you choose the right system for your specific floor type.
For maximum barefoot comfort, most systems are designed to reach a floor surface temperature of 80°F to 85°F. This "sweet spot" ensures your room stays warm through efficient radiation while keeping the floor perfectly comfortable to walk on, even during the coldest months of the year.
The layers for the full installation are as follows:
- Bottom: 8-12” of compressed crushed rock aggregate (may already exist)
- 2” polystyrene insulation
- 2-3” layer of concrete
- Rebar and/or reinforcing mesh and attach the cable or mat
- Top: Pour a 2-3” layer of concrete as the final flooring surface
Call tech support at +1 (800) 875-5285 to customize this to your unique application.
A heat loss calculation is essential to ensure your radiant system produces more BTUs than your room loses to the outside environment. This professional assessment guarantees your system has the necessary power to serve as your primary heat source, providing peace of mind during record-breaking cold.
Temperature affects core resistance - lower temperatures decrease resistance and higher temperatures increase resistance. Another consideration is the test equipment, sometimes switching test units, adjusting the calibration, or allowing for the verified differential may be necessary.
Bedroom floor heating is popular because it provides consistent, draft-free warmth that enhances comfort in a space where people often walk barefoot. It eliminates cold spots, operates silently, and is highly energy-efficient. Additionally, radiant heat doesn't circulate dust or allergens, contributing to a healthier sleeping environment compared to forced-air systems.
A floor sensor measures floor temperature so a compatible thermostat can regulate comfort and enforce the flooring manufacturer’s temperature limit. Some thermostats, including nTrust 2.0, offer a regulator mode without a sensor, but that mode does not measure floor temperature. Use sensor-based temperature control whenever required by the flooring or heating-system instructions.
Documents
Technical Support
- Floor Fault Location Thermal Camera Troubleshooting Kit Instruction (English)
- Floor Fault Location Thermal Camera Troubleshooting Kit Instruction (Spanish)
- Floor Fault Location Thermal Camera Troubleshooting Kit Instruction (French)
- Snow Melt and Slab Heat Endcap Repair Instructions (English)
- Snow Melt and Slab Heat Endcap Repair Instructions (French)
- Snow Melt and Slab Heat Repair Kit Instructions (English)
- Snow Melt and Slab Heat Repair Kit Instructions (French)
Installation
- Slab Heating Installation Manual (English)
- Installing Floor Heating Under Concrete Slabs Step by Step (English)
- Snow Melting & Slab Heating Application Cross Sections (Spanish)
Project Planners
- Floor Heating Request for Quotation Form (English)
- Calculating Project Dimensions (English)
- Floor Heating Project Planning Guide Form (English)
Publications
Technical Specifications
Technical Information
- PRO Field Checklist: Electric Floor Heating Diagnostics & Troubleshooting (English)
- Slab Heating Master Specifications
Wiring Diagrams
- Slab Heat Wiring Diagram for TH115, TH114 and a Relay (English)
- Slab Heat Wiring Diagram for TH115, TH114, Power Module (English)
Sell Sheets
Warranties
Specifications
Electrical
| Amps | 11 A |
| Floor Load | 2.64 kW |
| Ohms | 21.82 Ω |
| Thermal Power | 2.64 kW |
| Voltage | 240 V |
| Watts | 2640 W |
| Watts Per Sq. Ft. | 15 to 20 |
| Watts Per Sq. Ft. at 3 Inch Spacing | Up to 20 |
| Watts Per Sq. Ft. at 5 Inch Spacing | Up to 15 |
Warranty / Certifications
| Approvals | cCSAus Listed |
| Warranty | 10 Year Warranty |
Performance
| BTU Per Hour | 9008 Btu |
Product Dimensions
| Cold Lead Length | 20′ |
| Coverage at 3 Inch Spacing | 110.8 ft² |
| Coverage at 4 Inch Spacing | 147.7 ft² |
| Coverage at 5 Inch Spacing | 184.6 ft² |
| Heating Element Thickness | 1/4″ |
| Length | 443′ |
| Weight | 26.9 lbs |
| Width | 0.75″ |
Appearance
| Color | Blue |
Installation
| Floor Types | Cement, Tile, Marble, Stone, Vinyl, LVT, LVP, Wood, Bamboo, Carpet, and more |
Cabling Specs
| Ideal Cable Spacing | 3″ |
| Wire | Energy efficient twin-conductor |
Identifiers
| SKU | WSHC-240-00443 |
| UPC (GTIN-12) | 881308020750 |
Logistics
| UNSPSC Code | 40101830 |
Videos
Articles
- Choosing wood flooring for electric radiant heating
- Electric radiant heat under LVT, vinyl and resilient flooring
- Extending floor-heater cold leads and sensor wiring
- Finding LVT products compatible with electric floor heating
- Floor heating and implanted pacemakers: checking compatibility
- FLOR carpet tiles over radiant floor heating
- How to reduce winter gaps in wood flooring
- Selecting watt density for indoor slab heating
Related Items
Do you need support or specifications for a specific model? Identify your model below.