
October 2026 Webinar - Snow Melt Controls & Sensors: Getting Activation Right
Master Controller Setup and Sensor Placement for Snow Melt
Have you ever worried that your expensive snow melting system won't activate when the first major winter storm hits?
In this technical webinar, radiant heating experts from WarmlyYours break down the essentials of getting snow melt activation right every single time. Discover how proper controller selection and strategic sensor placement protect your investment, cut unnecessary operational costs, and prevent frustrating winter callbacks.
Learn practical strategies and expert installation tips to optimize your radiant heating setup:
- ✅ Choosing between aerial and slab sensors based on project conditions like driveways, ramps, and car washes
- 💡 Understanding the dual 38°F and moisture activation rule that triggers automated controllers
- ⚡ Sizing and pairing controllers such as the SCV-Dual, SCA-Dual, and Zone Breaker with relay panels
- 🌡️ Setting proper hold-on after-run times to completely eliminate slush and prevent refreezing
- 🔥 Step-by-step preseason commissioning using freeze spray and moisture to verify system operation
By applying these field-tested practices and troubleshooting methods, you can ensure reliable, hassle-free winter performance and maintain clear, ice-free pavement all season long.
Chapters
- 0:00Welcome and Webinar Overview
- 2:28Why Snow Melting Systems Fail and the 38°F Rule
- 4:49Manual vs Automatic Control Strategies
- 8:18Automated Controllers: SCV, SCA, SCE, SCP, Zone Breaker
- 17:49Aerial vs Slab Sensors and Placement
- 23:04After-Run Settings and Relay Panel Scaling
- 27:04Preseason Commissioning and Sensor Testing
- 29:39Field Symptoms and Quick Diagnostics
- 33:09Installer Activation Checklist
- 34:49Support, Resources, and Next Webinar
Transcript
Hello and good afternoon, everyone. Thanks for joining our October webinar. My name is Mary Godawa and I'm your sales manager at WarmlyYours. And today with me, I have Anatoly, our tech support manager. Good afternoon, guys.
Welcome. Today we're going to be talking about snow melting controls and getting the activation right. This is all about the sensors and activation of controls.
Snow melting controls and sensors are really part of the biggest decision-making for your snow melting system. What we're going to be talking about here is selecting the right controller and sensor placement. We'll get into a little bit of wiring, preseason commissioning of your sensors, and what to do next. We'll talk a little bit about the hidden vulnerabilities of snow melting systems and what to look out for. And really just why the control strategy dictates how your system's going to operate, your operating costs, and the satisfaction of your clients, of course.
I like that last one because that's what I deal a lot with, and that's a very important part of the whole project. So we'll talk about that a lot. Also, a big technical takeaway is that no matter how large your system is—it might be a big $15,000 project or cable in the cement—if your $600 control package is not working or not configured or installed right, the whole system doesn't work. So that's where a control package or control mechanism becomes extremely important. Right, absolutely.
The number one reason that we hear complaints is really not that the snow melting system fails—it's not the heating mat or the cable. The worst call that the contractor or WarmlyYours gets in the wintertime is, "Help me, my driveway has 4 inches of snow already buried on top of it. What am I going to do now?" So what really happened when that call comes? There are a few different things that can be our common culprits, and there are a few things that we can detect to see what is what here. I think our number one thing to do is probably check and see where the sensor is.
Is it covered in snow? Is it working? Yep. Check the sensor, check what type of sensor you actually have, and make sure it's not obstructed. But another big one related to control would always be an actual setting on the controller.
Either it's something as simple as the after-run, or maybe that controller was not set up correctly from day one. All of these things are important, and that's where anybody who's troubleshooting the system should start. And that's what we're going to cover today. Absolutely. Good.
The physical activation for automated sensors needs two things: it's going to need temperature and moisture to really trigger the system on. It's not just that when it's cold out, the system is going to be operating all the time. It needs both. And the temperature is really 38, not 32.
People ask us all the time, why is it 38, not 32? Well, we know sometimes when the snowflakes fall, we're talking about the air temperature. And sometimes the falling snow starts around—what do you say, 30? I mean, it can start at really anything because that air temperature is different higher up in the atmosphere. Your ground surface temperature might be much cooler or much warmer.
If it's an elevated, bridge-type system, it's going to lose more heat. So, yeah, lots of factors there. But we know, and the industry knows, that 38 is the number that we want to stick with. That has worked for 20+ years, and that's what all major controllers and sensors are designed with. We know people like to question it or maybe adjust it, but we know it works and there is typically no need to make any changes to it. Right.
So we definitely want to talk about making sure the system turns on when it's supposed to, when that first flake of snow flies. And there are different strategies for what type of control to choose. Some people always want something that's manual: "I just want to be able to turn on the dial. I want to do it myself."
"I want to do it myself. I want full control of my system." And then there are automated controls that use the sensors, as we mentioned. Then we have multi-zone control, which is for somebody who has limited amperage availability.
So we'll get into talking about the three main differences between those. Yeah, and I think before we move on and go into each type of control in detail, the biggest thing I always try to bring up when somebody wants to do a manual control is: how are you actually planning to run the system? What's going to happen if it starts to snow just when you went to bed? You don't want to wake up with 6 inches of snow on the ground and then turn the system on, because that's not really what it's designed for. Now you pretty much have your driveway or walkway covered in snow with an expensive system installed.
Yes. Typically manual controls would be a good fit for something like a walkway to a hot tub that you just want to run manually, maybe even disregarding the snow just to keep it running. There are lots of applications for manual, but automatic is really where you always want to steer. When we talk about manual controls, we have two main ones that we offer. The SCM is the one that we call the Snow Melt Manual Dual Timer Control.
This is what it sounds like. It's an old-school timer with a big crank on it. You just turn that dial over to the number of hours you'd like it to run. Again, this is really convenient if you've got just an entry to a building or something like that, where it's more of a manual start.
Some people like a Wi-Fi option. Wi-Fi is also a newer technology where people think it's going to be the greatest thing—you can turn it on and it'll just melt all your cares away. But I think it's a little bit more manual. People don't realize: at 3:00 in the morning, are you going to wake up to manually turn that on? Exactly.
That's my favorite example to bring up, because even though Wi-Fi sounds like it's much better than a timer and not manual, it's still manual. You are controlling that. It's a simple switch. The same thing applies, right? If it starts to snow in the middle of the night, are you going to turn it on the evening before?
Are you going to turn it on in the morning? That's just not what the system is designed for. I think a good use for the Wi-Fi control, as we show here on that optional diagram, is that you can utilize your Wi-Fi switch as a cutoff for your automatic operation. A typical example of this would be applications I hear a lot about for a vacation home up in the mountains. They want to have an automatic system, so that's why you see an automatic controller there.
But the customer wants to completely cut the power between that controller and the system when they are away, for example, for two months. They don't want that system to run. But they still want to have an automatic system for those two to three weeks they are at the location and have it operate fully automatically. So there's always a use for it. The more we know about the application, the better we can tailor the components and setup for you.
Absolutely. Here's the selection of automated controls that we offer. We have several to choose from, starting with our simple little cone-shaped controller. People call it the cone. This is the SCB-Dual, and I like this one a lot because it is an all-in-one unit.
It's at a great price point for most residential projects. It can be used for some bigger projects, too, but it's nice because it's a standalone, all-in-one little unit. Yep. Does the trick. And then the next one is our next most popular control, the SCA-Dual.
This is our advanced control. When you see the word "Dual" after that, that means it's able to do dual voltage. That means if you have a 120-volt snow melting system versus a 240-volt snow melting system, it can switch the loads depending on the max capacity. The SCA Advanced has a larger capacity at 30 amps, and we'll talk a little more about that.
Yeah, we'll dive into those details. But the SCP series is a higher-end step up from your dual controller because it can handle more sensors and is tailored for larger applications, as well as commercial and industrial projects. The Economy Controller is a slightly different approach. It has a digital screen and a processor with a knob to make additional adjustments. Again, that's a great controller for a slightly different, unique application.
And our third big one here is our Zone Breaker control. The Zone Breaker was designed for projects that don't have enough amperage available to run a very large driveway system, for example. What this will do is separate the available amps into different zones so that you can melt a whole driveway in sequence. Yeah, we're going to dive into more details on this controller, but really what's most important to know about this type of controller is that you may have only 50 amps available, but you have a large driveway that requires 200 amps. To make it simple, this controller can run only a quarter of that area at a time, so you're only pulling 50 amps instead of 200 and not overloading your system.
That's great. So here's the little cone, our SCV-Dual. This is the all-in-one budget control. Let's take a look at what that is. Yeah, let's take a look.
Just like Mary said, the cone controller has very simple operation and a very simple setup because you're dealing with a two-in-one unit. That's how I describe it to every customer. You have your sensing grid on the top, which is your sensor, and you have the main enclosure with the relay and the actual logic. You don't need anything else.
That's your all-in-one piece to get that running. Yeah, as I said, there are no buttons. How do you turn it on? Well, it just turns on with the activation of ice and snow on the top of the sensor. Yeah, we can do a little close-up here. The trick on this controller is you have two lights, a green light and a yellow light, that give you an indication of whether there's power and if the system is running or not.
It's that simple to see if it's running or what it's doing. But what else do we want to say? We already talked about how it's a great value option because it gives you everything you need at a low cost. And it doesn't take up space to install like some of the other bigger control panels might. Yeah, you just mount it on 3/4-inch conduit and put it up in the open where the snow is going to hit it.
Make sure it's not under a tree or overhang, and you're good to go.
That's the SCV-Dual. The next one we have is the SCA-Dual, and this is our most popular one because it offers a lot of flexible support. Up to two additional sensors can be installed, so you can do your AIR-SS Snow Owl sensor or a pavement sensor on this one, offering plenty of versatility. It does have a larger amp capacity at 30 amps, and again, dual voltage. Yeah, you can do these medium-sized jobs without the need for a relay panel.
So, yeah, great for those small to medium jobs, maybe with the ability to connect two sensors if that's what's needed. But also, what's most important here, you now have a very easy ability to adjust your hold-on time and the heater cycle. Hold-on time is your dial that allows you to adjust how long the system runs after the snow stops, because of course you don't want anything to refreeze or create slush. You also have a very simple-to-use manual heater cycle button. So let's say it's a windy day and there's some snow on the surface that just needs to be melted; you can easily do that with this button.
Very good. And the next controller we'll talk about is our SCE-120, and this is the 120-volt control. This is able to do two distinct zones at the same time with two sensors. It'll take up to two sensors. It does have just a little backlit display, nothing super fancy, just an intuitive control there.
And what else can we say? Slab sensors on this? Yeah, slab sensors are the only type of sensor that can be used here for snow melting applications. The main project that I always see for this controller is the combination of maybe a small—or really any size—snow melting area with a slab sensor, plus an additional roof and gutter deicing section with cable. Because this controller can manage these two sections independently, it will only turn on your snow melting when it's needed, while maybe the roof doesn't need to run at that time, and vice versa.
So it really gives you the ability to have two different applications within one controller and still run them independently. So it can pick up two different sensors. Yeah, exactly. Plus you can dive into very specific, detailed settings to adjust temperatures, temperature setpoints, and after-run, which, like we discussed before, is not really critical because we know they operate just fine on the default.
Okay, and then our biggest control here is the SCP Premium control. This is the big brother to the SCA we just showed you a little bit ago. This is a great controller. It also comes with a high-limit temperature sensor, a little probe that goes in, so it is integrated with that high-limit temp sensor. That sensor can meet energy requirements in certain areas, so check with your local codes to know if you are in an area that requires that type of setup.
This one also takes multiple sensors, so you can do roof and gutter as well as snow melting on this. This unit takes up to—is it six? Six sensors, or four sensors. Yeah, you can add up to six sensors.
Like I was saying earlier, if it's a larger commercial or industrial project and there is a requirement for more than two sensors, that's your perfect example of the controller to pick. You still have your hold-on time adjustments together with the high-temperature cutoff dial. That high-temperature cutoff dial allows you to set how warm you want that snow melt system to run. We know it's going to melt snow if it's 40 or 50 degrees, but some systems may need to run higher, and some systems may need to run lower. That's what gives you the ability to make that adjustment.
So it really steps up from your typical residential snow melt installation. And like Mary said, when there is a requirement for a high-temperature limit sensor in the pavement, that's a great way to do it. Absolutely. So another thing we're going to talk about is our next controller: the Zone Breaker control.
This is an intelligent load-sharing multi-zone controller, and what that means is it breaks down the system into sections. It can go up to four sections. Ideally, we want to do that based on the maximum amount of amperage available. Depending on how big you go, the maximum amount of amps available is going to dictate how many zones or sections we break it up into. I always like to talk about the details of this controller, particularly the touchscreen interface, which is a big deal when it comes to setting up and monitoring the system.
As you can see, there are four zones. You can see what the runtime is, adjust your priority, and see what the system is doing. You can also adjust how long each zone runs. So maybe you have zones 1 and 2 as your highest priority and want to spend more time or energy running those zones, while zones 3 and 4 are for a back patio that doesn't need as much power or time; that can be easily set on this controller. Once again, the main trigger for this controller would be limited electrical ampacity available, but a large system that needs to be managed.
Right. When we're talking about aerial sensors versus slab sensors, this is all about the job fit. You really have to match the sensor to the project, the circumstances, wind conditions, exposure, and feasibility. Your residential projects in one area of the country may be different than another area, depending on whether you have milder, slushier snowfall versus a high-wind, high-exposure snowfall area.
So there are differences in choosing your sensors. When we're talking about compatibility, there's the aerial and the slab. The key advantages of an aerial sensor are that it's out there in the open, and it's easy to service if you can access it quickly. It reads the current conditions as the snow is coming down.
Yeah, I always like to talk about the slab sensor. Most of the time we quote an aerial sensor because that's what's used on the majority of projects. But the slab sensor provides a specific approach that we sometimes need. Just like you see here, for something like a commercial ramp, a hospital entryway, or any entrance, you have the sensor right on the surface. Even if it's not snowing, people might track snow onto that driveway, ramp, or entryway.
You want the system to pick that up and turn on. The only way it will do that is if the sensor is right on that surface. Another example would be a car wash or a loading dock. You want to make sure that system is running when there is moisture dripping onto it, like water from a car in a car wash, or at a loading dock where a truck just pushed some snow onto the area.
Now it gets slippery, even on a clear, non-snowy day, and an aerial sensor will never pick that up. So, again, learning more about the project will allow all of us to pick the right combination of sensors. Very good advice. When it comes to placing your sensors, this is probably the next most important piece of advice.
We've got several different field best practices we'll go over with you real quick. I think the number one complaint we get is that the sensor is in a poor location and not detecting the snow and ice, which leads to the phone call where the customer says, "Hey, this isn't working." The sensor may be obstructed. Maybe it's too close to the building and doesn't catch the drift because the snow is blowing past the sensor instead of landing on it. Or, if the snow is coming down really hard, it can pack on top of that sensor and create a little igloo effect, preventing the snow from reaching the metal disc.
That can definitely happen. So where you put that sensor is important. You never want to mount it right under an overhang, trees, or roof eaves. Another big thing with that sensor, to prevent that igloo effect Mary mentioned, is to tilt it about 10 to 15 degrees so it sits at a slight angle. That way, if snow starts to accumulate, it will just slide off.
You don't want it completely flat because, depending on your climate, that can cause snow to bridge over it. Also, to connect back to what we were saying at the very beginning of the webinar, you can have a $15,000 job with a $1,000 controller that runs the system perfectly fine, but a $300 sensor is the piece that might prevent it from running properly. The sensor really is that final activation piece to get it done right. Absolutely.
When we're talking about a slab sensor on a ramp, a car wash, or a driveway, it's important to make sure it's centered between two heating runs so that it reads the average pavement temperature for the area being heated. Correct. I also like to mention that you want that slab sensor in the worst possible conditions. You don't want it tucked in a corner where people aren't walking or trucks aren't driving, because that area will probably stay clear. You want it right in the tire tracks or right where people are walking, so if snow gets packed down onto it, the system triggers, runs, and melts it. That way, you're detecting the actual conditions.
Absolutely. Another important takeaway here—and we've highlighted this before, but it's crucial—is that these slab sensors come with a housing. You always want to install that housing first and then install the sensor into it. That allows you to service and replace the sensor with ease, instead of embedding the sensor directly in concrete where it can never be replaced. So always use that housing.
That's the correct way to install it. Very good. Okay, and let's say the snow event has stopped and snow is no longer falling. Does the system shut off immediately? Well...
It does not. Ideally, no. We want that system to keep running just a little bit longer. This is what we call the after-run. The heating cables stay fully energized for a short while after the snow event stops, and you can adjust your controller to determine how long the system continues melting away residual moisture to prevent refreezing.
The call we sometimes get is, "My system is running and melting snow, but a little layer of slush remains." As soon as you ask the customer where the after-run dial is set, it's usually set to something like one or two hours, which might not be enough. Dial it up to three or four hours and see how it responds during the next weather event. But at the same time, we also get the opposite call.
The snow stopped, the surface is nice and dry because the system kept running and evaporated all the moisture, but the customer sees that the controller still indicates heat. They think, "It's still running and using energy. What am I doing wrong? Is my sensor bad?" Probably not. If the heat indicator is on but the snow indicator isn't, the after-run is just set too high, so you'll want to dial it down. It's very simple and easily adjustable.
It doesn't mean you have to leave it at one setting forever. If you know heavier snow or really cold temperatures are coming, dial it up. If it's a milder temperature with just light snowfall, keep it in the default position. Great advice. There's another component needed to operate a snow melting system when you get above roughly 16 amps, which we mentioned earlier.
16 amps was the limit for that value controller. Anything bigger than that will need a relay panel paired with it. We have three different sizes of relays: small, medium, and large. Tell us a little bit about what those relays do and what size relay is needed for different systems. The whole concept of snow melting is very scalable.
You approach it depending on the application. Just as we were saying, the basic controller handles up to 16 amps. If your system is roughly that or under, that's your setup. If you are anywhere between 16 and 30 amps, we'll probably design it with an advanced controller, knowing it fits within that 30-amp limit. When you step higher and need more than 30 amps—
—say you have two 240-volt cables totaling around 37 amps—you'll need a small relay panel to connect those mats or cables. And so on. You can go up to a large relay panel that takes six 240-volt cables or mats. But it doesn't stop there.
You can continue scaling up. If it's a large commercial ramp project and you have 35 cables, you'll need a couple of these large relay panels to connect everything, and they will still all run from one main controller. That's how you scale it up to the size you need. What's also great is that you can start with a smaller system.
Maybe you start with just the driveway because you're redoing it, so you have the snow melting, the controller, and a relay panel. Three years from now, you redo your back patio and want to add snow melting there. All you need to do is add another small relay panel. You don't need to buy a whole new controller or sensor; you just scale it up from there.
Absolutely. So there are a few things that we'd like to give you some tips on, and this is the time of year right now in October when we have some nice warmish days in the 60s and 70s. This is the time of year that we need you out there to commission these systems and test those little sensors—test that aerial sensor. We don't want that callback on the first snowfall, so when we're out there testing these systems, there's a few simple steps that we're going to show you how to do that. Yeah, three simple steps.
So as you already know from the second or third slide, that sensor—or the aerial sensor—all it needs is it needs to be cold, right? Because you only want to turn the system on when it's 38°F or below, and it needs some moisture on the top, right? Actually, we didn't touch on the topic that that sensor is heated. That's how it knows that if there's any kind of precipitation—snow, ice, or any kind of pellets landing on it—they melt, they close the contact, and that's how it operates. So what we need is step one. Hopefully I'm not going to spray your fingers here, but with this duster upside down, when you're spraying that, it starts to freeze.
So the more you spray, the more you freeze it. The more you freeze it, the closer that internal sensor is going to get to 38°. So now your condition number one is met. And then realistically, all you need to add is just a small piece of ice on the top. It's going to start to melt.
It's going to close the contact. So now two of your conditions are met: it's cold, and there is moisture on the top. That's what's going to trigger your system. And that would be a perfect time for an electrician to grab an amp meter and check the system to see if it's pulling exactly what it's designed to pull.
There is nothing else in the world that would tell me that that system would not be running, right? Because that's all the indication that the system is doing what it's supposed to do. So cool it down, put a piece of ice, a wet sponge, or something on the top just so it starts to create that water film, and give it some time. Make sure that snow and heat light starts to light up.
Yeah, that's really your only maintenance on the snow melting system each year: to just double-check and make sure that little sensor disc is free of any debris or stuff that might have come down over the summer. Yeah, it's a good practice to simply clean it up, make it nice and clean before that winter season comes, because that's how you know it will operate correctly. You don't want to have a layer of anything on it where maybe it's going to delay the trigger or anything like that. Absolutely. Good advice.
So, the really common field symptoms and fast diagnostics. Our number one controller issue here is the heater stays on continuously or shuts down too early. We basically said that's your after-run dial time. So it's not a one-system-fits-all, set-it-and-forget-it. You do need to maybe adjust it based on the conditions for that event.
And I think the important part here is to fully understand and confirm: is your system actually running during the snow event? Yes. Yes. If it is, then adjustment is what you need to do next. Yeah.
Okay, and the next point here we'll talk about is the sensor issue. So if it's a really heavy snowfall and the system has never turned on, what might be the cause of that? I would always start with asking who is on the site: let's go outside, let's find that sensor, and let's see what's happening.
Yeah, because we need to find out where that sensor actually is. Is it up in the open and it has an igloo effect? Perfect, let's clean it up, tilt it, and that should prevent that from happening. Is that sensor outside but has no snow on it?
It's probably under a tree, under an overhang, or right alongside the building, barely getting any snow landing on it. So it's all about that visual inspection that will tell us what to do next. Yeah, and you can even send us photos, too. Photos are really helpful, especially to diagnose something like that. So definitely send us a quick photo if you have an opportunity and you're having an issue.
A third reason might be something like an error code. This is something like, "Oh my gosh, I have a light blinking, blinking lights, what do I do?" Yeah, the good thing is we know what those error codes mean, and we know how to resolve those types of problems. The most common one would be a blinking green supply light on the premium controller.
That happens when the over-temperature or high-temperature limit sensor is either not connected or it's damaged, right? That just means the controller doesn't see that sensor. So of course, the most obvious approach would be to actually see: is there a sensor connected? Is it connected to the right terminal? Is that sensor testing like it's working, or is it reading open, meaning it got damaged?
And the good thing is you always have a way to bypass it. Either temporarily or for a future fix, you can just put a 470k resistor in it, and that's going to simulate that it's still cold, and it will continue to run the system. Right. So the big takeaway is now is the time of year to be out there testing your snow melting system. Good time.
Definitely a good time. We were just talking—there's a ski resort that just opened in Colorado. So yeah, it's snowing somewhere. Yeah, snow will be falling shortly. I think one more takeaway related to that:
when we talk about cleaning the sensor, that should immediately tell you that you don't want to have that sensor installed somewhere far away on the roof where it's going to be hard for either a homeowner or maintenance to reach it. You can still have it at the roof level if it's accessible, easy to reach, and works for your end user or homeowner. But it's not a mandatory requirement to place it there, and it definitely needs to be planned so someone can access it. Because the last thing you want is that sensor goes through two or three winters, now it's all dirty, now it's not working, and now we're troubleshooting something else when at the end of the day, that sensor just needs to be cleaned. That's all it is.
Yes, very good. So, the professional installer activation checklist. The first thing we want to make sure that you're doing is educating the client or homeowners on what controls the system and how it turns on. It's the moisture and temperature rule. The next best thing is always making sure that that sensor is just slightly tilted so that it doesn't get that igloo effect.
Yeah, and that you have it in a good location. The one thing I feel like I want to go back to on that number one again is—now that I'm thinking about this—a lot of the time, clients want to go with manual because they think the system is going to activate anytime it rains or anytime it's just cold. And it's not like that. It needs both of these to be met at the same time.
To make it very simple, the snow melting system is not going to run if it's just raining, and the snow melting system is not going to run when it's just 20 degrees outside but it's not snowing. So it's a tested, proven sensor that will do the job for you. But coming down to the rest of the checklist, you want to make sure your wiring polarity is right, so your sensor is color-coded and those wires are connected in the right order.
We talked about after-run: make sure it's set. For starters, if it's a brand-new system that just got installed, I would put it anywhere in the middle—three or four hours—and see how it goes, but make sure the homeowner knows that it can be adjusted. That's kind of the whole beauty of it. It's not a pre-programmed, set-it-and-forget-it setting.
It's something that you can adjust. And of course, bench test it using your freeze spray and some moisture to ensure it's running so that it's ready for that first snowfall. Great advice, great advice. There is technical support and design project services available. WarmlyYours has the best customer service, technical support, and design team in the industry, in my opinion, if I do say so myself.
I agree with you. Thank you. You will get your free SmartPlan. All you need to do is send in your drawing for the area that you're looking to have heated, whether it's a front porch, a big driveway, or some sort of commercial area. Send us the drawing with the dimensions.
Tell us what type of surface you're doing. We definitely need to know: is it going to be asphalt, concrete, or pavers? We do have different recommendations sometimes based on the surface you're using for the project. Give us those details, and we'll be happy to get you back a smart installation plan and go over the details to help you provide the best system for your clients.
And you're going to get a copy of the Pro Field Guide for your controls and sensors, so you'll be able to download that. If you have any questions, that's a good time to send those in via our contact forms, and we can always answer those live or later on in the follow-up email. And I'll let you close it up, Mary. Yeah, we want to say thank you very much for joining our webinar today. With the resources that we're going to send you today, you're going to get the PDF of all the slides that we just went through.
These are great resources for you to hand out to your field techs. We have an additional coupon available for your next snow melting project, so be sure to mention that coupon. You'll get an email directly for watching the webinar with us, and of course the full webinar recording will be given to you as well. I mentioned we have our wonderful 24/7 technical support, so if you do need help on the project, definitely reach out to us or shoot us an email.
We have tech support text messaging support also, so don't hesitate. We'd rather have you ask a question now than have a problem later. 100%. Just like that sensor that needs to be cleaned, right? There's no need to involve three hours of electrical testing if it's just something simple. Yep.
If you'd like to join us back next month, we're going to be doing it a little bit earlier in the month due to the Thanksgiving holiday in the US. We will be back on Wednesday, November 18th, same time at 1:00 PM Central. This time we're going to be talking about heating beyond the tile. This is for the folks that are heating under luxury vinyl, engineered flooring, laminate, or carpet. We're going to have a whole webinar on really great ways to keep your customers happy and cozy all winter long.
I really love that topic because every 10th call we get is, "Can I heat carpet? Can I heat wood? Can I heat LVT?" So yeah, that's what we're going to be talking about. Please join us on the next one, and thanks so much for today's webinar.
Thank you. Bye-bye.
Bonjour et bon après-midi à tous. Merci de vous joindre à notre webinaire d'octobre. Je m'appelle Mary Godawa et je suis votre gestionnaire des ventes chez WarmlyYours. Aujourd'hui, j'ai avec moi Anatoly, notre gestionnaire du soutien technique. Bon après-midi, tout le monde.
Bienvenue. Aujourd'hui, nous allons parler des commandes de fonte de la neige et de la bonne façon de les activer. Tout repose sur les sondes et l'activation des commandes.
Les commandes et les sondes de fonte de la neige sont vraiment au cœur des plus importantes décisions à prendre pour votre système de fonte de la neige. Nous allons parler du choix du bon contrôleur et de l'emplacement des sondes. Nous aborderons un peu le câblage, la mise en service des sondes avant la saison et la marche à suivre ensuite. Nous parlerons aussi des vulnérabilités cachées des systèmes de fonte de la neige et de ce qu'il faut surveiller. Et surtout, nous verrons pourquoi la stratégie de commande dicte le fonctionnement de votre système, vos coûts d'exploitation et, bien sûr, la satisfaction de vos clients.
J'aime bien ce dernier point, parce que c'est ce à quoi j'ai souvent affaire, et c'est une partie très importante de l'ensemble du projet. Nous allons donc en parler abondamment. Il y a aussi un point technique majeur à retenir : peu importe la taille de votre système, qu'il s'agisse d'un gros projet de 15 000 $ ou d'un câble dans le béton, si votre ensemble de commande de 600 $ ne fonctionne pas, n'est pas configuré ou n'est pas installé correctement, tout le système ne fonctionne pas. C'est pourquoi l'ensemble de commande, ou le mécanisme de commande, devient extrêmement important. Exactement, tout à fait.
La principale raison pour laquelle nous recevons des plaintes n'est pas vraiment que le système de fonte de la neige tombe en panne, que ce soit le tapis chauffant ou le câble. L'appel le plus redouté que reçoivent l'entrepreneur ou WarmlyYours en hiver est : « Aidez-moi, j'ai déjà 4 pouces de neige sur mon entrée. Qu'est-ce que je fais maintenant? » Alors, que s'est-il vraiment passé quand cet appel arrive? Il y a quelques causes courantes possibles, et certaines choses peuvent nous aider à faire le diagnostic. Je pense que la première chose à faire est probablement de vérifier où se trouve la sonde.
Est-elle couverte de neige? Fonctionne-t-elle? Oui. Vérifiez la sonde, vérifiez quel type de sonde vous avez réellement et assurez-vous qu'elle n'est pas obstruée. Un autre élément important lié à la commande est toujours un réglage du contrôleur.
Il peut s'agir de quelque chose d'aussi simple que la temporisation de fin de cycle, ou peut-être que le contrôleur n'a pas été bien configuré dès le premier jour. Tous ces éléments sont importants, et c'est par là que toute personne qui dépanne le système devrait commencer. Et c'est ce que nous allons couvrir aujourd'hui. Tout à fait. Bien.
L'activation physique des sondes automatiques exige deux choses : il faut de la température et de l'humidité pour déclencher le système. Ce n'est pas parce qu'il fait froid dehors que le système fonctionne en permanence. Il faut les deux. Et la température seuil est en fait de 38, et non de 32.
On nous demande tout le temps pourquoi c'est 38 et non 32. Eh bien, nous savons que, parfois, quand les flocons tombent, on parle de la température de l'air. Et parfois, la neige commence à tomber autour de... disons 30? En fait, elle peut commencer à n'importe quelle température, parce que la température de l'air est différente plus haut dans l'atmosphère. La température de la surface du sol peut être beaucoup plus froide ou beaucoup plus chaude.
Dans le cas d'un système surélevé, de type pont, il y aura plus de perte de chaleur. Donc oui, il y a beaucoup de facteurs. Mais nous savons, et l'industrie sait, que 38 est le chiffre auquel nous voulons nous en tenir. Il fonctionne depuis plus de 20 ans, et c'est avec cette valeur que sont conçus tous les principaux contrôleurs et sondes. Nous savons que les gens aiment le remettre en question ou peut-être l'ajuster, mais nous savons que ça fonctionne et qu'il n'y a généralement aucune raison d'y apporter des changements. Exact.
Nous voulons donc absolument nous assurer que le système se met en marche quand il le doit, dès que le premier flocon de neige tombe. Et il existe différentes stratégies selon le type de commande choisi. Certaines personnes veulent toujours quelque chose de manuel : « Je veux simplement pouvoir tourner le cadran. Je veux le faire moi-même. »
« Je veux le faire moi-même. Je veux un contrôle total de mon système. » Ensuite, il y a les commandes automatiques qui utilisent des sondes, comme nous l'avons mentionné. Puis nous avons la commande multizone, destinée à ceux qui disposent d'un ampérage limité.
Nous allons donc passer en revue les trois principales différences entre ces options. Oui, et avant de poursuivre et de voir chaque type de commande en détail, le point le plus important que j'essaie toujours de soulever quand quelqu'un veut une commande manuelle est celui-ci : comment prévoyez-vous réellement de faire fonctionner le système? Que se passera-t-il s'il se met à neiger juste au moment où vous allez vous coucher? Vous ne voulez pas vous réveiller avec 6 pouces de neige au sol et seulement alors mettre le système en marche, parce que ce n'est pas vraiment ce pour quoi il est conçu. Vous vous retrouvez alors avec une entrée ou une allée couverte de neige, alors qu'un système coûteux est installé.
Oui. En général, les commandes manuelles conviennent bien à quelque chose comme une allée menant à un spa, que vous voulez simplement faire fonctionner manuellement, peut-être même sans tenir compte de la neige, simplement pour la garder en marche. Il existe beaucoup d'applications pour le manuel, mais c'est vers l'automatique qu'il faut toujours s'orienter. Pour les commandes manuelles, nous en offrons deux principales. La SCM est ce que nous appelons la commande manuelle de fonte de la neige à double minuterie.
C'est exactement ce que ça laisse entendre. C'est une minuterie à l'ancienne avec une grosse manivelle. Vous tournez simplement le cadran jusqu'au nombre d'heures de fonctionnement souhaité. Encore une fois, c'est très pratique si vous avez simplement l'entrée d'un bâtiment ou quelque chose du genre, où le démarrage manuel convient davantage.
Certaines personnes aiment l'option Wi-Fi. Le Wi-Fi est aussi une technologie plus récente dont les gens pensent que ce sera la merveille des merveilles : vous l'activez et tous vos soucis fondent. Mais je pense que c'est un peu plus manuel qu'on ne le croit. Les gens ne réalisent pas que, à 3 h du matin, ils ne se réveilleront pas pour l'activer manuellement. Exactement.
C'est mon exemple préféré, parce que même si le Wi-Fi semble bien meilleur qu'une minuterie et pas manuel, c'est tout de même manuel. C'est vous qui contrôlez. C'est un simple interrupteur. Le même principe s'applique, n'est-ce pas? S'il se met à neiger au milieu de la nuit, allez-vous l'allumer la veille au soir?
Allez-vous l'allumer le matin? Ce n'est tout simplement pas ce pour quoi le système est conçu. Je pense qu'une bonne utilisation de la commande Wi-Fi, comme nous le montrons ici sur ce schéma optionnel, est d'utiliser votre interrupteur Wi-Fi comme coupure pour le fonctionnement automatique. Un exemple typique, ce sont les applications dont j'entends beaucoup parler pour un chalet à la montagne. Les propriétaires veulent un système automatique, c'est pourquoi vous voyez un contrôleur automatique ici.
Mais le client veut couper complètement l'alimentation entre ce contrôleur et le système lorsqu'il est absent, par exemple pendant deux mois. Il ne veut pas que le système fonctionne. Mais il veut quand même avoir un système automatique pour les deux ou trois semaines où il est sur place, et qu'il fonctionne de façon entièrement automatique. Il y a donc toujours une utilité. Plus nous en savons sur l'application, mieux nous pouvons adapter les composants et la configuration pour vous.
Tout à fait. Voici la sélection de commandes automatiques que nous offrons. Vous avez plusieurs choix, à commencer par notre petit contrôleur en forme de cône. Les gens l'appellent « le cône ». C'est le SCB-Dual, et je l'aime beaucoup parce que c'est une unité tout-en-un.
Son prix est excellent pour la plupart des projets résidentiels. Il peut aussi servir pour certains projets plus grands, mais ce qui est bien, c'est que c'est une petite unité autonome, tout-en-un. Oui. Elle fait le travail. Ensuite, la suivante est notre commande la plus populaire après celle-là, la SCA-Dual.
C'est notre commande avancée. Quand vous voyez le mot « Dual » après le nom, cela signifie qu'elle peut fonctionner à double tension. Autrement dit, que vous ayez un système de fonte de la neige de 120 volts ou de 240 volts, elle peut commuter les charges selon la capacité maximale. La SCA Advanced a une plus grande capacité, soit 30 ampères, et nous en reparlerons un peu plus.
Oui, nous allons entrer dans ces détails. Mais la série SCP est un cran au-dessus de votre contrôleur Dual, car elle peut gérer plus de sondes et est conçue pour de plus grandes applications, ainsi que pour des projets commerciaux et industriels. Le contrôleur Economy adopte une approche légèrement différente. Il possède un écran numérique et un processeur avec un bouton pour effectuer des réglages supplémentaires. Encore une fois, c'est un excellent contrôleur pour une application légèrement différente et particulière.
Et notre troisième grande commande ici est la commande Zone Breaker. La Zone Breaker a été conçue pour les projets qui n'ont pas suffisamment d'ampérage disponible pour alimenter, par exemple, un très grand système d'entrée de garage. Elle répartit les ampères disponibles en différentes zones, de sorte que vous puissiez faire fondre toute l'entrée en séquence. Oui, nous allons voir ce contrôleur plus en détail, mais ce qu'il est surtout important de savoir à propos de ce type de contrôleur, c'est que vous n'avez peut-être que 50 ampères disponibles, alors que votre grande entrée en exige 200. Pour simplifier, ce contrôleur ne peut faire fonctionner qu'un quart de cette surface à la fois; vous ne tirez donc que 50 ampères au lieu de 200 et vous ne surchargez pas votre système.
Excellent. Voici donc le petit cône, notre SCV-Dual. C'est la commande économique tout-en-un. Voyons ce que c'est. Oui, voyons ça.
Comme Mary l'a dit, le contrôleur en cône est très simple à utiliser et très simple à configurer, parce que c'est une unité deux-en-un. C'est ainsi que je le décris à chaque client. La grille de détection se trouve sur le dessus, c'est votre sonde, et vous avez le boîtier principal contenant le relais et la logique proprement dite. Vous n'avez besoin de rien d'autre.
C'est votre pièce tout-en-un pour faire fonctionner le tout. Oui, comme je l'ai dit, il n'y a aucun bouton. Comment l'allumer? Eh bien, il se met en marche tout seul lorsque de la glace ou de la neige se dépose sur le dessus de la sonde. Oui, nous pouvons faire un gros plan ici. Le truc avec ce contrôleur, c'est que vous avez deux voyants, un vert et un jaune, qui vous indiquent s'il y a de l'alimentation et si le système fonctionne ou non.
C'est aussi simple que ça pour voir s'il fonctionne et ce qu'il fait. Mais qu'est-ce qu'on veut dire d'autre? Nous avons déjà parlé du fait que c'est une option au excellent rapport qualité-prix, parce qu'elle offre tout ce dont vous avez besoin à faible coût. Et elle ne prend pas d'espace à l'installation comme certains autres panneaux de commande plus gros. Oui, vous la montez simplement sur un conduit de 3/4 de pouce et vous la placez à découvert, là où la neige va la frapper.
Assurez-vous qu'elle n'est pas sous un arbre ou un surplomb, et le tour est joué.
Voilà pour le SCV-Dual. La suivante est la SCA-Dual, et c'est notre commande la plus populaire parce qu'elle offre beaucoup de souplesse. On peut y installer jusqu'à deux sondes supplémentaires; vous pouvez donc utiliser votre sonde AIR-SS Snow Owl ou une sonde de pavage avec celle-ci, ce qui offre une grande polyvalence. Elle a une plus grande capacité en ampères, soit 30 ampères, et encore une fois, une double tension. Oui, vous pouvez réaliser ces travaux de taille moyenne sans avoir besoin d'un panneau de relais.
Donc oui, c'est excellent pour les petits et moyens travaux, avec peut-être la possibilité de raccorder deux sondes au besoin. Mais surtout, ce qui est le plus important ici, c'est que vous avez maintenant une façon très facile d'ajuster votre temps de maintien et le cycle de chauffage. Le temps de maintien est le cadran qui vous permet de régler la durée de fonctionnement du système après l'arrêt de la neige, parce que, bien sûr, vous ne voulez pas que quoi que ce soit regèle ou forme de la gadoue. Vous avez aussi un bouton de cycle de chauffage manuel très simple à utiliser. Disons que c'est une journée venteuse et qu'il reste de la neige en surface qu'il faut simplement faire fondre; vous pouvez le faire facilement avec ce bouton.
Très bien. Et le prochain contrôleur dont nous allons parler est notre SCE-120, la commande de 120 volts. Elle peut gérer deux zones distinctes en même temps avec deux sondes. Elle accepte jusqu'à deux sondes. Elle a un petit afficheur rétroéclairé, rien de très sophistiqué, juste une commande intuitive.
Et que peut-on dire d'autre? Des sondes de dalle avec celle-ci? Oui, les sondes de dalle sont le seul type de sonde utilisable ici pour les applications de fonte de la neige. Le projet principal que je vois toujours avec ce contrôleur est la combinaison d'une petite zone de fonte de la neige, ou de n'importe quelle taille en fait, avec une sonde de dalle, plus une section supplémentaire de dégivrage de toit et de gouttière avec du câble. Comme ce contrôleur peut gérer ces deux sections indépendamment, il ne mettra en marche la fonte de la neige que lorsque c'est nécessaire, alors que le toit n'a peut-être pas besoin de fonctionner à ce moment-là, et vice versa.
Il vous donne donc vraiment la possibilité d'avoir deux applications différentes dans un seul contrôleur tout en les faisant fonctionner indépendamment. Il peut donc recevoir deux sondes différentes. Oui, exactement. De plus, vous pouvez accéder à des réglages très précis et détaillés pour ajuster les températures, les points de consigne de température et la temporisation de fin de cycle, qui, comme nous l'avons dit plus tôt, n'est pas vraiment critique, car nous savons que les systèmes fonctionnent très bien avec les valeurs par défaut.
D'accord, et notre plus grosse commande ici est la SCP Premium. C'est le grand frère de la SCA que nous venons de vous présenter. C'est un excellent contrôleur. Il est aussi fourni avec une sonde de température à limite haute, une petite sonde qui s'insère, de sorte qu'il est intégré à cette sonde de limite haute. Cette sonde peut satisfaire aux exigences d'efficacité énergétique de certaines régions; vérifiez donc auprès de vos codes locaux si vous vous trouvez dans une région qui exige ce type de configuration.
Celui-ci accepte aussi plusieurs sondes; vous pouvez donc gérer le toit et la gouttière ainsi que la fonte de la neige avec cette unité. Cette unité accepte jusqu'à... est-ce six? Six sondes, ou quatre sondes. Oui, vous pouvez ajouter jusqu'à six sondes.
Comme je le disais plus tôt, s'il s'agit d'un plus grand projet commercial ou industriel et qu'il faut plus de deux sondes, c'est l'exemple parfait du contrôleur à choisir. Vous avez toujours les réglages du temps de maintien, ainsi que le cadran de coupure à haute température. Ce cadran vous permet de définir à quelle température vous voulez que le système de fonte de la neige fonctionne. Nous savons qu'il fera fondre la neige à 40 ou 50 degrés, mais certains systèmes pourraient avoir besoin de fonctionner plus chaud, et d'autres, moins chaud. C'est ce qui vous permet de faire cet ajustement.
Il se situe donc vraiment au-dessus d'une installation résidentielle typique de fonte de la neige. Et comme Mary l'a dit, quand une sonde de limite de haute température dans le pavage est exigée, c'est une excellente façon de le faire. Tout à fait. Un autre élément dont nous allons parler est notre prochain contrôleur : la commande Zone Breaker.
C'est un contrôleur multizone intelligent à répartition de charge, ce qui signifie qu'il divise le système en sections. Il peut aller jusqu'à quatre sections. Idéalement, nous voulons le faire en fonction de la quantité maximale d'ampérage disponible. Selon la taille du système, la quantité maximale d'ampères disponibles dictera en combien de zones ou de sections nous le divisons. J'aime toujours parler des détails de ce contrôleur, en particulier de l'interface à écran tactile, qui est un atout majeur pour la configuration et la surveillance du système.
Comme vous pouvez le voir, il y a quatre zones. Vous pouvez voir le temps de fonctionnement, ajuster votre priorité et voir ce que fait le système. Vous pouvez aussi régler la durée de fonctionnement de chaque zone. Par exemple, vous avez peut-être les zones 1 et 2 comme priorités les plus élevées et vous voulez y consacrer plus de temps ou d'énergie, alors que les zones 3 et 4 servent à un patio arrière qui n'a pas besoin d'autant de puissance ni de temps; cela se règle facilement sur ce contrôleur. Encore une fois, le principal critère pour ce contrôleur est une ampacité électrique disponible limitée, mais un grand système à gérer.
Exact. Quand on compare les sondes aériennes et les sondes de dalle, tout est une question d'adéquation au travail. Vous devez vraiment associer la sonde au projet, aux circonstances, aux conditions de vent, à l'exposition et à la faisabilité. Vos projets résidentiels dans une région du pays peuvent différer de ceux d'une autre, selon que vous avez des chutes de neige plus douces et plus détrempées ou une région où la neige tombe avec de grands vents et une forte exposition.
Il y a donc des différences dans le choix de vos sondes. Pour la compatibilité, il y a la sonde aérienne et la sonde de dalle. Les principaux avantages d'une sonde aérienne sont qu'elle est à découvert et qu'elle est facile à entretenir si on peut y accéder rapidement. Elle lit les conditions actuel
Hola y buenas tardes a todos. Gracias por acompañarnos en nuestro seminario web de octubre. Me llamo Mary Godawa y soy su gerente de ventas en WarmlyYours. Hoy me acompaña Anatoly, nuestro gerente de soporte técnico. Buenas tardes, chicos.
Bienvenidos. Hoy vamos a hablar sobre los controles para derretimiento de nieve y cómo lograr una activación correcta. Todo gira en torno a los sensores y la activación de los controles.
Los controles y sensores para derretimiento de nieve son, en realidad, parte de la decisión más importante de su sistema de derretimiento de nieve. De lo que vamos a hablar aquí es de cómo seleccionar el controlador correcto y la ubicación adecuada del sensor. Veremos un poco de cableado, la puesta en marcha de sus sensores antes de la temporada y qué hacer después. Hablaremos un poco sobre las vulnerabilidades ocultas de los sistemas de derretimiento de nieve y a qué debe prestarse atención. Y, en realidad, sobre por qué la estrategia de control determina cómo va a funcionar su sistema, sus costos de operación y, por supuesto, la satisfacción de sus clientes.
Me gusta ese último punto porque es con lo que tengo que lidiar mucho, y es una parte muy importante de todo el proyecto. Así que hablaremos bastante de eso. Además, una conclusión técnica importante es que, sin importar qué tan grande sea su sistema —puede ser un proyecto grande de $15,000 dólares o cable dentro del concreto—, si su paquete de control de $600 dólares no funciona, no está configurado o no está instalado correctamente, todo el sistema no funciona. Por eso el paquete o mecanismo de control se vuelve extremadamente importante. Así es, absolutamente.
La razón número uno por la que recibimos quejas en realidad no es que el sistema de derretimiento de nieve falle; no es la malla calefactora ni el cable. La peor llamada que recibe el contratista o WarmlyYours en invierno es: "Ayúdenme, mi entrada de autos ya tiene 10 centímetros de nieve encima. ¿Qué hago ahora?" Entonces, ¿qué sucedió realmente cuando llega esa llamada? Hay algunas causas comunes distintas, y hay algunas cosas que podemos revisar para saber qué pasó. Creo que lo primero que hay que hacer es verificar dónde está el sensor.
¿Está cubierto de nieve? ¿Está funcionando? Sí. Revise el sensor, revise qué tipo de sensor tiene realmente y asegúrese de que no esté obstruido. Pero otro factor importante relacionado con el control siempre sería un ajuste en el propio controlador.
Puede ser algo tan simple como el tiempo de postfuncionamiento, o tal vez ese controlador no se configuró correctamente desde el primer día. Todo esto es importante, y ahí es donde debe comenzar cualquier persona que esté diagnosticando el sistema. Y eso es lo que vamos a cubrir hoy. Absolutamente. Bien.
La activación física de los sensores automáticos necesita dos cosas: requiere temperatura y humedad para activar realmente el sistema. No es que, cuando hace frío afuera, el sistema vaya a estar funcionando todo el tiempo. Necesita ambas. Y la temperatura en realidad es de 38 °F, no de 32 °F.
La gente nos pregunta todo el tiempo: ¿por qué 38 y no 32? Bueno, sabemos que a veces, cuando caen los copos de nieve, hablamos de la temperatura del aire. Y a veces la nieve empieza a caer alrededor de... ¿cuánto dirías?, 30. Es decir, puede empezar prácticamente a cualquier temperatura porque la temperatura del aire es distinta más arriba en la atmósfera. La temperatura de la superficie del suelo podría ser mucho más fría o mucho más cálida.
Si se trata de un sistema elevado, tipo puente, va a perder más calor. Así que, sí, hay muchos factores. Pero sabemos, y la industria sabe, que 38 es el número al que queremos apegarnos. Ha funcionado por más de 20 años, y es con lo que están diseñados todos los controladores y sensores principales. Sabemos que a la gente le gusta cuestionarlo o tal vez ajustarlo, pero sabemos que funciona y normalmente no hay necesidad de hacerle ningún cambio. Correcto.
Así que definitivamente queremos hablar de asegurarnos de que el sistema se encienda cuando debe, cuando cae el primer copo de nieve. Y hay diferentes estrategias según el tipo de control que se elija. Algunas personas siempre quieren algo manual: "Solo quiero poder girar la perilla. Quiero hacerlo yo mismo."
"Quiero hacerlo yo mismo. Quiero control total de mi sistema." Y luego están los controles automáticos que usan los sensores, como mencionamos. Después tenemos el control multizona, que es para quien tiene disponibilidad limitada de amperaje.
Así que hablaremos de las tres diferencias principales entre ellos. Sí, y creo que antes de continuar y revisar cada tipo de control en detalle, lo más importante que siempre trato de mencionar cuando alguien quiere un control manual es: ¿cómo piensa operar realmente el sistema? ¿Qué pasará si empieza a nevar justo cuando se fue a dormir? No querrá despertarse con 15 centímetros de nieve en el suelo y entonces encender el sistema, porque para eso no está diseñado. Ahora prácticamente tiene su entrada de autos o su andador cubierto de nieve con un sistema costoso instalado.
Sí. Normalmente, los controles manuales serían una buena opción para algo como un andador hacia un jacuzzi que simplemente quiere operar manualmente, incluso sin importar si hay nieve, solo para mantenerlo funcionando. Hay muchas aplicaciones para el control manual, pero el automático es realmente hacia donde siempre se quiere orientar. Cuando hablamos de controles manuales, tenemos dos principales que ofrecemos. El SCM es el que llamamos control manual de temporizador dual para derretimiento de nieve.
Es justo lo que parece. Es un temporizador de la vieja escuela con una perilla grande. Solo gira esa perilla al número de horas que quiera que funcione. Nuevamente, esto es muy conveniente si solo tiene la entrada de un edificio o algo así, donde el arranque es más bien manual.
A algunas personas les gusta la opción de Wi-Fi. El Wi-Fi también es una tecnología más nueva con la que la gente cree que será lo mejor del mundo: lo enciende y se le derriten todas las preocupaciones. Pero creo que es un poco más manual. La gente no se da cuenta: a las 3:00 de la mañana, ¿se va a despertar para encenderlo manualmente? Exactamente.
Ese es mi ejemplo favorito, porque aunque el Wi-Fi suene mucho mejor que un temporizador y no manual, sigue siendo manual. Usted es quien lo controla. Es un interruptor simple. Se aplica lo mismo, ¿verdad? Si empieza a nevar a media noche, ¿lo va a encender la noche anterior?
¿Lo va a encender en la mañana? Para eso simplemente no está diseñado el sistema. Creo que un buen uso del control Wi-Fi, como mostramos aquí en ese diagrama opcional, es que puede utilizar su interruptor Wi-Fi como corte para su operación automática. Un ejemplo típico serían las aplicaciones de las que escucho mucho para una casa de vacaciones en la montaña. Quieren tener un sistema automático, por eso ven un controlador automático ahí.
Pero el cliente quiere cortar por completo la energía entre ese controlador y el sistema cuando está ausente, por ejemplo, durante dos meses. No quiere que ese sistema funcione. Pero aun así quiere tener un sistema automático durante esas dos o tres semanas que está en el lugar y que opere de forma totalmente automática. Así que siempre tiene un uso. Cuanto más sepamos sobre la aplicación, mejor podremos adaptar los componentes y la configuración para usted.
Absolutamente. Esta es la selección de controles automáticos que ofrecemos. Tenemos varios para elegir, empezando con nuestro pequeño controlador en forma de cono. La gente le llama "el cono". Este es el SCB-Dual, y me gusta mucho porque es una unidad todo en uno.
Tiene un excelente precio para la mayoría de los proyectos residenciales. También puede usarse en algunos proyectos más grandes, pero es práctico porque es una pequeña unidad independiente, todo en uno. Sí. Cumple su función. Y luego el siguiente es nuestro segundo control más popular, el SCA-Dual.
Este es nuestro control avanzado. Cuando ven la palabra "Dual" después, significa que puede manejar doble voltaje. Es decir, si tiene un sistema de derretimiento de nieve de 120 voltios o uno de 240 voltios, puede conmutar las cargas según la capacidad máxima. El SCA Advanced tiene una mayor capacidad, de 30 amperios, y hablaremos un poco más de eso.
Sí, entraremos en esos detalles. Pero la serie SCP es un paso superior a su controlador dual porque puede manejar más sensores y está pensada para aplicaciones más grandes, así como para proyectos comerciales e industriales. El controlador Economy tiene un enfoque un poco distinto. Tiene una pantalla digital y un procesador con una perilla para hacer ajustes adicionales. De nuevo, es un gran controlador para una aplicación un poco distinta y específica.
Y nuestro tercer control importante aquí es el control Zone Breaker. El Zone Breaker se diseñó para proyectos que no tienen suficiente amperaje disponible para operar, por ejemplo, un sistema de entrada de autos muy grande. Lo que hace es dividir los amperios disponibles en diferentes zonas para que pueda derretir toda la entrada de autos en secuencia. Sí, vamos a profundizar en este controlador, pero lo más importante que hay que saber sobre este tipo de controlador es que quizá solo tenga 50 amperios disponibles, pero tiene una entrada de autos grande que requiere 200 amperios. Para simplificar, este controlador puede operar solo una cuarta parte de esa área a la vez, de modo que solo consume 50 amperios en lugar de 200 y no sobrecarga su sistema.
Excelente. Aquí está el pequeño cono, nuestro SCV-Dual. Este es el control económico todo en uno. Veamos qué es. Sí, veámoslo.
Como dijo Mary, el controlador de cono tiene una operación muy sencilla y una configuración muy simple porque se trata de una unidad dos en uno. Así se lo describo a todos los clientes. Tiene su rejilla de detección en la parte superior, que es su sensor, y tiene la caja principal con el relevador y la lógica. No necesita nada más.
Esa es su pieza todo en uno para ponerlo en marcha. Sí, como dije, no tiene botones. ¿Cómo se enciende? Pues simplemente se enciende con la activación de hielo y nieve en la parte superior del sensor. Sí, podemos hacer un acercamiento aquí. Lo especial de este controlador es que tiene dos luces, una verde y una amarilla, que le indican si hay energía y si el sistema está funcionando o no.
Es así de simple ver si está funcionando o qué está haciendo. Pero ¿qué más queremos decir? Ya hablamos de que es una excelente opción de valor porque le da todo lo que necesita a bajo costo. Y no ocupa espacio para instalarse como algunos de los otros paneles de control más grandes. Sí, solo se monta sobre un conduit de 3/4 de pulgada y se coloca al aire libre donde le vaya a caer la nieve.
Asegúrese de que no esté debajo de un árbol ni de un alero, y listo.
Ese es el SCV-Dual. El siguiente que tenemos es el SCA-Dual, y es el más popular porque ofrece mucha flexibilidad. Se pueden instalar hasta dos sensores adicionales, por lo que puede usar su sensor AIR-SS Snow Owl o un sensor de pavimento en este, lo que ofrece mucha versatilidad. Tiene una mayor capacidad de amperaje, de 30 amperios, y de nuevo, doble voltaje. Sí, puede hacer estos trabajos de tamaño mediano sin necesidad de un panel de relevadores.
Entonces, sí, es excelente para esos trabajos pequeños a medianos, tal vez con la capacidad de conectar dos sensores si es necesario. Pero también, y lo más importante aquí, ahora tiene una forma muy sencilla de ajustar el tiempo de mantenimiento y el ciclo del calefactor. El tiempo de mantenimiento es la perilla que le permite ajustar cuánto tiempo funciona el sistema después de que deja de nevar, porque por supuesto no quiere que nada se vuelva a congelar ni que se forme nieve semiderretida. También tiene un botón de ciclo manual del calefactor muy fácil de usar. Digamos que es un día con viento y hay algo de nieve en la superficie que solo necesita derretirse; puede hacerlo fácilmente con este botón.
Muy bien. Y el siguiente controlador del que hablaremos es nuestro SCE-120, que es el control de 120 voltios. Puede manejar dos zonas distintas al mismo tiempo con dos sensores. Admite hasta dos sensores. Tiene solo una pequeña pantalla retroiluminada, nada demasiado sofisticado, solo un control intuitivo.
¿Y qué más podemos decir? ¿Sensores de losa en este? Sí, los sensores de losa son el único tipo de sensor que se puede usar aquí para aplicaciones de derretimiento de nieve. El proyecto principal que siempre veo para este controlador es la combinación de un área de derretimiento de nieve, quizá pequeña —o realmente de cualquier tamaño— con un sensor de losa, más una sección adicional de deshielo de techo y canalones con cable. Como este controlador puede manejar estas dos secciones de forma independiente, solo encenderá el derretimiento de nieve cuando se necesite, mientras que quizá el techo no necesite funcionar en ese momento, y viceversa.
Así que realmente le da la capacidad de tener dos aplicaciones distintas en un solo controlador y aun así operarlas de forma independiente. Entonces puede recibir dos sensores diferentes. Sí, exactamente. Además, puede entrar a configuraciones muy específicas y detalladas para ajustar temperaturas, puntos de ajuste de temperatura y el postfuncionamiento, que, como comentamos antes, no es realmente crítico porque sabemos que operan perfectamente con el valor predeterminado.
Bien, y luego nuestro control más grande aquí es el control SCP Premium. Este es el hermano mayor del SCA que acabamos de mostrarles hace un momento. Es un gran controlador. También viene con un sensor de límite de alta temperatura, una pequeña sonda que se inserta, de modo que está integrado con ese sensor de temperatura de límite alto. Ese sensor puede cumplir con requisitos de energía en ciertas zonas, así que consulte sus códigos locales para saber si está en un área que requiere ese tipo de configuración.
Este también admite varios sensores, por lo que puede manejar techo y canalones, así como derretimiento de nieve. Esta unidad admite hasta... ¿son seis? ¿Seis sensores o cuatro? Sí, puede agregar hasta seis sensores.
Como decía antes, si es un proyecto comercial o industrial más grande y se requieren más de dos sensores, ese es el ejemplo perfecto del controlador que debe elegir. Sigue teniendo los ajustes del tiempo de mantenimiento junto con la perilla de corte por alta temperatura. Esa perilla de corte por alta temperatura le permite establecer qué tan caliente quiere que opere el sistema de derretimiento de nieve. Sabemos que derretirá nieve si hace 40 o 50 grados, pero algunos sistemas pueden necesitar operar a una temperatura más alta y otros a una más baja. Eso es lo que le da la capacidad de hacer ese ajuste.
Así que realmente da un salto respecto a la instalación residencial típica de derretimiento de nieve. Y como dijo Mary, cuando existe el requisito de un sensor de límite de alta temperatura en el pavimento, esa es una excelente manera de hacerlo. Absolutamente. Otra cosa de la que vamos a hablar es nuestro siguiente controlador: el control Zone Breaker.
Este es un controlador multizona inteligente con distribución de carga, y eso significa que divide el sistema en secciones. Puede llegar hasta cuatro secciones. Idealmente, queremos hacerlo con base en la cantidad máxima de amperaje disponible. Dependiendo de qué tan grande sea el sistema, la cantidad máxima de amperios disponibles va a determinar en cuántas zonas o secciones lo dividimos. Siempre me gusta hablar de los detalles de este controlador, en particular de la interfaz de pantalla táctil, que es muy importante a la hora de configurar y monitorear el sistema.
Como pueden ver, hay cuatro zonas. Puede ver cuál es el tiempo de funcionamiento, ajustar la prioridad y ver lo que está haciendo el sistema. También puede ajustar cuánto tiempo funciona cada zona. Por ejemplo, quizá las zonas 1 y 2 son su máxima prioridad y quiere dedicar más tiempo o energía a esas zonas, mientras que las zonas 3 y 4 son para un patio trasero que no necesita tanta potencia ni tiempo; eso se puede configurar fácilmente en este controlador. Una vez más, el principal motivo para este controlador sería una capacidad eléctrica de amperaje limitada, pero con un sistema grande que debe administrarse.
Correcto. Cuando hablamos de sensores aéreos frente a sensores de losa, todo se trata de qué tan bien se ajusta al trabajo. Realmente hay que combinar el sensor con el proyecto, las circunstancias, las condiciones de viento, la exposición y la factibilidad. Sus proyectos residenciales en una región del país pueden ser diferentes a los de otra, dependiendo de si hay nevadas más suaves y con nieve semiderretida, o una zona de nevadas con mucho viento y alta exposición.
Por eso hay diferencias al elegir sus sensores. Cuando hablamos de compatibilidad, existen el aéreo y el de losa. Las ventajas clave de un sensor aéreo son que está al aire libre y es fácil de revisar si se puede acceder a él rápidamente. Lee las condiciones actuales mientras cae la nieve.
Sí, siempre me gusta hablar del sensor de losa. La mayor parte del tiempo cotizamos un sensor aéreo porque es el que se usa en la mayoría de los proyectos. Pero el sensor de losa ofrece un enfoque específico que a veces necesitamos. Como ven aquí, para algo como una rampa comercial, la entrada de un hospital o cualquier acceso, el sensor está justo en la superficie. Aunque no esté nevando, la gente puede arrastrar nieve hacia esa entrada de autos, rampa o acceso.
Usted quiere que el sistema lo detecte y se encienda. La única manera de que lo haga es si el sensor está justo en esa superficie. Otro ejemplo sería un autolavado o un muelle de carga. Quiere asegurarse de que el sistema esté funcionando cuando haya humedad goteando sobre la superficie, como el agua de un auto en un autolavado, o en un muelle de carga donde un camión acaba de empujar nieve hacia el área.
Ahora se pone resbaloso, incluso en un día despejado y sin nieve, y un sensor aéreo nunca lo detectará. Así que, de nuevo, conocer más sobre el proyecto nos permitirá a todos elegir la combinación correcta de sensores. Muy buen consejo. Cuando se trata de colocar los sensores, este es probablemente el siguiente consejo más importante.
Tenemos varias mejores prácticas de campo diferentes que repasaremos rápidamente. Creo que la queja número uno que recibimos es que el sensor está en un mal lugar y no detecta la nieve ni el hielo, lo que lleva a la llamada en la que el cliente dice: "Oigan, esto no está funcionando." Puede que el sensor esté obstruido. Tal vez esté demasiado cerca del edificio y no capte la nieve acumulada porque la nieve pasa volando junto al sensor en lugar de caer sobre él. O, si la nieve cae con mucha fuerza, puede compactarse encima del
Dzień dobry wszystkim i witamy w naszym październikowym webinarze. Nazywam się Mary Godawa i jestem kierowniczką sprzedaży w WarmlyYours. Dziś jest ze mną Anatoly, nasz kierownik wsparcia technicznego. Dzień dobry, Anatoly.
Witamy. Dziś porozmawiamy o sterownikach do systemów topienia śniegu i o prawidłowej aktywacji. Cały temat dotyczy czujników i aktywacji sterowników.
Sterowniki i czujniki do topienia śniegu to jedna z najważniejszych decyzji przy projektowaniu systemu. Omówimy wybór odpowiedniego sterownika i rozmieszczenie czujników. Poruszymy trochę kwestię okablowania, przedsezonowego uruchomienia czujników i tego, co robić dalej. Porozmawiamy też o ukrytych słabych punktach systemów topienia śniegu i na co zwracać uwagę. No i przede wszystkim o tym, dlaczego strategia sterowania decyduje o tym, jak będzie działał system, ile będą wynosić koszty eksploatacji i, oczywiście, jak zadowoleni będą Państwa klienci.
Podoba mi się ten ostatni punkt, bo zajmuję się tym bardzo często, a to bardzo ważna część całego projektu. Będziemy więc o tym dużo mówić. Najważniejszy wniosek techniczny jest też taki, że bez względu na to, jak duży jest Państwa system – może to być projekt za 15 000 dolarów albo kabel w betonie – jeśli pakiet sterowania za 600 dolarów nie działa, nie jest skonfigurowany lub został źle zainstalowany, cały system nie działa. Dlatego pakiet sterowania, czyli mechanizm sterujący, jest tak niezwykle ważny. Tak, absolutnie.
Najczęstszą przyczyną reklamacji wcale nie jest awaria systemu topienia śniegu – to nie mata grzewcza ani kabel. Najgorszy telefon, jaki wykonawca lub WarmlyYours dostaje zimą, brzmi: „Pomocy, na moim podjeździe leży już 10 cm śniegu. Co mam teraz zrobić?” Co się więc naprawdę stało, gdy dostajemy takie zgłoszenie? Najczęstszych winowajców jest kilku i istnieje kilka rzeczy, które możemy sprawdzić, żeby ustalić, co jest przyczyną. Myślę, że pierwszą rzeczą jest sprawdzenie, gdzie znajduje się czujnik.
Czy jest przykryty śniegiem? Czy działa? Tak. Sprawdźcie czujnik, sprawdźcie, jakiego typu czujnik faktycznie macie, i upewnijcie się, że nic go nie zasłania. Drugą ważną rzeczą związaną ze sterowaniem jest zawsze konkretne ustawienie w sterowniku.
Może to być coś tak prostego jak czas dogrzewania, a może sterownik od początku nie został prawidłowo skonfigurowany. Wszystkie te rzeczy są ważne i od nich powinna zacząć każda osoba diagnozująca system. I to właśnie omówimy dzisiaj. Dokładnie. Dobrze.
Fizyczna aktywacja czujników automatycznych wymaga dwóch rzeczy: do uruchomienia systemu potrzebna jest zarówno odpowiednia temperatura, jak i wilgoć. Nie jest tak, że system będzie pracował cały czas, gdy tylko jest zimno. Potrzebne są oba warunki. A temperatura to w rzeczywistości 38°F (ok. 3°C), a nie 32°F (0°C).
Ludzie pytają nas cały czas, dlaczego 38, a nie 32? Cóż, wiemy, że czasem, gdy spadają płatki śniegu, mówimy o temperaturze powietrza. A czasem opady śniegu zaczynają się przy – jak mówisz, 30? To znaczy, mogą zacząć się praktycznie przy dowolnej wartości, ponieważ temperatura powietrza wyżej w atmosferze jest inna. Temperatura powierzchni gruntu może być znacznie niższa lub znacznie wyższa.
Jeśli jest to system podwyższony, typu mostowego, będzie tracił więcej ciepła. Tak więc jest tu wiele czynników. Ale wiemy, i branża też wie, że 38 to wartość, której chcemy się trzymać. Sprawdza się od ponad 20 lat i na tej wartości opierają się wszystkie główne sterowniki i czujniki. Wiemy, że ludzie lubią to kwestionować lub może coś zmieniać, ale wiemy, że to działa, i zazwyczaj nie ma potrzeby wprowadzania żadnych zmian. Zgadza się.
Zdecydowanie chcemy więc porozmawiać o tym, jak upewnić się, że system włącza się wtedy, kiedy powinien, czyli gdy spadnie pierwszy płatek śniegu. Istnieją różne strategie wyboru rodzaju sterowania. Niektórzy zawsze chcą czegoś manualnego: „Chcę po prostu móc przekręcić pokrętło. Chcę to robić sam.”
„Chcę robić to sam. Chcę mieć pełną kontrolę nad moim systemem.” Są też sterowniki automatyczne, które wykorzystują czujniki, jak wspomnieliśmy. Mamy również sterowanie wielostrefowe, przeznaczone dla kogoś, kto ma ograniczoną dostępną moc przyłączeniową w amperach.
Omówimy więc trzy główne różnice między nimi. Tak, i myślę, że zanim przejdziemy do szczegółowego omawiania każdego typu sterowania, najważniejsze, o co zawsze staram się zapytać, gdy ktoś chce sterowania manualnego, to: jak właściwie planujesz obsługiwać ten system? Co się stanie, jeśli zacznie padać śnieg akurat wtedy, gdy pójdziesz spać? Nie chcesz obudzić się z 15 cm śniegu na ziemi, a dopiero potem włączyć system, bo nie do tego został zaprojektowany. Wtedy masz podjazd lub chodnik pokryty śniegiem, a zainstalowany kosztowny system.
Tak. Zazwyczaj sterowanie manualne dobrze sprawdza się na przykład przy ścieżce do jacuzzi, którą chcesz po prostu włączać ręcznie, może nawet ignorując opady śniegu, żeby system po prostu działał. Zastosowań dla sterowania manualnego jest wiele, ale zawsze warto kierować się w stronę automatycznego. Jeśli chodzi o sterowanie manualne, oferujemy dwa główne rozwiązania. SCM to to, co nazywamy manualnym sterownikiem z podwójnym zegarem do topienia śniegu.
Jest dokładnie taki, jak brzmi. To staromodny zegar z dużym pokrętłem. Po prostu przekręcasz tarczę na liczbę godzin, przez które ma pracować. Znowu, jest to bardzo wygodne, jeśli masz tylko wejście do budynku lub coś podobnego, gdzie start jest raczej manualny.
Niektórzy lubią opcję Wi-Fi. Wi-Fi to także nowsza technologia, od której ludzie oczekują cudów – można ją włączyć i po prostu rozwiąże wszystkie problemy. Ale myślę, że to jest trochę bardziej manualne. Ludzie nie zdają sobie sprawy: czy o trzeciej w nocy obudzisz się, żeby ręcznie to włączyć? Dokładnie.
To mój ulubiony przykład, bo chociaż Wi-Fi brzmi, jakby było dużo lepsze niż zegar i nie było manualne, to nadal jest manualne. To ty tym sterujesz. To zwykły włącznik. Obowiązuje ta sama zasada, prawda? Jeśli śnieg zacznie padać w środku nocy, czy włączysz system wieczorem poprzedniego dnia?
Czy włączysz go rano? Po prostu nie do tego system został zaprojektowany. Myślę, że dobrym zastosowaniem sterowania Wi-Fi, jak pokazujemy na tym opcjonalnym schemacie, jest wykorzystanie przełącznika Wi-Fi jako wyłącznika dla pracy automatycznej. Typowy przykład to zastosowania, o których często słyszę, w domu wakacyjnym w górach. Chcą mieć system automatyczny, dlatego widzicie tam sterownik automatyczny.
Ale klient chce całkowicie odciąć zasilanie między sterownikiem a systemem, gdy go nie ma, na przykład przez dwa miesiące. Nie chce, żeby system pracował. Ale nadal chce mieć system automatyczny na te dwa do trzech tygodni, kiedy przebywa w tym miejscu, i żeby działał w pełni automatycznie. Więc zawsze znajdzie się dla tego zastosowanie. Im więcej wiemy o zastosowaniu, tym lepiej możemy dopasować komponenty i konfigurację.
Absolutnie. Oto wybór sterowników automatycznych, które oferujemy. Mamy kilka do wyboru, zaczynając od naszego prostego, małego sterownika w kształcie stożka. Ludzie nazywają go stożkiem. To SCB-Dual i bardzo go lubię, ponieważ jest to urządzenie typu wszystko w jednym.
Ma świetną cenę dla większości projektów mieszkaniowych. Można go używać także w niektórych większych projektach, ale jest fajny, bo to samodzielne, kompaktowe urządzenie typu wszystko w jednym. Tak. Robi swoje. A następny to nasz kolejny najpopularniejszy sterownik, SCA-Dual.
To nasz zaawansowany sterownik. Kiedy widzisz słowo „Dual” po nazwie, oznacza to, że obsługuje podwójne napięcie. Czyli jeśli masz system topienia śniegu 120 V lub system 240 V, może przełączać obciążenia w zależności od maksymalnej mocy. SCA Advanced ma większą obciążalność – 30 A – i powiemy o tym trochę więcej.
Tak, wejdziemy w te szczegóły. Seria SCP to wyższa półka niż sterownik Dual, ponieważ obsługuje więcej czujników i jest przeznaczona do większych zastosowań, a także do projektów komercyjnych i przemysłowych. Economy Controller to nieco inne podejście. Ma cyfrowy wyświetlacz i procesor z pokrętłem do dodatkowych regulacji. To również świetny sterownik do nieco innego, wyjątkowego zastosowania.
Naszym trzecim dużym rozwiązaniem jest sterownik Zone Breaker. Zone Breaker został zaprojektowany do projektów, w których nie ma wystarczającej dostępnej mocy w amperach, aby zasilić na przykład bardzo duży system na podjeździe. Dzieli on dostępne ampery na różne strefy, dzięki czemu można stopić śnieg na całym podjeździe po kolei. Tak, omówimy ten sterownik dokładniej, ale najważniejsze, co trzeba wiedzieć o tego typu sterowniku, to że możesz mieć dostępne tylko 50 A, a duży podjazd wymaga 200 A. Mówiąc prosto, ten sterownik może zasilać tylko jedną czwartą tej powierzchni naraz, więc pobierasz tylko 50 A zamiast 200 A i nie przeciążasz instalacji.
Świetnie. Oto nasz mały stożek, SCV-Dual. To budżetowy sterownik typu wszystko w jednym. Zobaczmy, co to takiego. Tak, zobaczmy.
Tak jak powiedziała Mary, sterownik w kształcie stożka ma bardzo prostą obsługę i bardzo prostą konfigurację, ponieważ mamy do czynienia z urządzeniem dwa w jednym. Tak opisuję go każdemu klientowi. Na górze masz siatkę czujnikową, czyli czujnik, a do tego główną obudowę z przekaźnikiem i właściwą logiką. Nie potrzebujesz niczego więcej.
To twój kompletny element, żeby wszystko zaczęło działać. Tak, jak mówiłem, nie ma przycisków. Jak go włączyć? Włącza się po prostu po pojawieniu się lodu i śniegu na górze czujnika. Tak, możemy zrobić tu małe zbliżenie. Fajne w tym sterowniku jest to, że masz dwie lampki, zieloną i żółtą, które informują, czy jest zasilanie i czy system pracuje, czy nie.
Tak łatwo zobaczyć, czy pracuje i co robi. Ale co jeszcze chcemy powiedzieć? Mówiliśmy już, że to świetna opcja pod względem stosunku ceny do jakości, bo daje wszystko, czego potrzebujesz, w niskiej cenie. I nie zajmuje miejsca przy montażu jak niektóre większe szafy sterownicze. Tak, po prostu montujesz go na rurze instalacyjnej 3/4 cala i umieszczasz na otwartej przestrzeni, gdzie będzie padał śnieg.
Upewnij się, że nie jest pod drzewem ani pod okapem, i gotowe.
To SCV-Dual. Następny, który mamy, to SCA-Dual, nasz najpopularniejszy, ponieważ oferuje dużą elastyczność. Można zainstalować do dwóch dodatkowych czujników, więc można zastosować czujnik AIR-SS Snow Owl lub czujnik nawierzchniowy, co daje dużą wszechstronność. Ma większą obciążalność – 30 A – i znów podwójne napięcie. Tak, można realizować te średniej wielkości prace bez potrzeby stosowania panelu przekaźnikowego.
Więc tak, świetny do małych i średnich realizacji, z możliwością podłączenia dwóch czujników, jeśli jest to potrzebne. Ale najważniejsze jest też to, że masz teraz bardzo łatwą możliwość regulacji czasu podtrzymania i cyklu grzania. Czas podtrzymania to pokrętło, które pozwala ustawić, jak długo system pracuje po ustaniu opadów śniegu, bo oczywiście nie chcesz, żeby cokolwiek ponownie zamarzło lub utworzyło breję. Masz też bardzo prosty w użyciu przycisk ręcznego cyklu grzania. Powiedzmy, że jest wietrzny dzień i na powierzchni leży trochę śniegu, który trzeba tylko stopić; możesz to łatwo zrobić tym przyciskiem.
Bardzo dobrze. Kolejny sterownik, o którym porozmawiamy, to nasz SCE-120, czyli sterownik 120 V. Obsługuje dwie oddzielne strefy jednocześnie z dwoma czujnikami. Przyjmie do dwóch czujników. Ma tylko mały podświetlany wyświetlacz, nic szczególnie wyszukanego, po prostu intuicyjna obsługa.
A co jeszcze możemy powiedzieć? Czujniki płytowe? Tak, czujniki płytowe to jedyny typ czujnika, którego można tu użyć do zastosowań topienia śniegu. Główny projekt, jaki zawsze widzę dla tego sterownika, to połączenie może małej – a właściwie dowolnej wielkości – powierzchni topienia śniegu z czujnikiem płytowym oraz dodatkowej sekcji odladzania dachu i rynien za pomocą kabla. Ponieważ ten sterownik potrafi niezależnie zarządzać tymi dwiema sekcjami, włączy topienie śniegu tylko wtedy, gdy jest potrzebne, podczas gdy dach może nie wymagać pracy w tym czasie, i odwrotnie.
Daje to więc możliwość obsługi dwóch różnych zastosowań w jednym sterowniku, a jednocześnie ich niezależnej pracy. Czyli może obsłużyć dwa różne czujniki. Tak, dokładnie. Ponadto można wejść w bardzo szczegółowe ustawienia i dostosować temperatury, wartości zadane temperatury oraz czas dogrzewania, który, jak wcześniej mówiliśmy, nie jest tak naprawdę krytyczny, bo wiemy, że przy ustawieniach domyślnych działają bez zarzutu.
Dobrze, a naszym największym sterownikiem jest SCP Premium. To starszy brat SCA, który pokazaliśmy chwilę temu. To świetny sterownik. Dostępny jest też z czujnikiem ograniczenia wysokiej temperatury, małą sondą, którą się wprowadza, więc jest zintegrowany z tym czujnikiem. Taki czujnik może spełniać wymagania dotyczące efektywności energetycznej w niektórych regionach, więc sprawdźcie lokalne przepisy, aby wiedzieć, czy znajdujecie się na obszarze, który wymaga takiej konfiguracji.
Ten również obsługuje wiele czujników, więc można w nim realizować zarówno dach i rynny, jak i topienie śniegu. To urządzenie obsługuje do – czy to sześć? Sześć czujników, czy cztery czujniki. Tak, można dodać do sześciu czujników.
Jak mówiłem wcześniej, jeśli jest to większy projekt komercyjny lub przemysłowy i wymagane jest więcej niż dwa czujniki, to doskonały przykład sterownika do wyboru. Nadal masz regulację czasu podtrzymania oraz pokrętło odcięcia wysokiej temperatury. To pokrętło pozwala ustawić, jak ciepło ma pracować system topienia śniegu. Wiemy, że będzie topił śnieg przy 40 czy 50 stopniach, ale niektóre systemy mogą wymagać pracy w wyższej temperaturze, a inne w niższej. Dzięki temu możesz wprowadzić taką regulację.
To naprawdę wyższy poziom niż typowa domowa instalacja topienia śniegu. I jak powiedziała Mary, gdy wymagany jest czujnik ograniczenia wysokiej temperatury w nawierzchni, to świetny sposób na jego zastosowanie. Absolutnie. Kolejna rzecz, o której powiemy, to nasz następny sterownik: Zone Breaker.
To inteligentny wielostrefowy sterownik z podziałem obciążenia, co oznacza, że dzieli system na sekcje. Może obsłużyć do czterech sekcji. Najlepiej robić to w oparciu o maksymalną dostępną moc w amperach. W zależności od wielkości systemu, maksymalna dostępna liczba amperów zadecyduje o tym, na ile stref lub sekcji go podzielimy. Zawsze lubię mówić o szczegółach tego sterownika, zwłaszcza o interfejsie z ekranem dotykowym, który ma duże znaczenie przy konfiguracji i monitorowaniu systemu.
Jak widać, są cztery strefy. Można zobaczyć czas pracy, ustawić priorytet i sprawdzić, co robi system. Można też regulować, jak długo pracuje każda strefa. Być może strefy 1 i 2 mają najwyższy priorytet i chcesz poświęcić więcej czasu lub energii na ich zasilanie, podczas gdy strefy 3 i 4 dotyczą tylnego patio, które nie potrzebuje tyle mocy ani czasu; da się to łatwo ustawić w tym sterowniku. Jeszcze raz: głównym powodem zastosowania tego sterownika jest ograniczona dostępna moc elektryczna przy jednoczesnej potrzebie obsłużenia dużego systemu.
Zgadza się. Gdy mówimy o czujnikach powietrznych i czujnikach płytowych, chodzi o dopasowanie do zadania. Naprawdę trzeba dobrać czujnik do projektu, okoliczności, warunków wiatrowych, ekspozycji i wykonalności. Projekty mieszkaniowe w jednej części kraju mogą się różnić od tych w innej, w zależności od tego, czy występują łagodniejsze, bardziej mokre opady śniegu, czy obszar o silnym wietrze i dużej ekspozycji na opady.
Występują więc różnice w doborze czujników. Jeśli chodzi o kompatybilność, mamy czujnik powietrzny i płytowy. Kluczowe zalety czujnika powietrznego to to, że znajduje się na otwartej przestrzeni i jest łatwy w serwisowaniu, jeśli można szyb
Related Resources
-
Product · SCA-DUAL
Advanced Snow and Ice Melt Control - 100-277VAC
The SCA-DUAL provides for advanced control of snow melting and roof and gutter deicing systems to minimize operating costs. It operates electrically- and mechanically-held conta...
-
Product · SCV-DUAL
Value Snow and Ice Melt Control - 100-240VAC
This configurable aerial snow melting controller makes automatic snow melting cost-effective in even the smallest applications. Heaters operate at temperatures below the de...
-
Product · SC-MZ-TOUCH
ZoneBraker Touchscreen Multi-Zone Snow and Ice Melting Controller
The automatic ZoneBraker Touchscreen Multi-Zone Snow and Ice Melting Controller is a high-tech yet intuitive option for controlling your electric snow melting system. The device...
-
Video
Snow Melt Control Options
Explore advanced snow melting controls with sensors, multi-zone options, and WiFi capabilities. Find the perfect solution for your project.
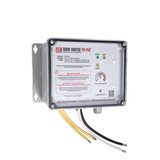
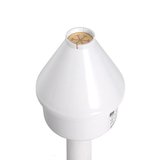
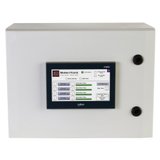
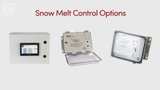
Related Questions
Showing all 2 questions
Heated driveway systems can be controlled using a variety of options, ranging from manual timers to advanced automatic controllers. Automatic controllers use moisture and temperature sensors to detect snow or freezing rain, turning the system on only when needed. This ensures your driveway is clear while maximizing energy efficiency.
WarmlyYours snow melting systems support two types of sensors for automatic operation:
Aerial sensor — Mounted above the heated surface (typically on a post or wall), this sensor measures air temperature and detects precipitation. The control activates the system when both conditions are met (cold enough and moisture is present). Aerial sensors are the most common choice because they respond quickly to changing weather and do not require embedding during installation.
Slab sensor — Embedded directly in the concrete or pavers during installation, this sensor measures the surface temperature of the slab. It activates the system when the slab drops below a set threshold and shuts off once the surface reaches the desired temperature. Slab sensors offer precise control over surface conditions but must be installed before the slab is poured.
If you are pouring a new slab, a slab sensor gives the most accurate control. For retrofit or overlay installations, an aerial sensor is typically the better choice. Some controllers support both sensor types simultaneously for enhanced reliability.
Get a Free Snow Melting Quote
Our Radiant Experts are ready to help. Start with a free, no-obligation quote for your project.


