

Thermostat with Power Modules (TH115-AF-12VDC / CT230 series)
Main Products
Do you need support or specifications for a specific model? Identify your model below.
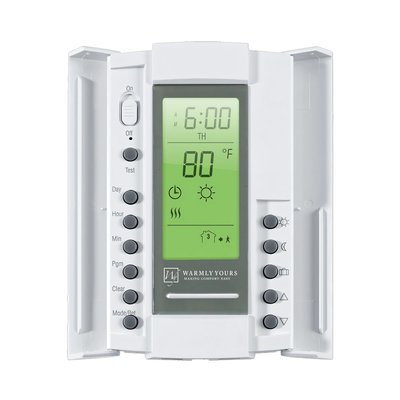
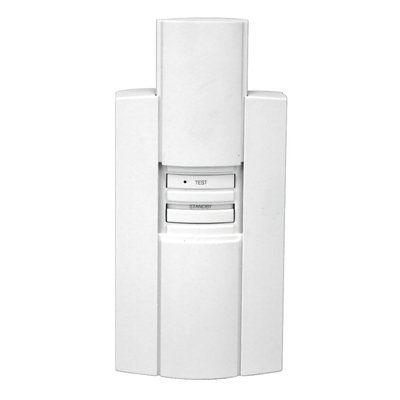
Support Questions
Showing 10 of 30 questions
The breaker and wire sizes are selected based on the total amperage of the WarmlyYours heating system connected to a single thermostat. This information is on the WarmlyYours heating system's installation plan, electrical plan, or UL label. Based on guidelines from the National Electrical Code: loads up to 16 Amps may utilize 12 gauge wire with a 20-Amp breaker, and loads up to 12 Amps - 14 gauge wire with a 15-Amp breaker. Local code and/or other factors may change these guidelines.
One thermostat can control multiple heating mats/cables as long as all the heating elements are using less than 15 amps:
TempZone™ will cover aprx. 120 sq. ft. for 120V systems and 240 sq. ft. for 240V systems on one thermostat.
Environ™ will cover aprx. 150 sq. ft. for 120V systems and 300 sq. ft. for 240V systems on one thermostat.
Slab Heat will cover aprx. 90 sq. ft. for 120V systems and 180 sq. ft. for 240V systems on one thermostat.
In theory, it is possible, if no other options are available. We do not recommend it, but If the thermostat is controlling the floor temperature with a floor sensor, then it can go on an exterior wall. It is important that the floor sensor gets located in an area of the floor not hit by sunshine.
If the thermostat will be controlling the air temperature with the built-in ambient sensor, then it should go on an interior wall.
A GFCI/GFEP (Ground Fault Circuit Interrupter / Ground Fault Equipment Protection) works differently than a circuit breaker by specifically detecting a small imbalance in electrical current between the hot and neutral wires, which indicates a potential ground fault (like a person touching a live wire), and instantly shutting off the power to prevent shock, while a circuit breaker only trips when there's a significant overload in current flow on the circuit, like a short circuit or too many appliances plugged in.
Relays can fail due to excessive current or voltage. When a relay is exposed to too much current, the contacts can burn out. High voltage can also damage the coil. Other reasons include mechanical wear and tear, dust or dirt buildup, and moisture. These factors can cause the relay to malfunction or stop working entirely. Regular maintenance and using the relay within its specified limits can help prevent failures.
First check for voltage at the back of the thermostat. Make sure the power module power switches are ON, then test for 12VDC across the 12VDC and GROUND screws on the back of the thermostat (see the wiring diagram).
If no power reaches the thermostat, test for 12VDC across the 12VDC and GND output on the front of the power module base that supplies it (the faceplate must be installed). If there is no power there, check the breaker feeding the power modules: it must be a non-GFCI breaker, so replace a GFCI breaker with a non-GFCI one.
If power reaches the thermostat and it is still blank, replace the thermostat. If the power module has power but no 12VDC output to the thermostat, replace the power module.
The flashing digits indicate that the actual (measured) floor temperature exceeds the thermostat temperature limit.
The temperature limit is set for either tile (104°F/40°C) or laminate (82°F/28°C) when the thermostat is first set up or re-configured.
For example: When the floor type (protection) is set to laminate, the limit defaults to 82°F/28°C. If the floor temperature goes above this - whether due to radiant floor heating or external heating sources, then the digits will flash and the heating is switched off.
Turning the temperature up or down will not affect the flashing digits. And leaving the thermostat alone with flashing digits does not harm the system.
Tip: To turn off the heated floor (ex. for months when it is not needed), on the outer edge of the thermostat, depress the lower right side button for 3-5 seconds. This will also turn it back on.
Turn the power (circuit breaker typically) to the thermostat off for 5 minutes and then back on to reset the thermostat.
If there is power to the thermostat and it still doesn't appear to work, then the next step toward a solution is to take Ohm measurements of the floor heating system.
This is done with a digital multi-meter that can select a low 200 Ohm (Ω) scale. To conduct this test, turn off the circuit breaker. Remove the thermostat completely from the wall and disconnect the wires connected to the LOAD connections at the back of the thermostat. Disconnect the ground wires from the house ground, and do the test shown on the links below. If you are uncomfortable doing this test, contact a qualified electrician.
Please follow one of these guides based on the type of heating system installed:
For a quick overview of the testing process:
Here is a video showing how the test is done
Here is a video showing how to locate and identify the floor heating wires
If the system still does not function, contact +1 (800) 875-5285 WarmlyYours Technical Support and provide the Ohm measurements for further assistance.
Verify that the master thermostat is calling for heat. If it is and the light does not illuminate, this means that the test has failed. Cut power to the heating system at the main electrical panel, have a qualified electrician verify the installation and, if necessary, replace the CT230.
To reset the ground fault protection, switch the CT230 OFF and back ON, or cycle the circuit breaker off and on. The TEST light will turn off if the ground fault protection is functioning properly. If the TEST light comes back on, contact WarmlyYours at 1-800-875-5285 and speak to a technical support representative to help further troubleshoot your system.
WarmlyYours controllers incorporate built-in Class A GFCI protection for all new floor heating systems. Class A GFCI provides personnel protection and trips when ground fault current exceeds 5 mA (milliamps). Class B GFCI protection is pretty much obsolete, but older systems may still require it. WarmlyYours controllers with built-in Class B GFCI provide equipment and circuit protection and operates when a fault to ground exceeds 15 mA.
GFCI can fail for various reasons, such as wear and tear, moisture, corrosion, power surges, faulty wiring, or improper installation. Some of these causes can be prevented by regular inspection and maintenance, while others may require professional assistance. It is important to note that GFCI devices (ex. thermostat, breakers, outlets) should be tested regularly as these do wear out over time.
A floor sensor measures floor temperature so a compatible thermostat can regulate comfort and enforce the flooring manufacturer’s temperature limit. Some thermostats, including nTrust 2.0, offer a regulator mode without a sensor, but that mode does not measure floor temperature. Use sensor-based temperature control whenever required by the flooring or heating-system instructions.
Documents
Installation
- Retro-Fit Kit Installation Guide (English)
- CT230 Power Module Installation Guide (English, French, Spanish)
Operation Manuals
Technical Information
Technical Specifications
Wiring Diagrams
- SmartStat TH115 to TempZone Flex Wiring Diagram (English)
- Master Thermostat with Dual Voltage Power Modules Wiring Diagram (English)
- Master Thermostat with Dual Voltage Power Modules Wiring Diagram and Instructions (English)
Sell Sheets
Videos
Articles
- Choosing wood flooring for electric radiant heating
- Electric radiant heat under LVT, vinyl and resilient flooring
- ETI Floorstat FWT-3: operation and replacement considerations
- Extending floor-heater cold leads and sensor wiring
- Finding LVT products compatible with electric floor heating
- Floor heating and implanted pacemakers: checking compatibility
- FLOR carpet tiles over radiant floor heating
- How to reduce winter gaps in wood flooring
- Resistance values for the Resideo/Honeywell Home AC112-01 floor sensor
- TH115-AF-GA configuration switches
